
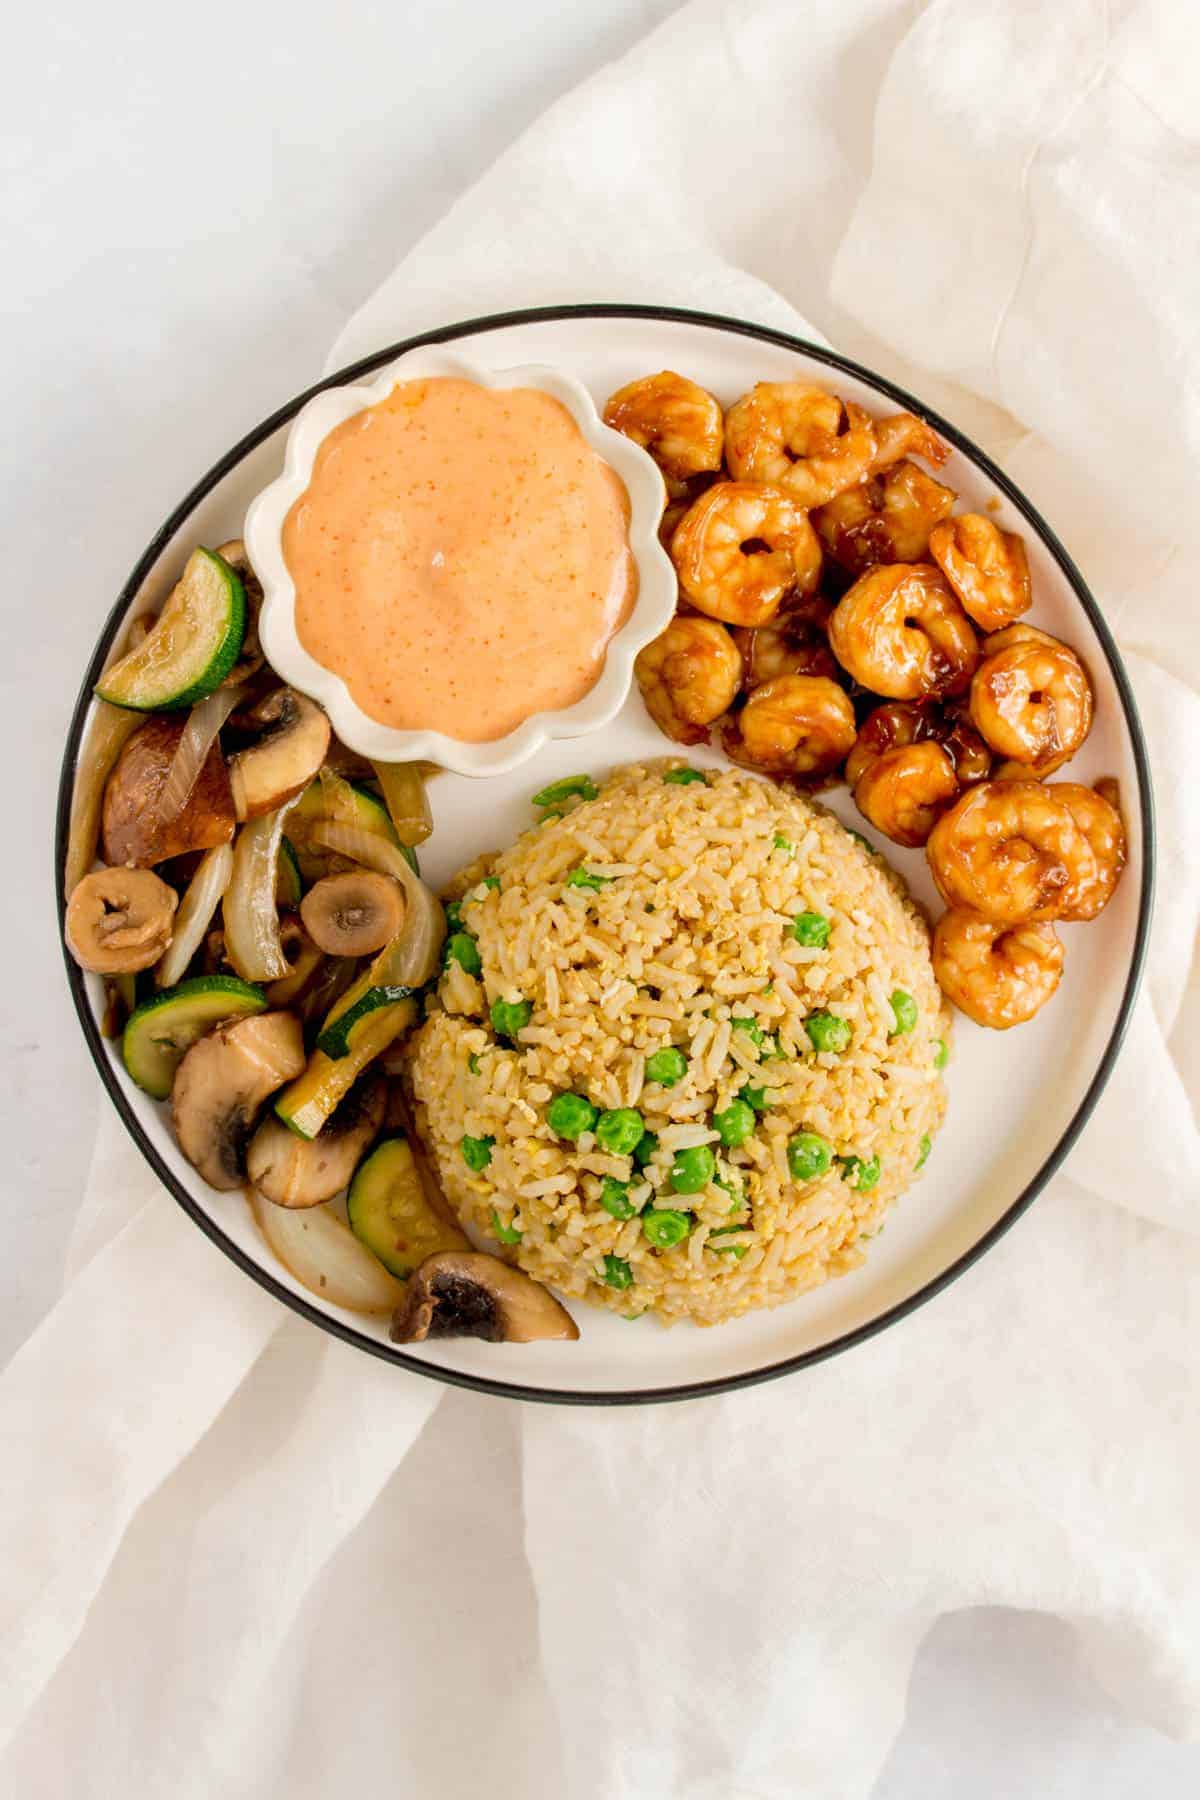
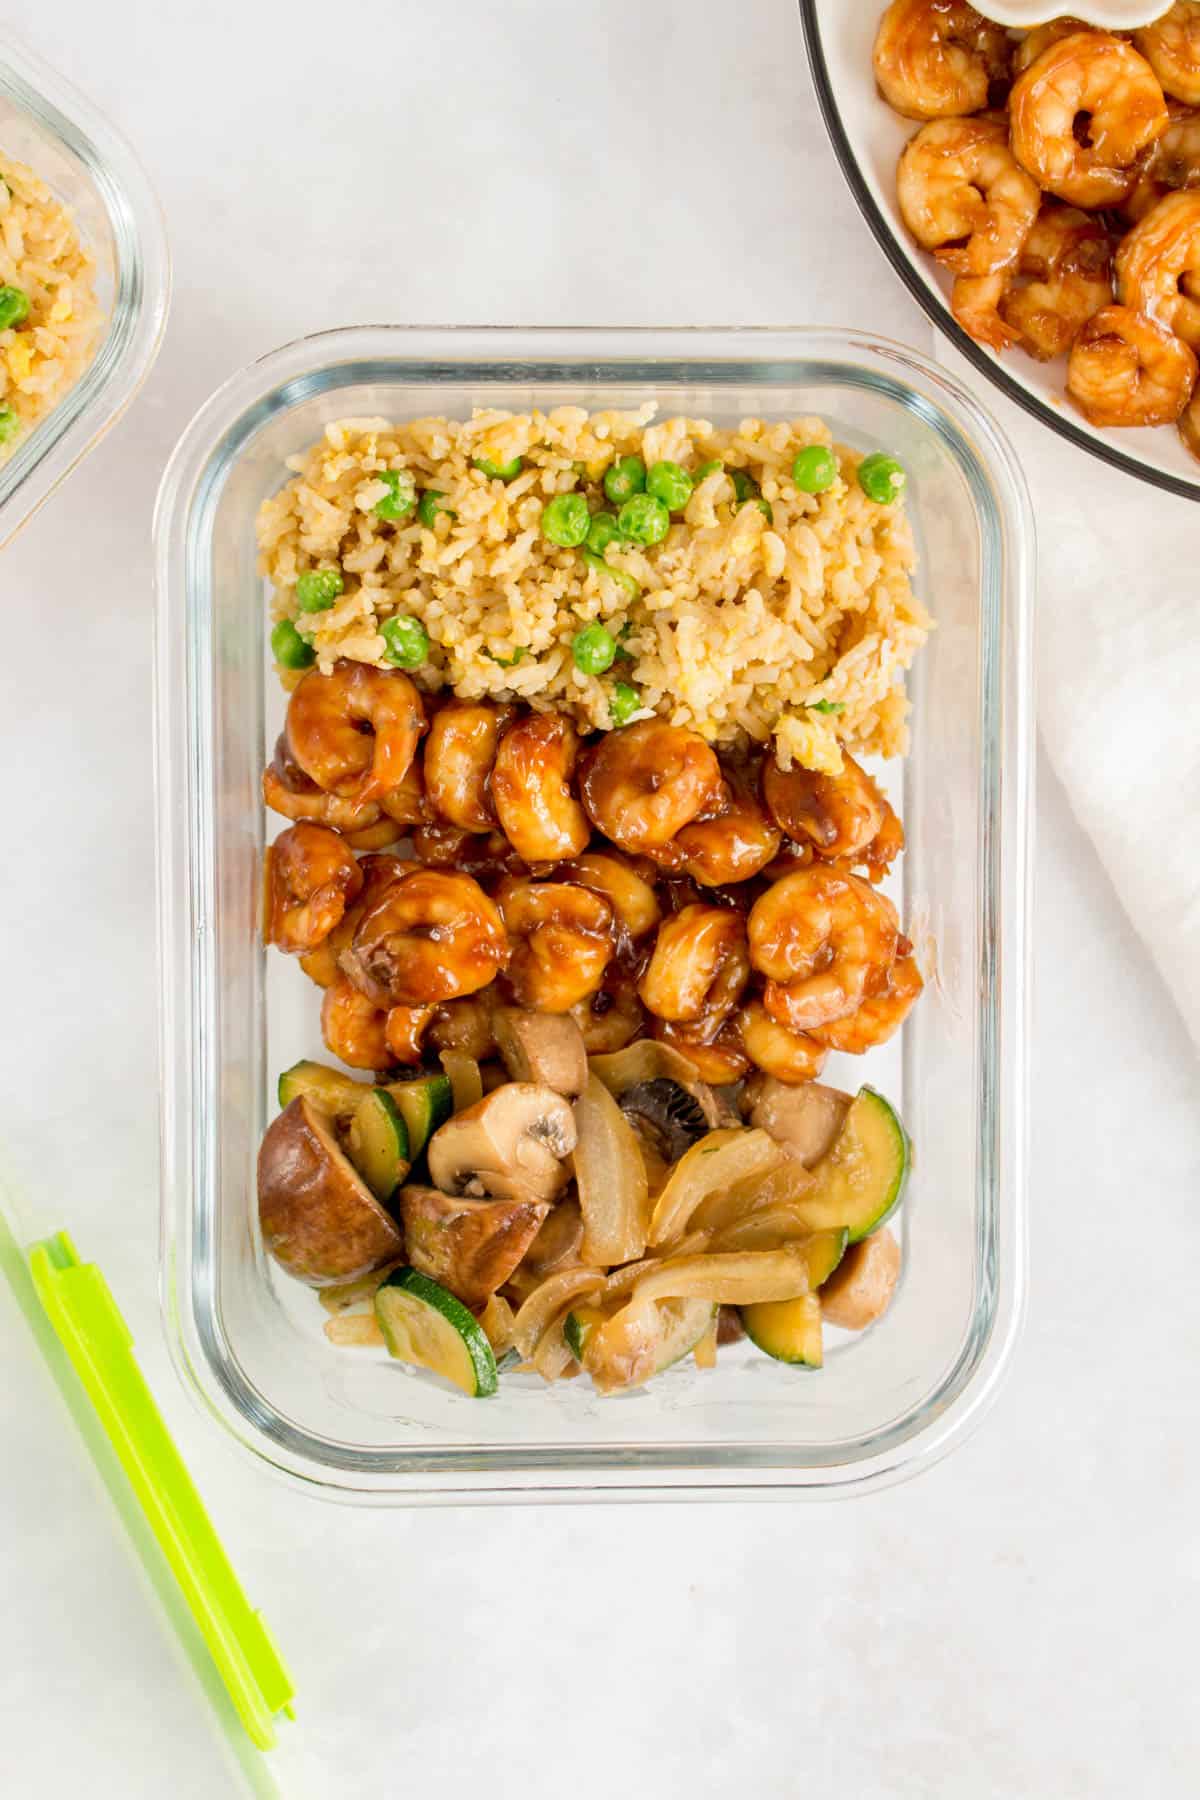
This Japanese style Hibachi Shrimp made with sautéed vegetables served over top of a simple fried rice is an easy and delicious dinner that also serves as a delicious meal prep.
It’s been a while since I went out for hibachi chicken so I had made it at home and shared the recipe. Then I thought, why not share how to make hibachi shrimp while I was at it! The steps are pretty much the same but it takes way less time since shrimp only takes a couple minutes to cook!
Hibachi means “fire bowl” or “fire bowl” and refers to a method of cooking food over very high heat. This is why I recommend cooking this shrimp hibachi over high heat in a wok or Dutch oven. However, for the rice, I recommend sticking with a wok as it doesn’t cook well in a Dutch oven.
While this may not be 100% authentic hibachi shrimp as traditional hibachi is pretty much only cooked with soy sauce, I added a few extra ingredients to customize it suit my personal tastes as I a fan of the flavour hoisin has. Feel free to only cook this with soy sauce if you wish.
Why You’ll Love this Hibachi Chicken
- It’s pretty easy. It might sound like a difficult process but it’s actually surprisingly easy to make hibachi shrimp at home. It requires a few steps but the steps on their own is really straight forward and simple.
- It’s super tasty. It’s hard to not like this shrimp hibachi recipe. It’s flavourful, it’s perfectly seasoned, and it’s tasty AF.
- It’s a complete meal. There’s shrimp, vegetables, rice and even a dipping sauce. Other than dessert, this recipe has you covered!

What You’ll Need
For the Yum Yum Sauce:
- mayonnaise
- ketchup
- paprika
- mirin
- garlic powder
For the Chicken:
- olive oil
- butter
- shrimp
- salt & pepper
- soy sauce
- hoisin sauce
- mirin
- garlic
- honey
For the Vegetables:
- olive oil
- butter — unsalted butter
- onion — white or yellow works
- mushrooms — I use quartered cermini
- zucchini
- soy sauce — low sodium soy sauce
For the Fried Rice:
- butter — unsalted butter
- garlic
- cooked rice — rice made the night before that’s been refrigerated is ideal.
- eggs
- soy sauce — low soy sauce
- oyster sauce
- peas — frozen is fine
How to Make Hibachi at Home
How to Make Yum Yum Sauce
- Mix all the ingredients together and store in the fridge until ready to use.
How to Make Hibachi Shrimp
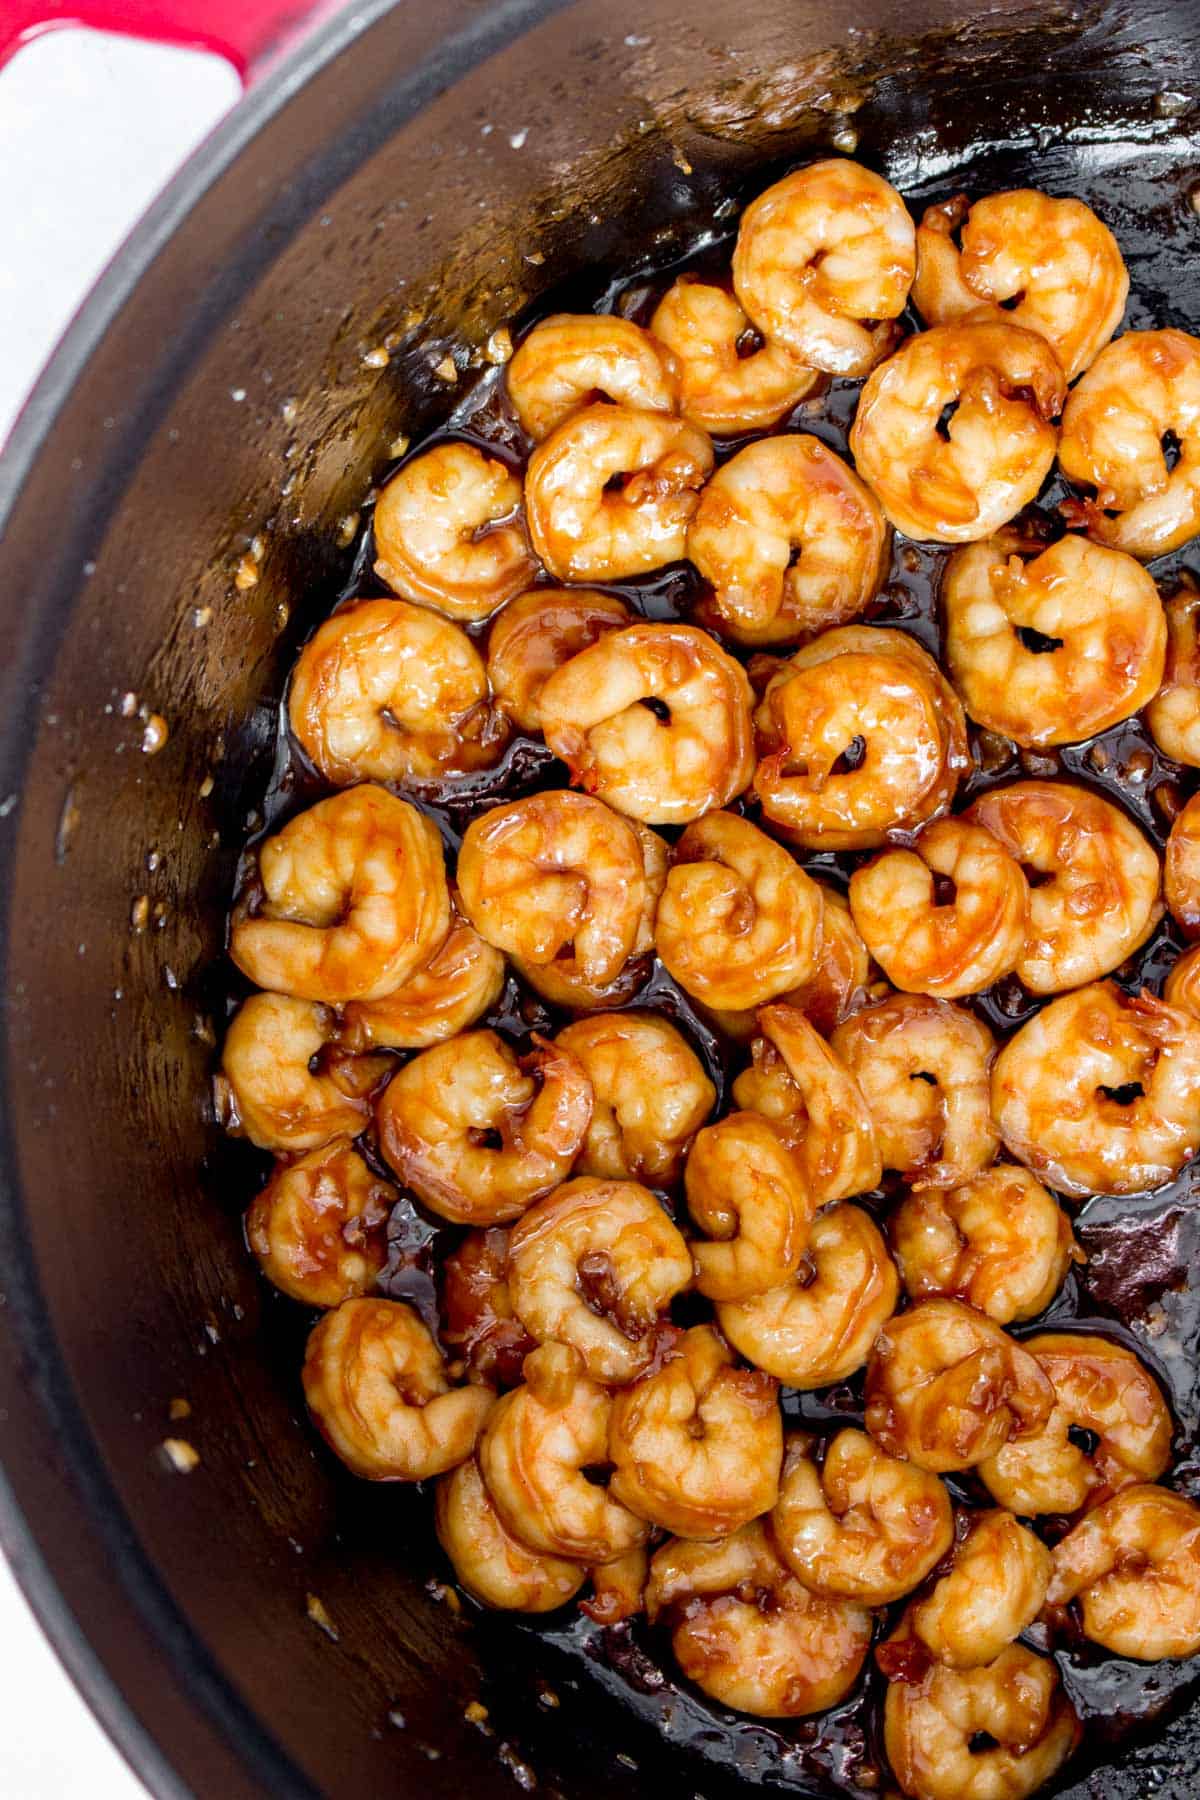
- In a wok or Dutch oven over high heat, add in olive oil and melt the 1 tbsp butter.
- Once the Dutch oven is hot, add the shrimp. Season with salt and pepper and cook until no longer pink, for 2-3 minutes.
- Add the soy sauce, hoisin sauce, mirin, garlic, and honey. Stir until the chicken has been coated and the sauce as thickened to your liking.
- Set aside the shrimp.
Note: if you are concerned about the shrimp being overcooked, you can cook the sauce first in a small saucepan ahead of time until it has thickened then add the prepared sauce to the sauce after it has cooked.
How to Make the Vegetables
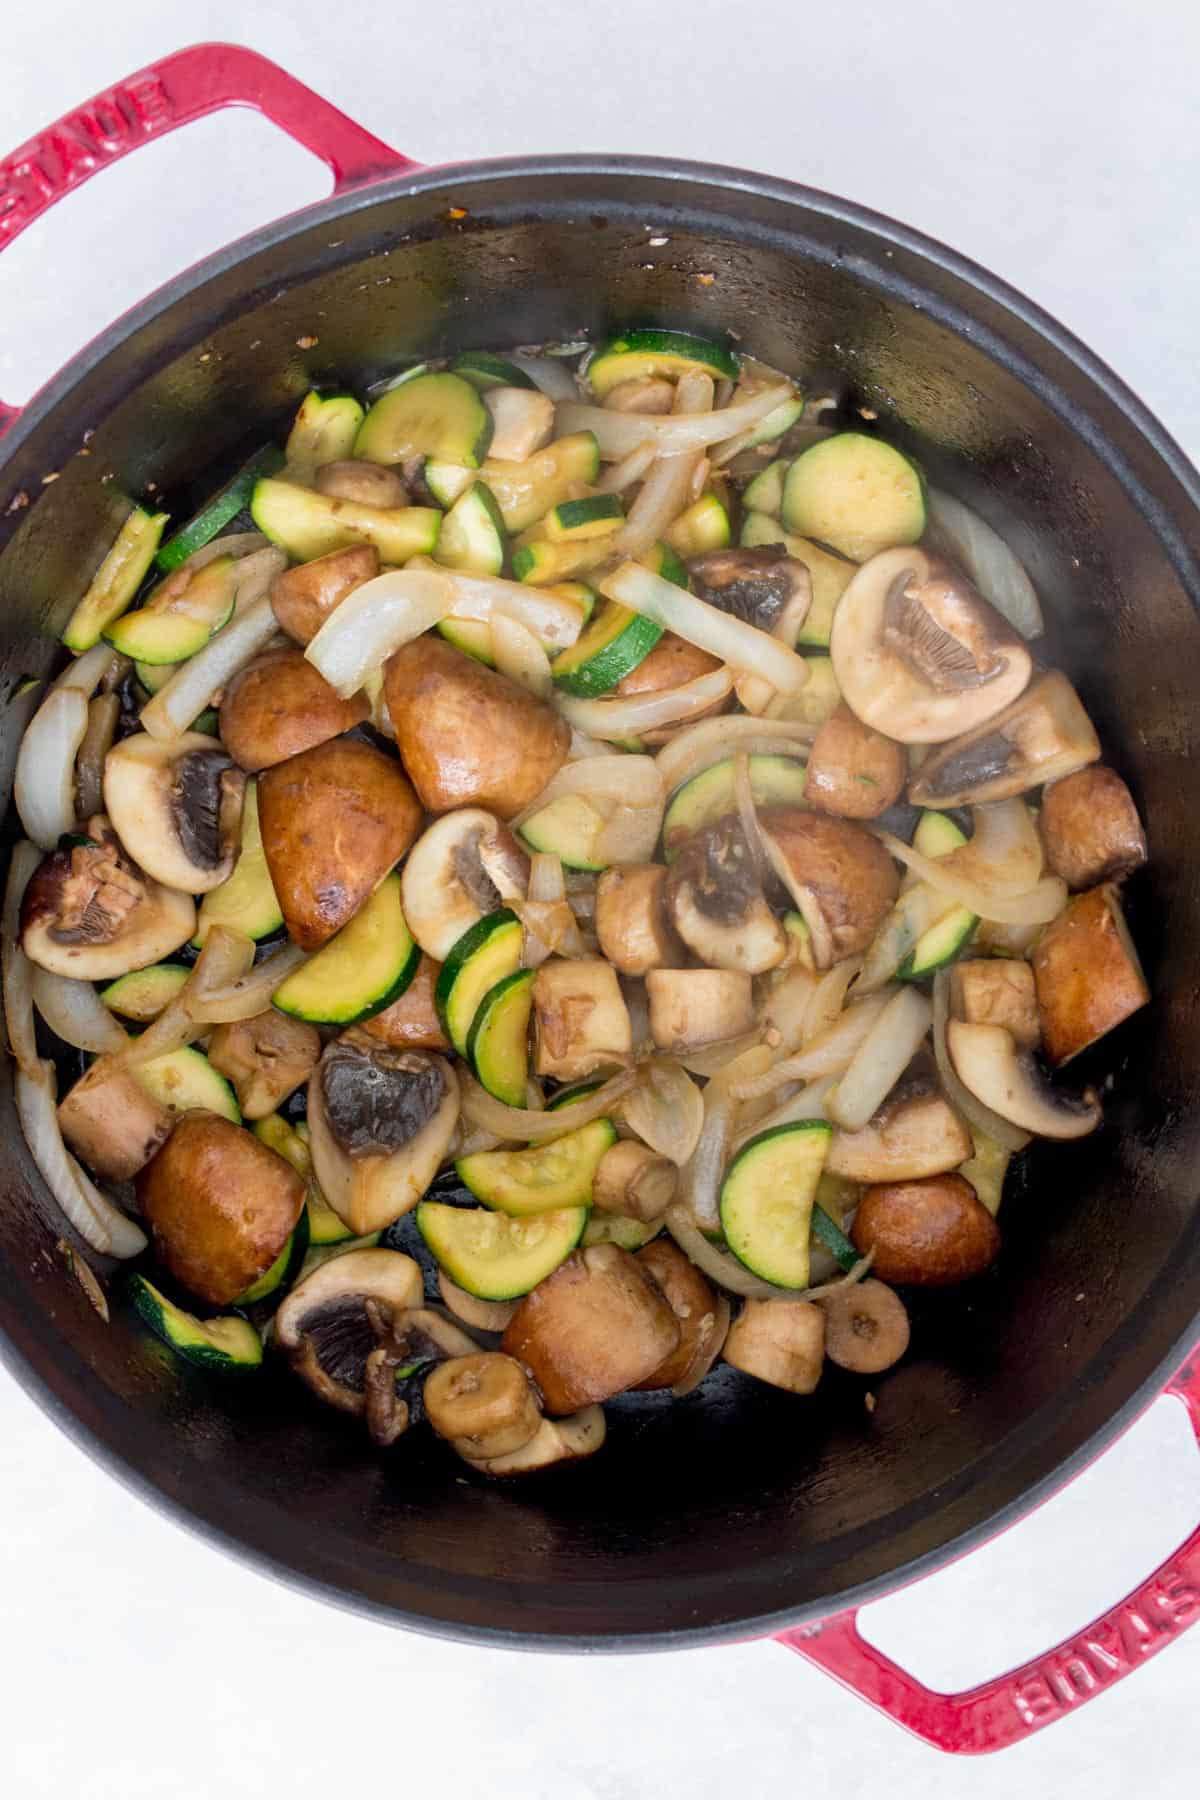
- In the same pan (no need to clean any leftover sauce off), add in the olive oil and ½ tbsp butter.
- Once the butter has melted, add in the onions, mushrooms, and zucchini. Stir fry for a minute before adding in the soy sauce.
- Continue to stir fry until the vegetables as softened to your liking.
How to Cook Hibachi Fried Rice
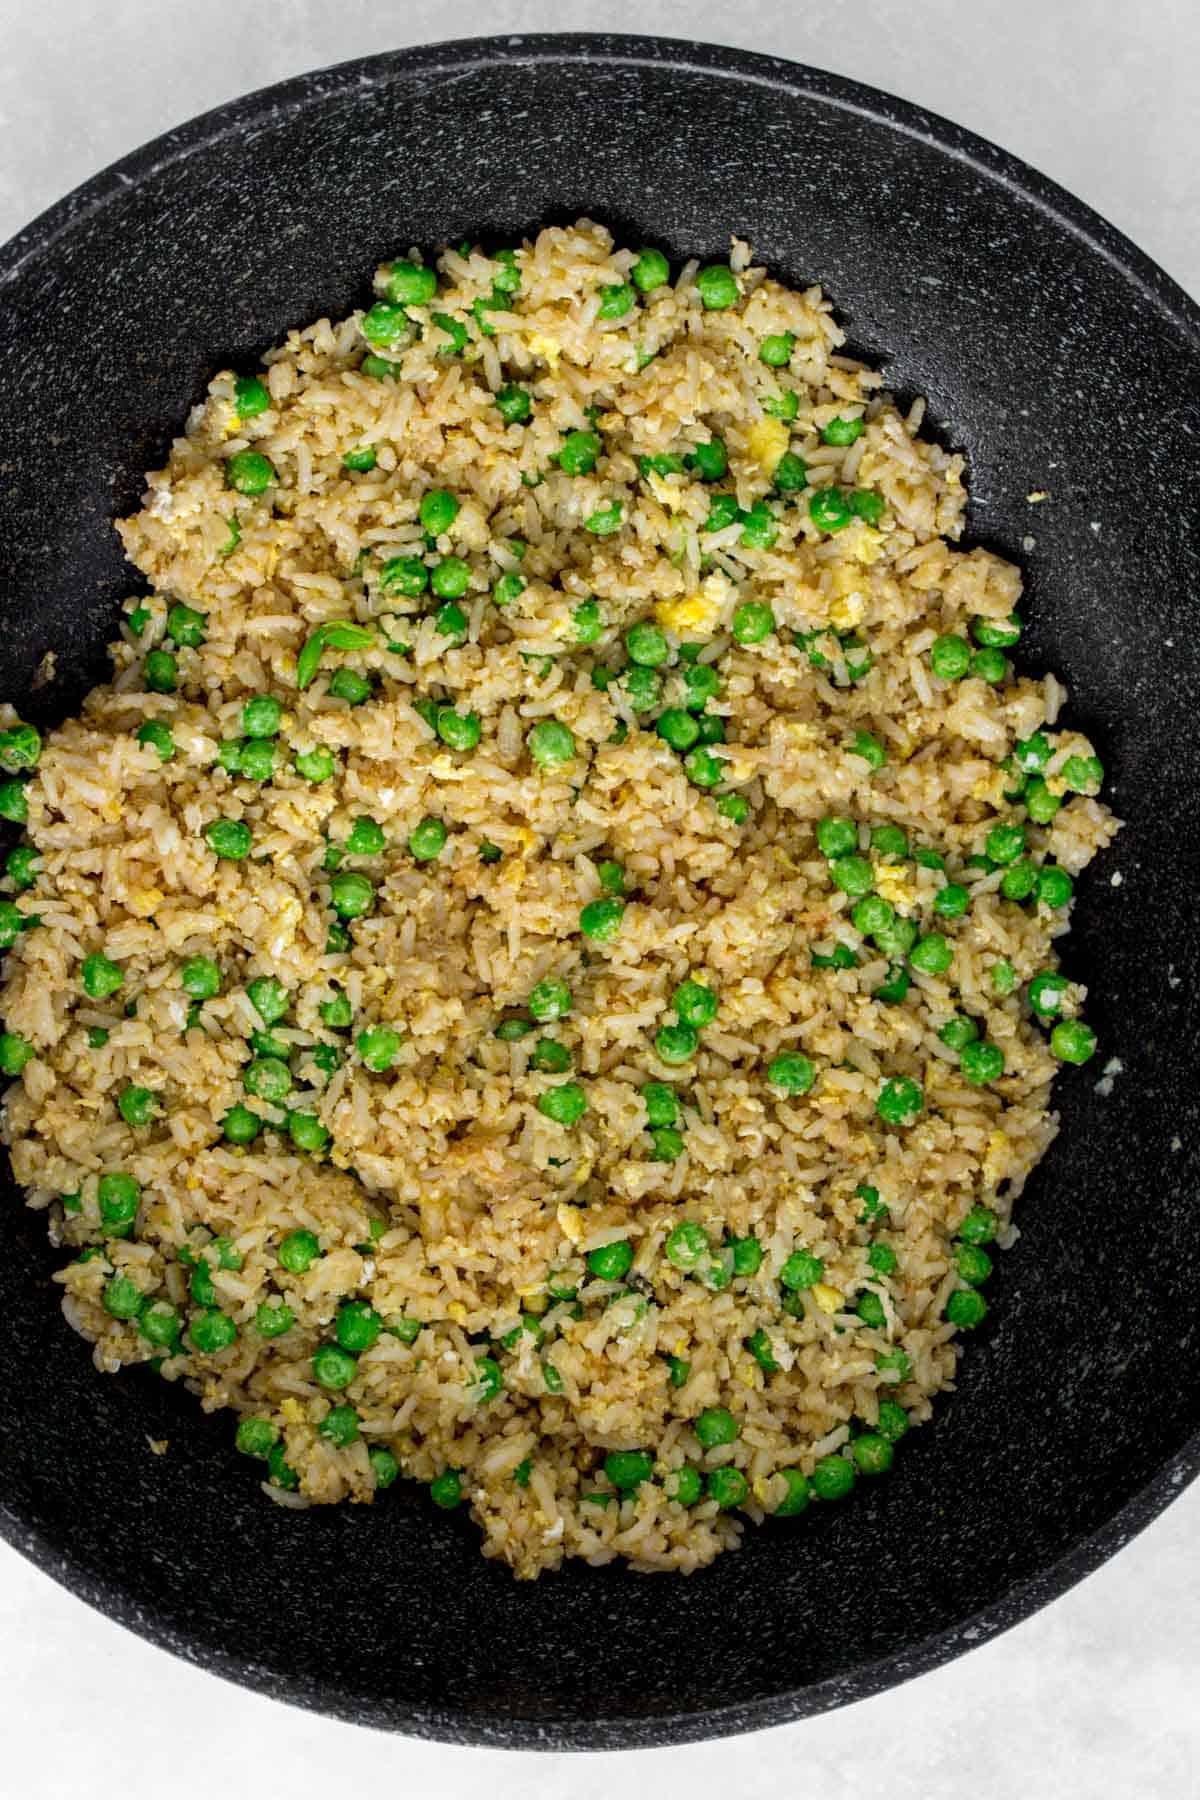
- In a wok on high heat, melt 1 tbsp butter and add in the minced garlic.
- Sauté the garlic for half a minute and then add in the rice, soy sauce, and oyster sauce. Sauté until the rice has heated through.
- Make a well in the middle of the rice and add in the eggs. Scrambling it until it’s almost fully set.
- Stir to combine everything before adding in the peas and stirring until the peas have been heated through.
Tips and Notes
- I always swap from my Dutch oven to my wok for the fried rice as my rice tends to stick in my Dutch oven. This also means I can make the fried rice at the same time as sautéing my vegetables.
- It’s important to use cold leftover rice for the fried rice as fresh rice will get mushy while stir frying as the grains aren’t as firm.
- If you’re not a fan of rice, you can use cauliflower rice.
- You can use any other vegetable of your choice.
- You must make sure you pat dry the shrimp after it’s been thawed as extra liquid will cause the shrimp to steam up in the cooking process as well as add extra water to the pot, making it difficult for the sauce to thicken.
- To quickly thaw your shrimp, simply place the frozen shrimp in cold water for around 10 minutes. Drain and pat dry after.
Make Ahead Tips
- Meal prep: store the cooked rice, shrimp, and vegetables in an airtight container for up to 4 days in the fridge. The yum yum sauce can be stored separately. You can reheat this on the stove or in the microwave.
- Freezer: Fried rice freezes very well! I would avoid freezing the shrimp and vegetables since they don’t take long to make. Allow the fried rice to cool before transferring it into an airtight container before storing it in the freezer. To reheat, thaw it in the fridge overnight before reheating on the stove or microwave.
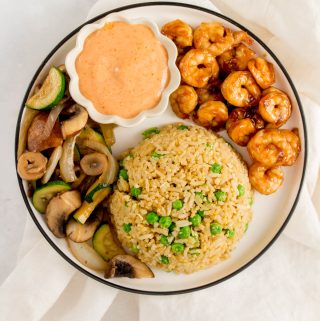
Hibachi Shrimp with Fried Rice
Ingredients
For the Yum Yum Sauce:
- 1 cup mayonnaise
- 3 tbsp ketchup
- 2 tbsp sriracha
- 1 tsp paprika
- 1 tbsp mirin
- ½ tbsp garlic powder
For the Chicken:
- 1 tbsp olive oil
- 1 tbsp butter
- 12 oz shrimp, tails removed, deveined, shell removed, thawed and patted dry
- salt & pepper, to taste
- 2 tbsp soy sauce
- 1 tbsp hoisin sauce
- 1 tbsp mirin
- 2 tbsp minced garlic
- 1 tbsp honey
For the Vegetables:
For the Fried Rice:
- 1 tbsp butter
- 1 tbsp minced garlic
- 3 cups cooked rice
- 2 eggs
- 2 tbsp soy sauce
- 1 tbsp oyster sauce
- 1 cup peas, frozen
Instructions
How to Make Yum Yum Sauce:
- Mix all the ingredients together and store in the fridge until ready to use.
How to Make Hibachi Shrimp:
- In a wok or Dutch oven over high heat, add in olive oil and melt the 1 tbsp butter.
- Once the Dutch oven is hot, add the shrimp. Season with salt and pepper and cook until no longer pink, for 2-3 minutes.
- Add the soy sauce, hoisin sauce, mirin, garlic, and honey.
- Stir until the chicken has been coated and the sauce as thickened to your liking. Set aside the shrimp.
How to Make the Vegetables:
- In the same pan (no need to clean any leftover sauce off), add in the olive oil and ½ tbsp butter.
- Once the butter has melted, add in the onions, mushrooms, and zucchini.
- Stir fry for a minute before adding in the soy sauce.
- Continue to stir fry until the vegetables as softened to your liking.
How to Cook Hibachi Fried Rice:
- In a wok on high heat, melt 1 tbsp butter and add in the minced garlic.
- Sauté the garlic for half a minute and then add in the rice, soy sauce, and oyster sauce.
- Sauté until the rice has heated through.
- Make a well in the middle of the rice and add in the eggs. Scrambling it until it’s almost fully set.
- Stir to combine everything before adding in the peas and stirring until the peas have been heated through.
Notes
- If you are concerned about the shrimp being overcooked, you can cook the sauce first in a small saucepan ahead of time until it has thickened then add the prepared sauce to the sauce after it has cooked.
More Meal Preps You’ll Love
- Bulgogi Korean Beef Bowls
- Teriyaki Beef Bowls
- Hibachi Chicken with Fried Rice Meal Prep
- Chicken Teriyaki Meatballs with Broccoli and Carrots
Other places to connect with me
@carmyshungry on Instagram
Facebook
Shop my Amazon faves
Email: [email protected]
Leave a Reply