
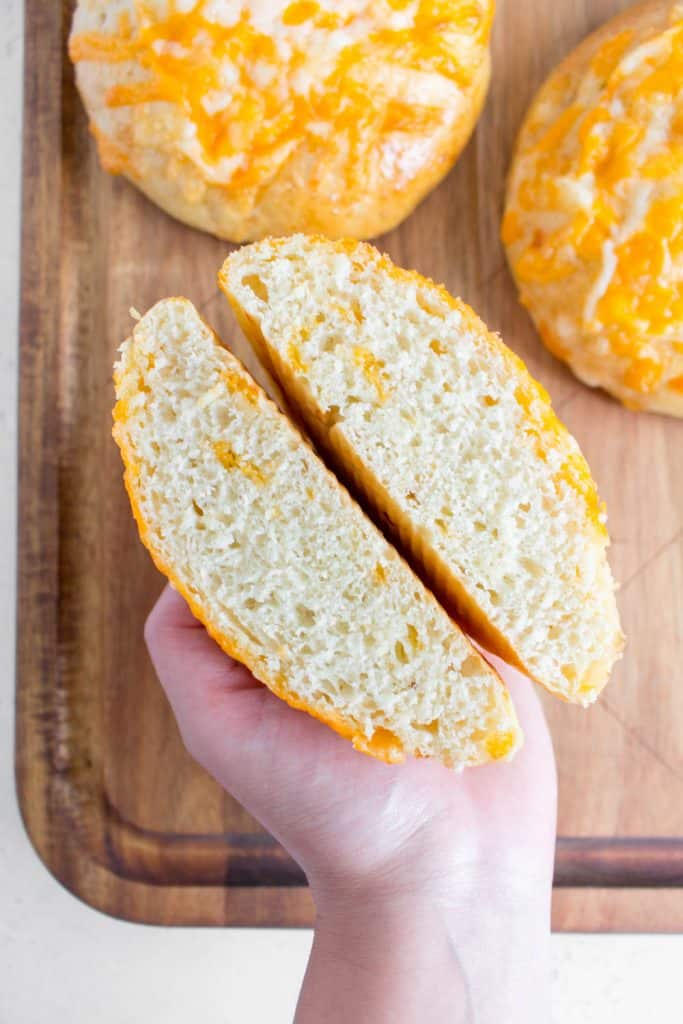
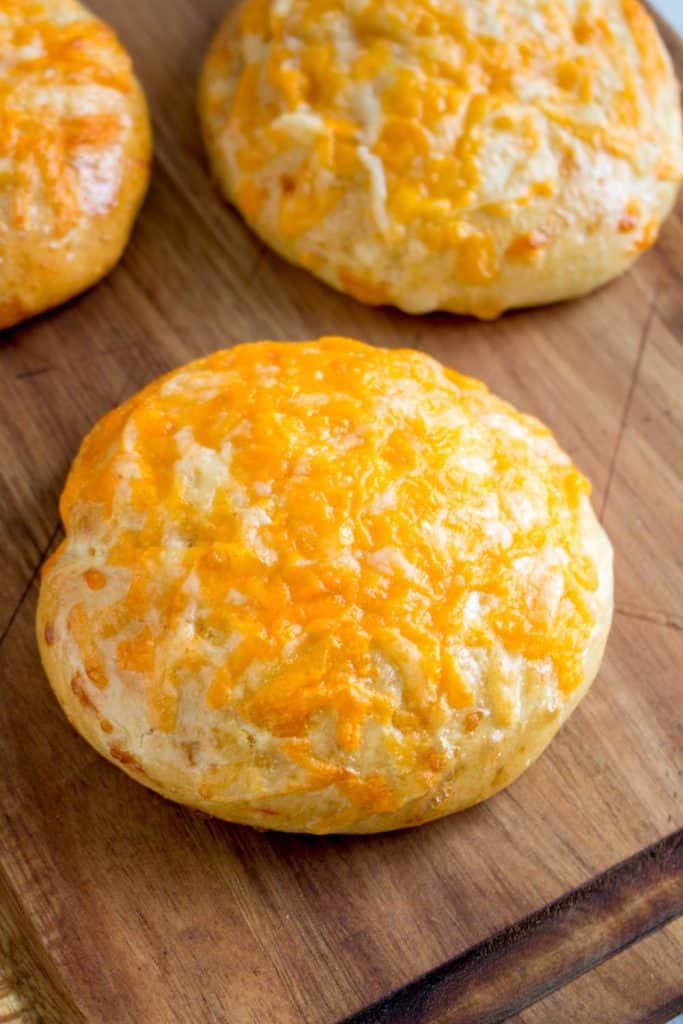
These savoury Cheddar Cheese Buns are perfect for snacking or as an alternative to a burger bun! Make a batch to enjoy for the week, for a weekend BBQ, or for a family dinner!

Easy Cheese Buns Recipe
Adapted from King Arthur’s amazing and super easy burger buns recipe, this cheesy bun recipe is my snack version of it. It’s just as amazing as their OG burger bun recipe but this one you can eat whenever, where ever. No actual burger needed ;)
When I say easy, I truly mean easy. You add everything into the mixer and just let it mix until it’s combined. Let it proof. Divide it up. Let it proof again. Then into the oven for 15 minutes. Yup, these cheesy buns are just that easy.
Originally, this recipe started with me adding garlic powder and onion powder to the King Arthur’s recipe for a weekend BBQ. Then I had a bunch of leftover shredded cheese and I tried folding it into each individual bun. That was too much work for what it yielded so here we are, the easiest cheesy buns you’ll ever make.
They’re not super fluffy so they can still double as a burger bun and they’re not super dense so they’re light enough to just snack on whenever you feel like it!
What You’ll Need To Make These Cheddar Buns
- water, lukewarm
- instant yeast
- flour, I use plain all purpose flour, nothing fancy
- onion powder
- garlic powder
- butter
- egg – one for the dough, one for the egg wash
- sugar
- shredded cheese, I used a cheddar mix
- salt
How To Make Cheese Buns (For Snacking or Burgers!)
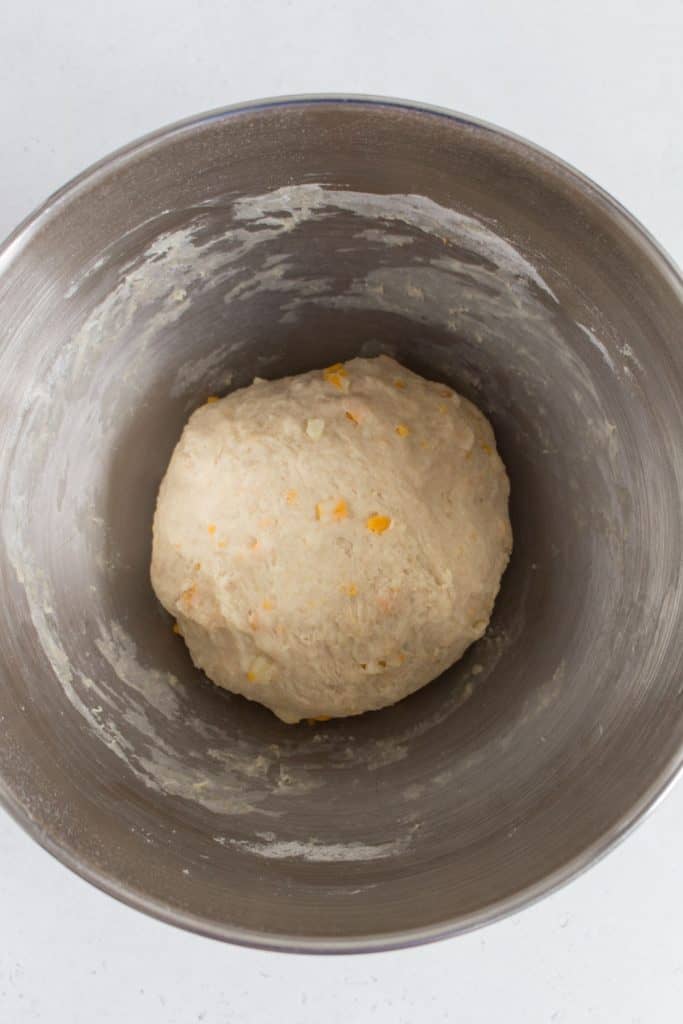
- Combine the ingredients in the order that they are listed and then mix by hand or mixer until you have a soft, smoothish dough.
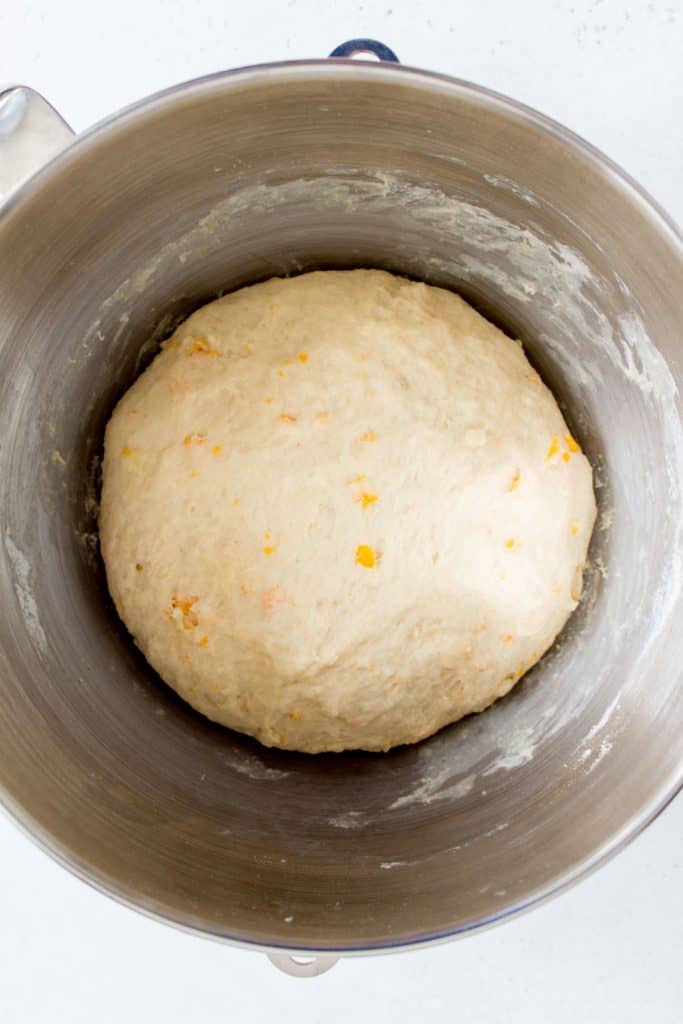
- Cover the dough, and let it rise for 1 to 2 hours, however long it takes for the dough to double in size.
- When finished rising, gently punch down the dough and divide it into 8 pieces.
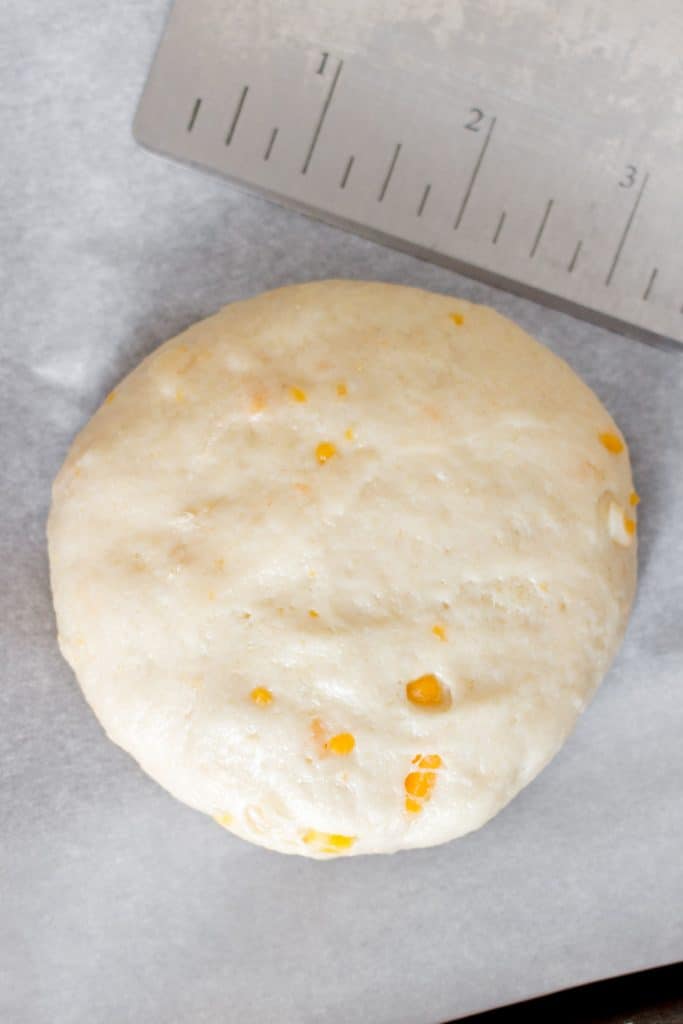
- Roll each piece into a round ball and gently flatten so it is about 3″ wide.
- Transfer each of the buns on a parchment lined baking sheet with at least 1.5″ inches in-between each bun, use two sheet pans if necessary.
- Cover the dough again and let rise for about an hour.
- Preheat oven to 355F.
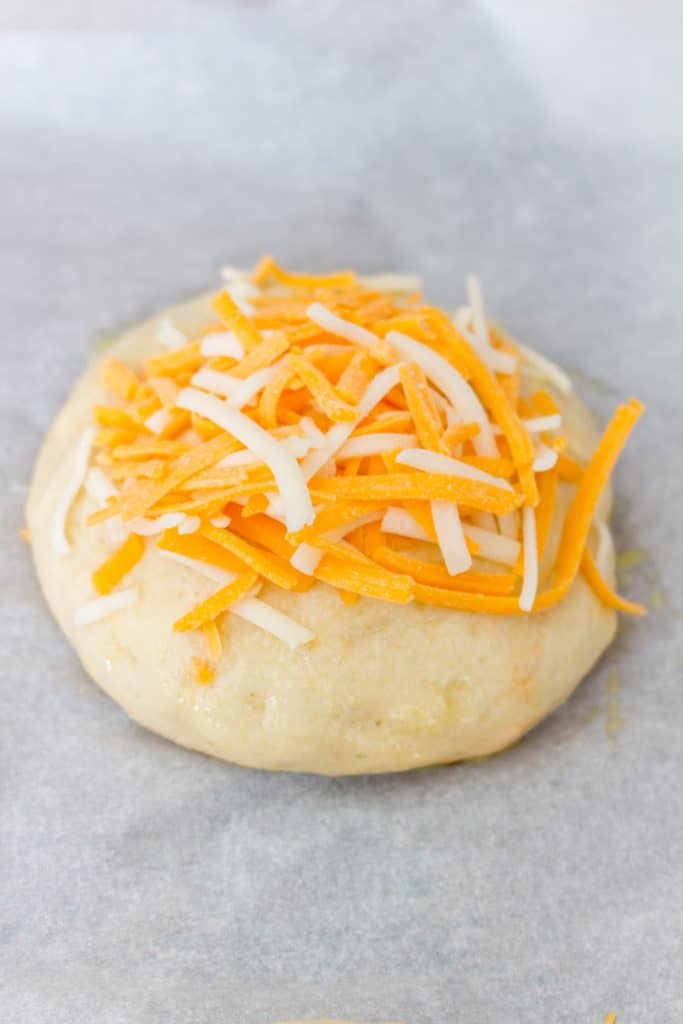
- When finished rising, brush egg wash on top of each bun and then top with shredded cheese.
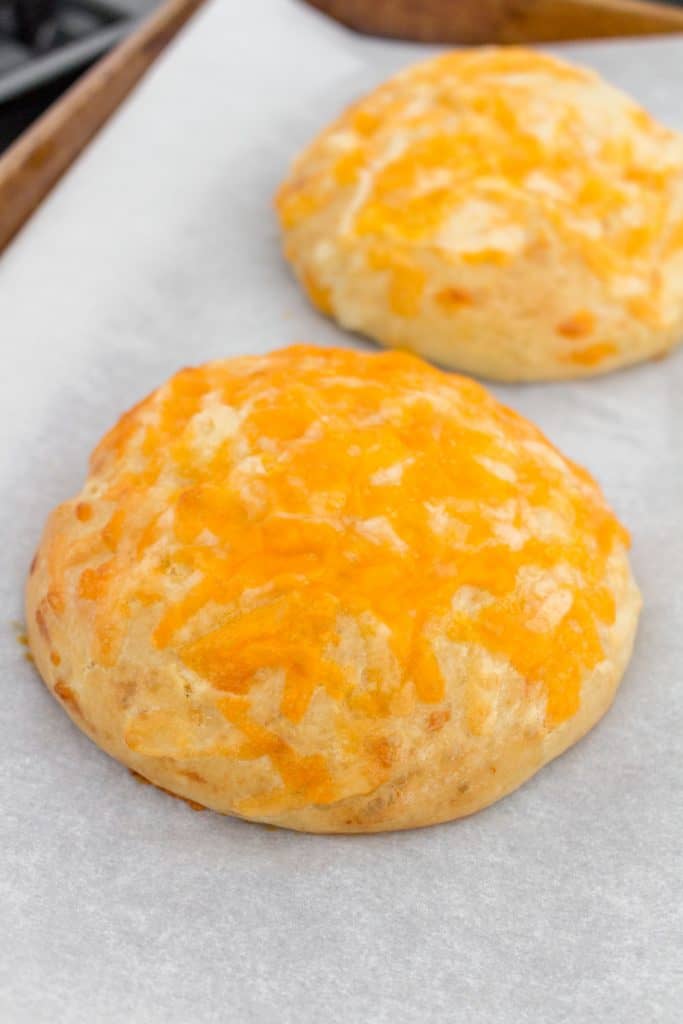
- Bake for 15-17 minutes.
- When done, let cool before enjoying!
Tips and Notes
- It usually takes me two sheet pans.
- I usually let the dough rise in the oven with the oven light on to help speed things up.
- I like to use this dough scraper to cut and divide my dough as it has a ruler on it so I can tell each dough ball is 3″
- Buns can be eaten as a snack or as a savoury burger bun.
- If making ahead to enjoy for the week, be sure to wrap them in saran wrap and store in the fridge for up to 4 days or on the counter for 2 days.
More Bread Recipes You May Like

Cheddar Cheese Buns
Ingredients
- 1 cup water , lukewarm (227g)
- 1 tbsp instant yeast, (10g)
- 3½ cups all purpose flour, (418g)
- 1 tbsp onion powder, (10g)
- 1 tbsp garlic powder, (10g)
- 2 tbsp unsalted butter, (28g)
- 2 eggs, one for the dough, one for the egg wash
- ¼ cup sugar, (50g)
- 1 cup shredded cheddar cheese
- 1¼ tsp salt
- ½ cup topping: shredded cheese, divided into 8
Instructions
- Combine the ingredients in the order that they are listed and then mix by hand or mixer until you have a soft, smoothish dough.
- Cover the dough, and let it rise for 1 to 2 hours, however long it takes for the dough to double in size.
- When finished rising, gently punch down the dough and divide it into 8 pieces.
- Roll each piece into a round ball and gently flatten so it is about 3″ wide.
- Transfer each of the buns on a parchment lined baking sheet with at least 1.5″ inches in-between each bun, use two sheet pans if necessary.
- Cover the dough again and let rise for about an hour.
- Preheat oven to 355F.
- When finished rising, brush egg wash on top of each bun and then top with shredded cheese, around 1 tbsp per bun.
- Bake for 15-17 minutes.
- When done, let cool before enjoying!
Notes
- August 2023 edit: I’ve decreased the amount of onion powder and garlic powder in the recipe as readers find it too strong. Feel free to use less or more as listed.
Nutrition Per Serving
Other places to connect with me
@carmyshungry on Instagram
Facebook
Shop my Amazon faves
Email: [email protected]
Dawn says
Excellent buns too much spice tho. Will reduce Onion and garlic next time
Aly says
Great dough recipe! However like the other comment I would add half the amount of garlic and onion powder. I love spices but its just a little too much. Other than that they came out awesome!
Kate says
OMG!! This really is easy. My first batch turned out perfect. However, the garlic powder was stronger than the cheese, so for my next batch I’ll use a little less garlic. Thanks ever so much for sharing. Kate from BC Canada
Kate says
Best recipe ever. Can somebody tell me if they go in freezer? Kate.
Carmy says
Hi Kate! so glad you enjoyed the recipe! you can definitely freeze the buns like you would with any type of bread :) I usually wrap them individually once cooled then freeze for up to 3 months.
KW says
I made these buns and they turned out pretty dense, but maybe my yeast is too old or my water wasn’t warm enough? They still tasted great, but I wish they weren’t so heavy.
Jennifer says
I had the same issue – they seemed too dense. But my kids loved them! Will pull back on the garlic and onion next time
David says
I’ve created a monster, my wife absolutely loves these. I thought I had a good bun recipe before, but these are awesome. Only change I made was to substitute milk for the water and did cut back on the onion and garlic. I can see me baking these as onion buns and sesame hamburger buns as well. Thanks so much for sharing your recipe… Dave… Fenelon Falls ON
Carmy says
Lol! I’m so happy to hear your wife loves these buns! Hope you keep making them for her :)
Diane says
Love this recipe!
Instead of instant yeast I proofed active dry yeast in the water for about 10 minutes and then follow the recipe as written.
As per the comments I didn’t see milk listed in the ingredients and didn’t find the garlic or onion powder over powering. Possibly because I used granular instead?
This is definitely is a keeper recipe. Next time I may add jalapeno peppers !
Thank you and Yum Yum.
Terri says
I made these last night and they turned out perfect! I used 2 teaspoons of garlic and onion powder instead of Tablespoons (honest reading mistake!) and they turned out perfect! Such a easy recipe too!
Carmy says
So happy to hear!!!
Linda says
I made these in my bread maker ,only used 1 tsp of onion and garlic
powder after reading reviews .These turned out amazing so much
better then you buy in the shops. Thank you so much for a wonderful
recipe.
Carmy says
Hi Linda! So happy to hear that you’ve enjoyed the recipe!!
Angi Everett says
can this be made into a loaf instead of buns? what do you do differently if so?
Carmy says
I have not tested this recipe in a loaf pan. If you try it, let me know how it goes!
Jennifer Manz says
Delicious! Took a little longer to cook as stated. I substituded dehydrated onions in leui of garlic and onion powder. The family gobbled them up.😋 Wish Icould attatch my pics.
Carmy says
Hi Jennifer, dehydrated onions sounds like such a delicious substitute! I’m going to use that the next time I make these cheddar buns!!
Rick says
Thank you very much!!😁😁😁
Mimi says
This recipe deserves a hundred stars! I made a batch for a friend recuperating from a surgery. I had to try them to make sure they were good. Wow! So soft and tasty! My daughter (who doesn’t like cheese) loved them too. I am making more tomorrow for us. :D Thank you for sharing!
Carmy says
Hi Mimi, I am so thrilled to hear that everyone loved them!! I hope your friend has a speedy recovery and get more cheddar buns from you!
Amber Leversedge says
These turned out amazing! Thank you! I will definitely be holding on to this recipe!
Carmy says
I am so happy to hear that you enjoyed my recipe, Amber! Thank you for your review!
Patti says
I made these today and they look and smell amazing! My husband will be one happy man!
Judy says
Excellent recipe, reduced the onion and garlic as suggested by other commenters. Going to try as a full sized loaf with awesome grilled cheese sandwiches in mind.
Only complaint is there are so many irritating ads it makes it hard to see the actual content… I understand you make money from these but you should count the cost of lost followers due to irritation…. No one likes ads… just saying maybe dial it back a bit🙂
Carmy says
I’m glad you enjoyed the recipe, Judy. Have a lovely day.
Carolyn says
My kid kept wanting cheese buns from the grocery store.. I said “no, i can make them at home” so this weekend I did… and WOW!
I used bread flour instead of regular flour,they are SO soft and delicious. Too bad I cant post a photo here. I doubled the recipe as well.
Carmy says
I am so happy to hear that it was enjoyed! Thank you for your kind words, Carolyn!