
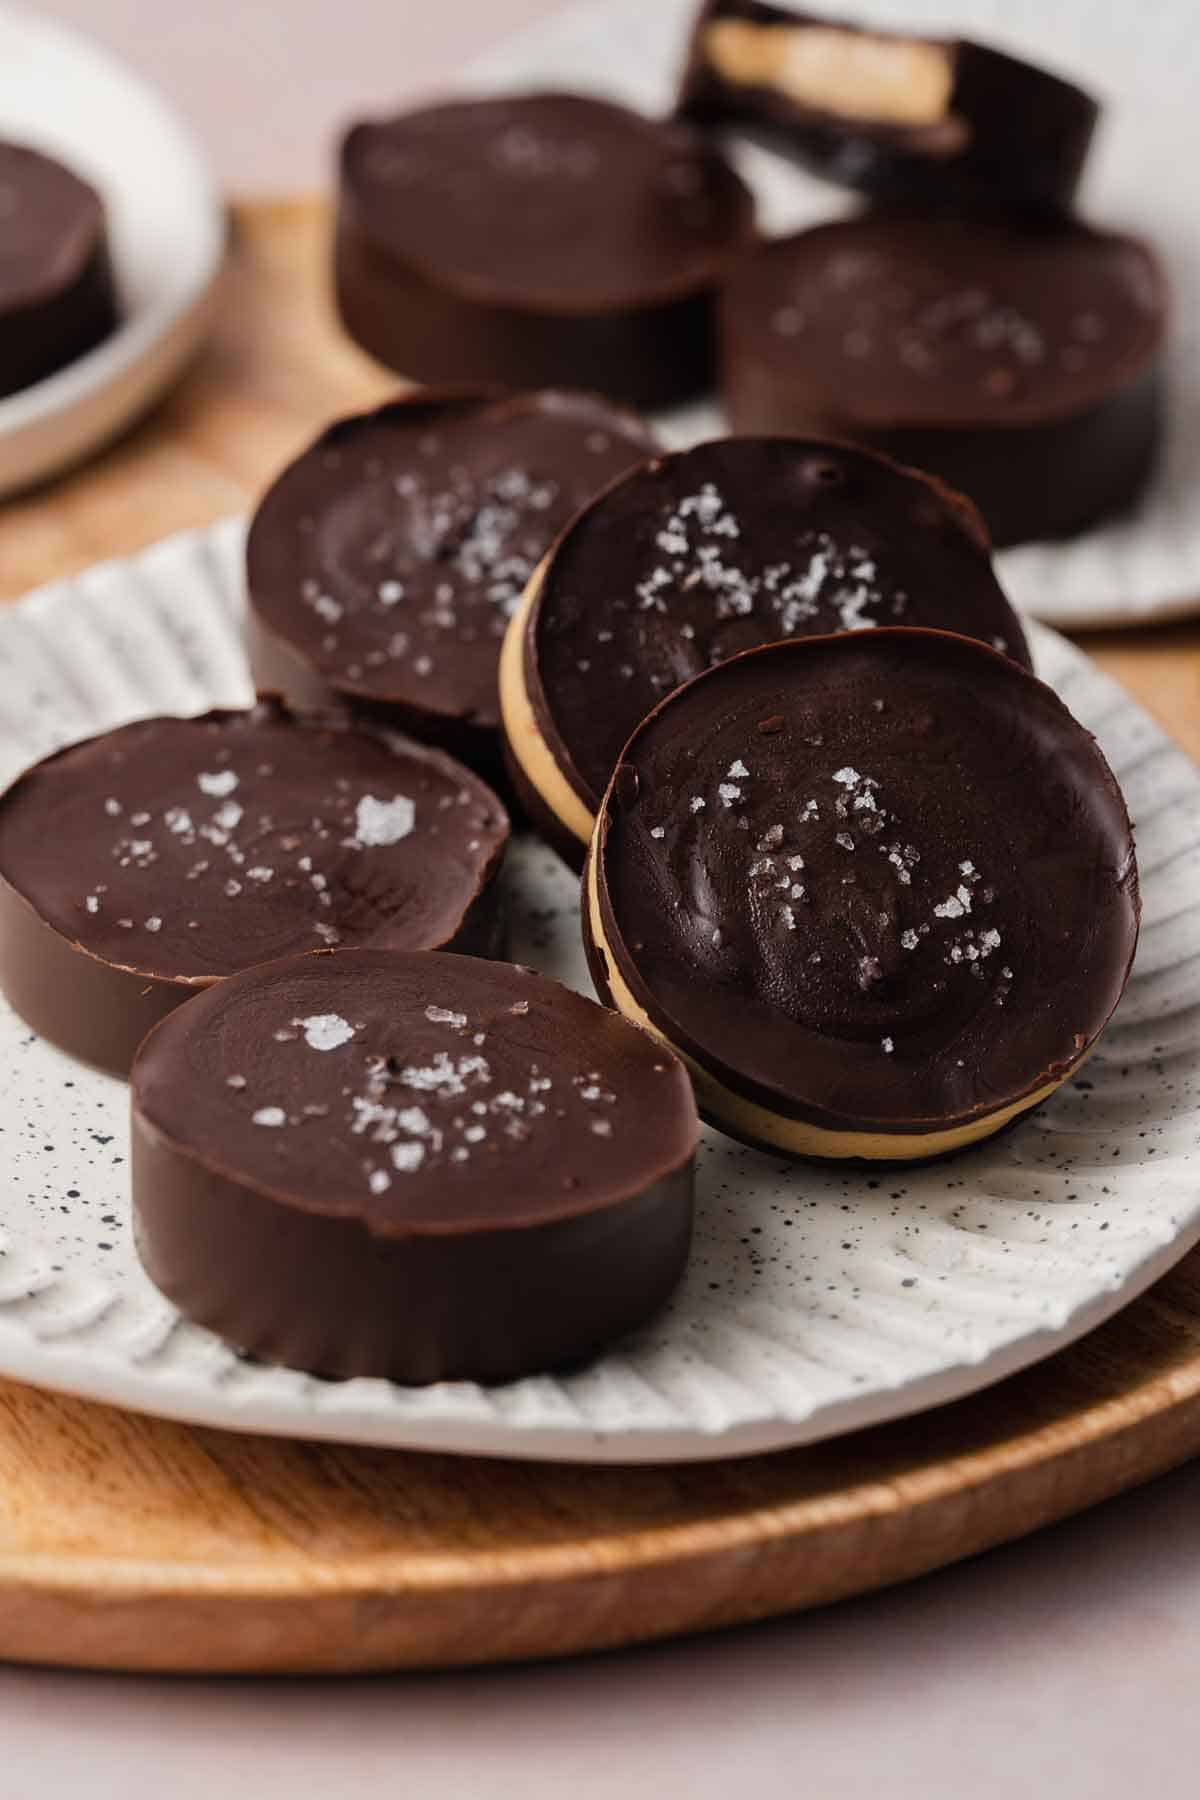
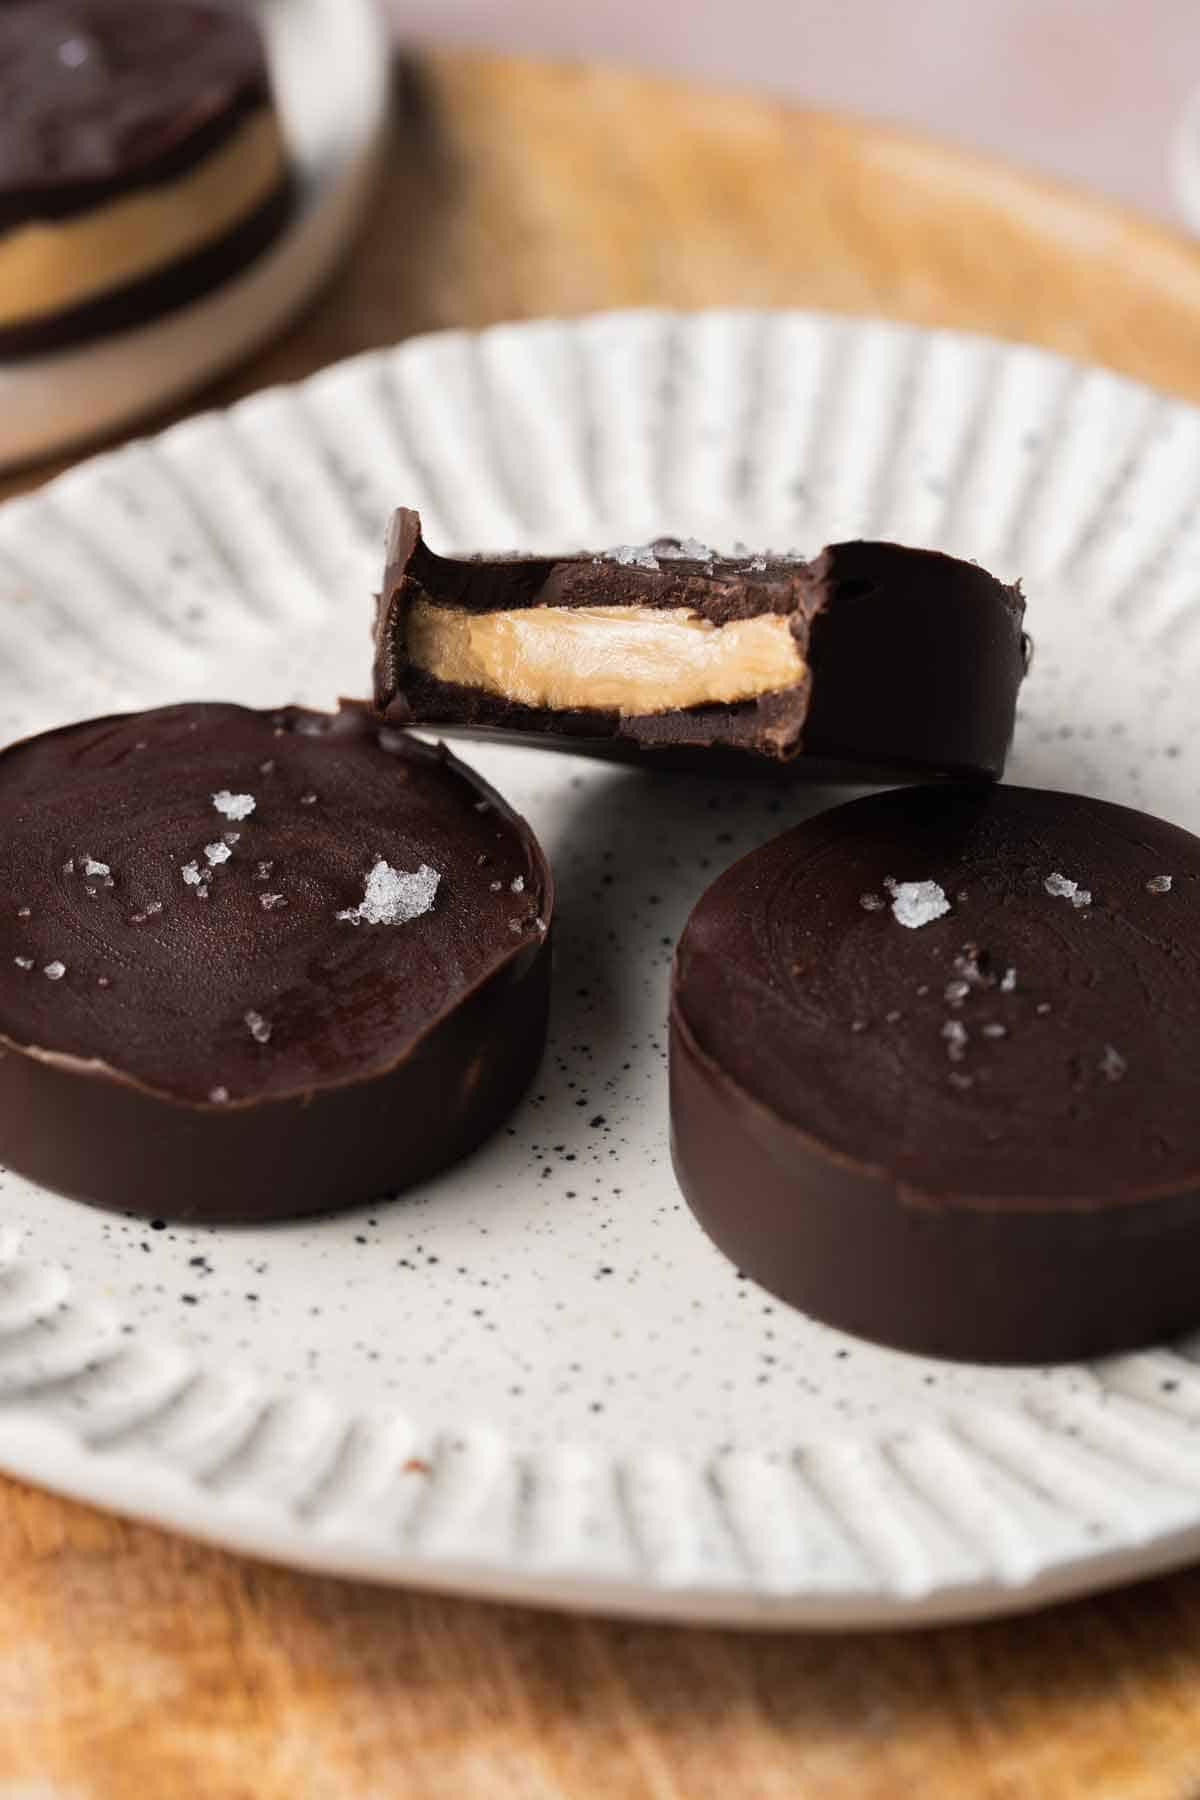
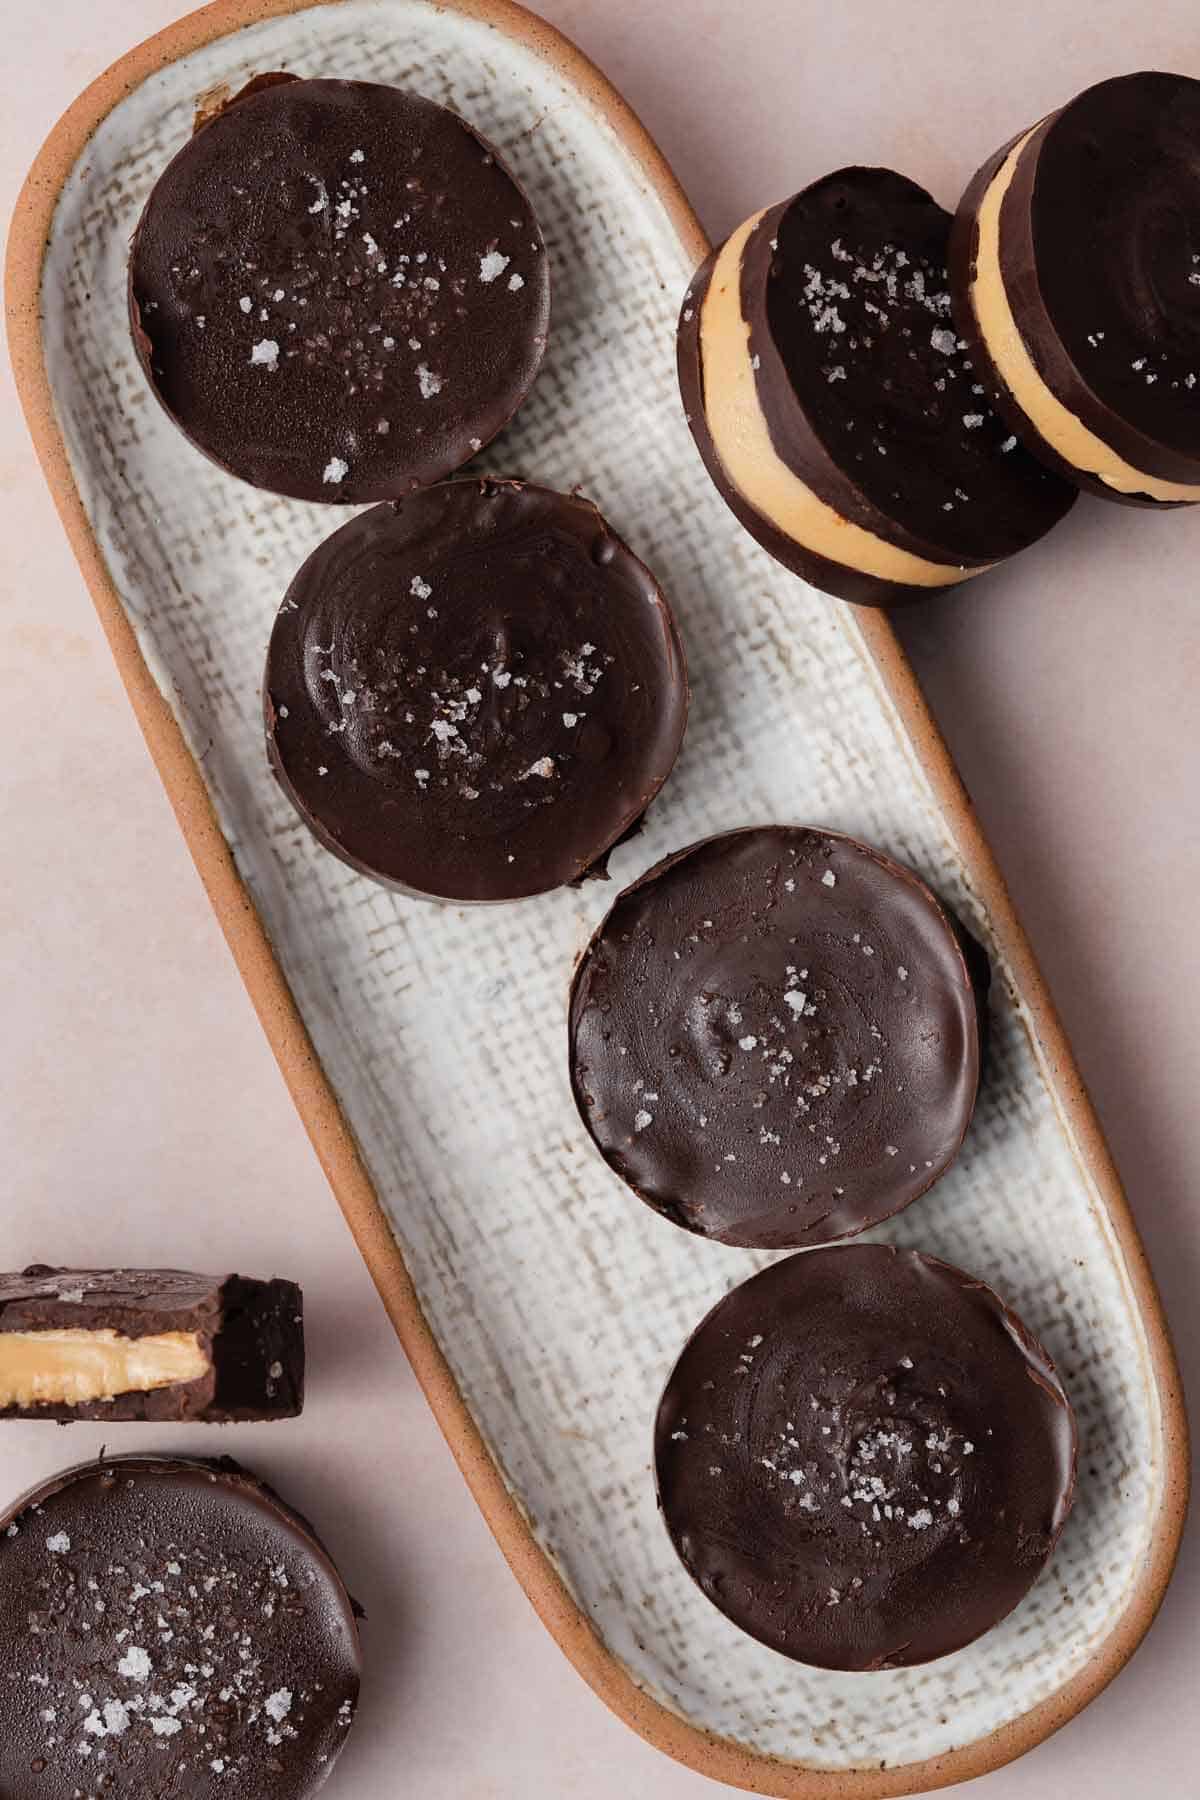
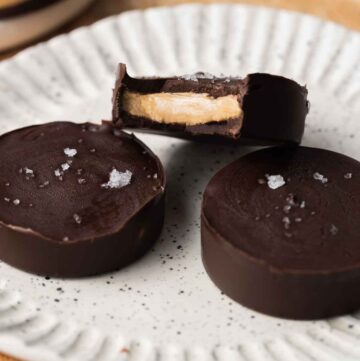
These homemade protein peanut butter cups come together so easily in a few simple steps! A rich chocolate layer wrapped around a creamy peanut butter center, these no-bake peanut butter cups make for the perfect snack or dessert.
One of my partner’s favorite sweet treats are Reese’s peanut butter cups. We’re usually proud owners of the tub from Costco, so these homemade chocolate protein peanut butter cups were definitely inspired by them!
Why You’ll Love This Recipe
- Chocolate and peanut butter are always a winning combination. You can’t go wrong with that!
- They’re pretty easy to make! These no-bake protein peanut butter cups come together with very minimal cooking.
- I love the boost in protein! I love adding protein powder to things recipes (like my cereal milk overnight oats and pumpkin protein muffins) to make it easier to hit my protein goals for the day.
- These are the perfect meal prep treat as you enjoy them straight from the freezer, so you can always make extra to have these protein peanut butter cups on hand.
Ingredients You’ll Need
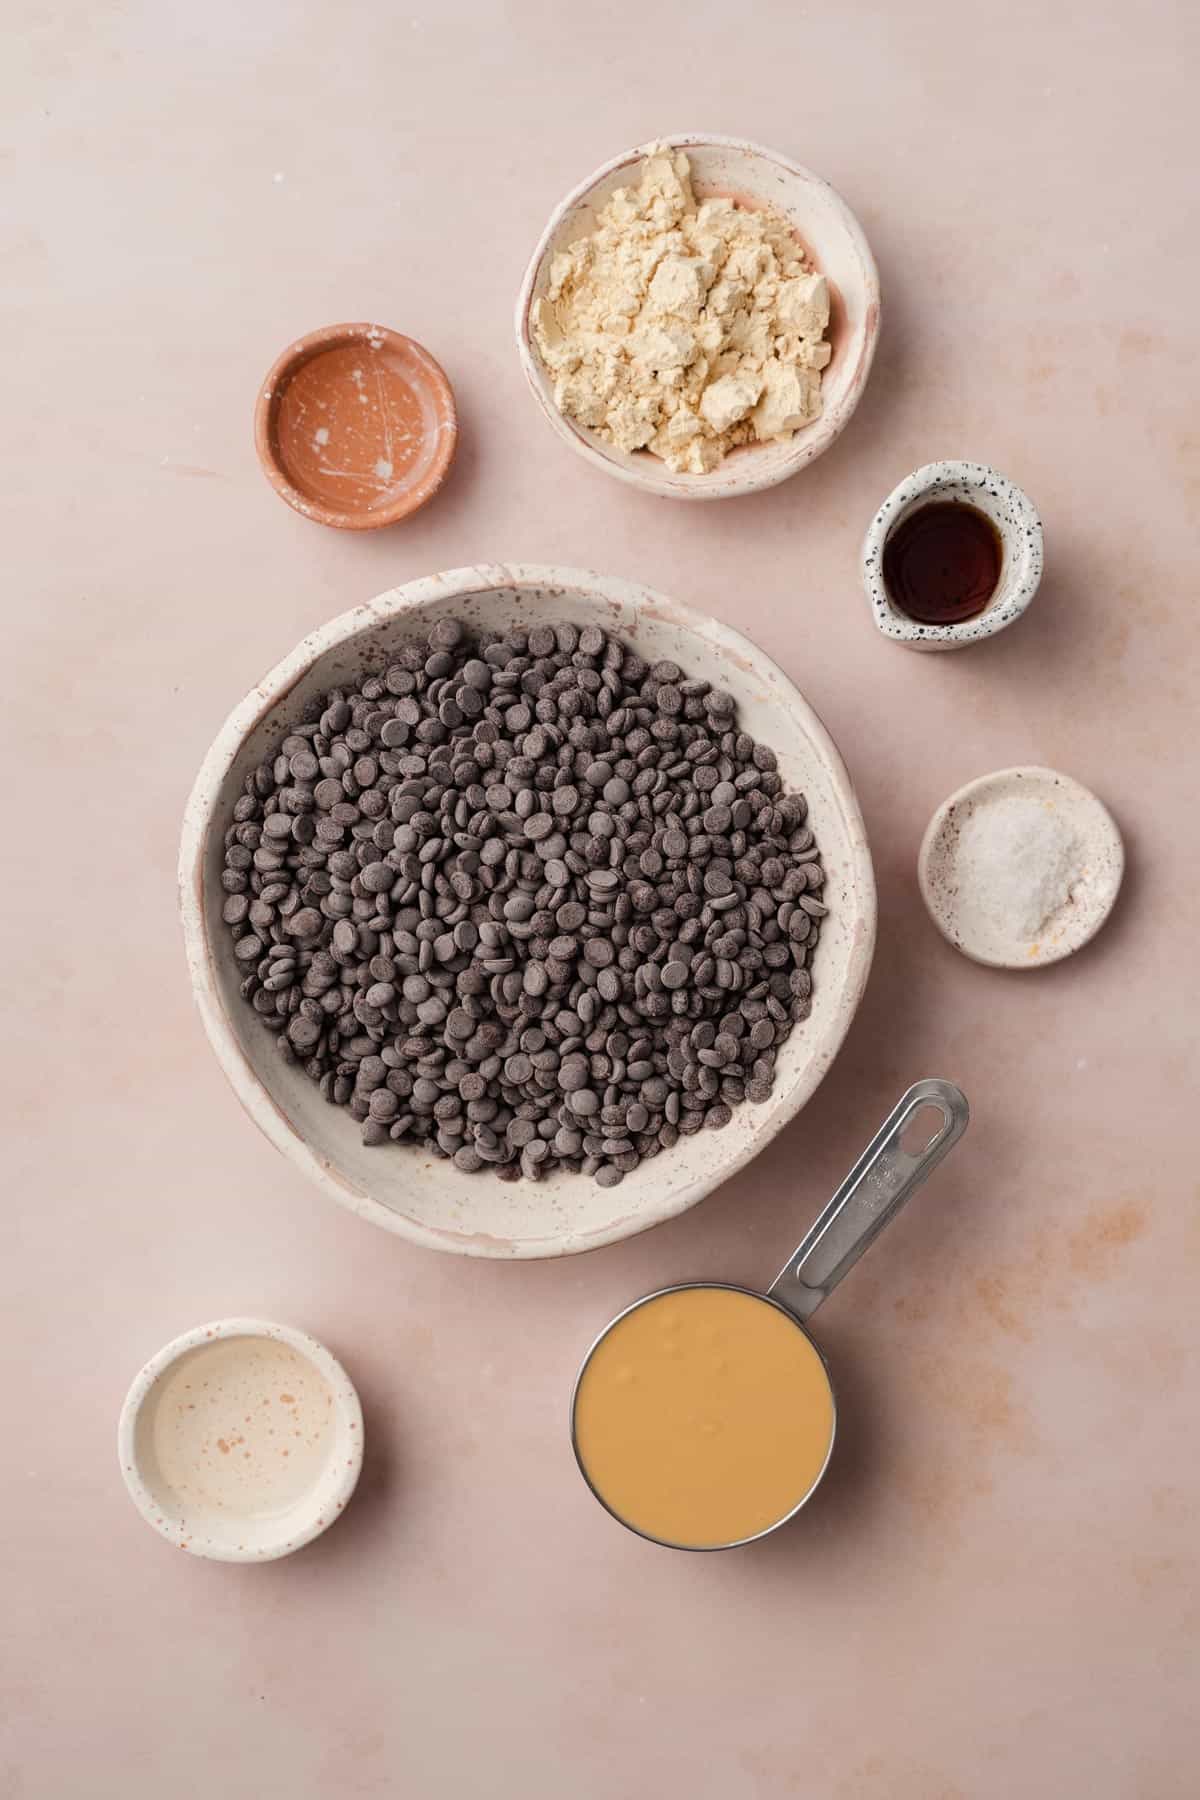
- peanut butter — full of heart-healthy, monounsaturated fats, micronutrients, and a source of plant-based protein, peanut butter is one of my favorite things to eat directly from a jar. This recipe uses peanut butter as the center and I have not tried making this with peanut butter powder. I use runny, natural peanut butter. It’s much easier to mix together than conventional peanut butter (eg Kraft or Jif).
- maple syrup — make sure you’re using real maple syrup, not pancake syrup. Real maple syrup comes straight from trees, whereas pancake syrup is usually made with corn syrup. You can also use honey in this recipe.
- coconut oil — combining the chocolate chips with coconut oil helps create the chocolate magic shell that coats the peanut butter bites, but I also like that it imparts a little bit of coconut flavor to the center while keeping it creamy.
- vanilla protein powder — use your favorite protein powder! I’m using 100% Whey Protein Isolate in vanilla. You can also use unflavored protein powder and add a drop of vanilla extract to the mixture.
- chocolate chips — you can use your favorite chocolate chips. I’m using semi-sweet chocolate chips. Dark chocolate chips are a great option, too.
How to Make Protein Peanut Butter Cups
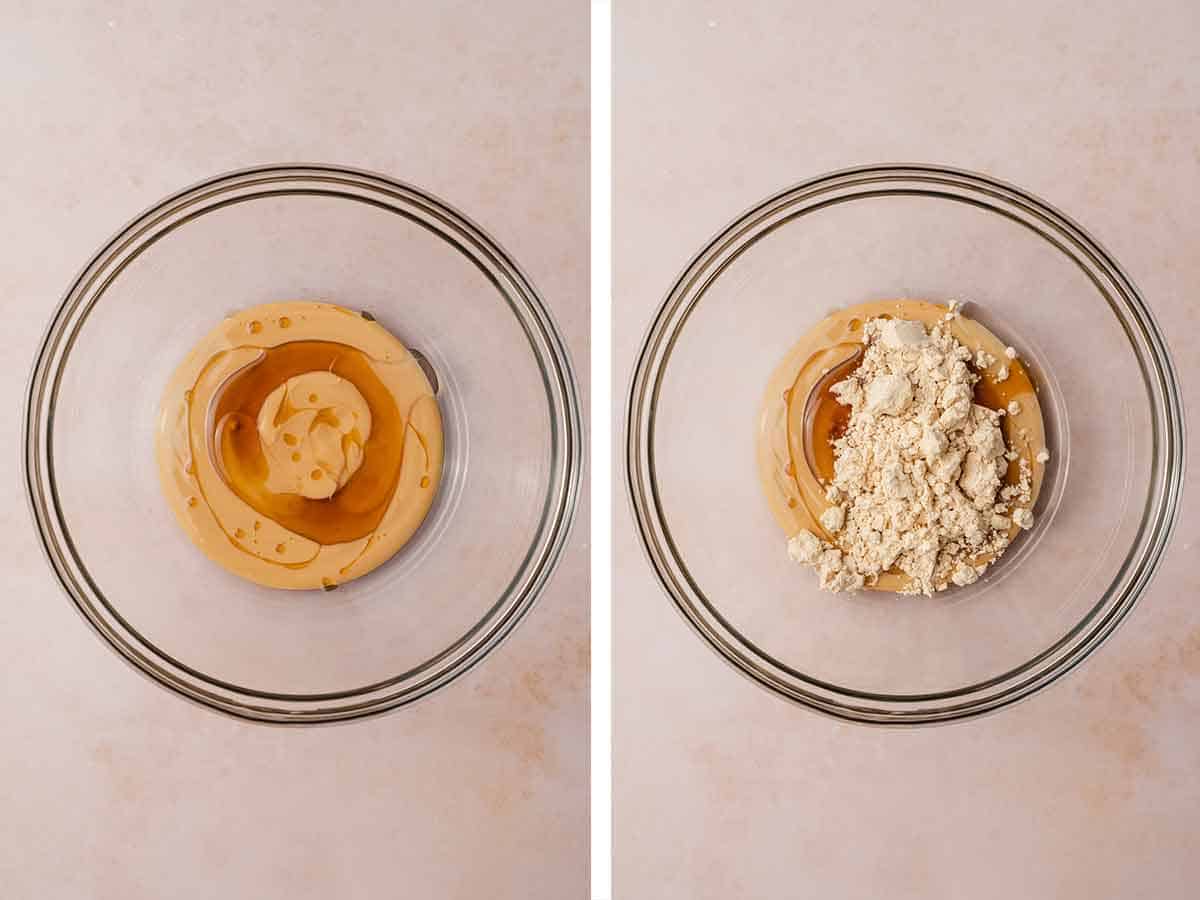
- In a large mixing bowl, combine peanut butter, maple syrup, coconut oil, and protein powder.
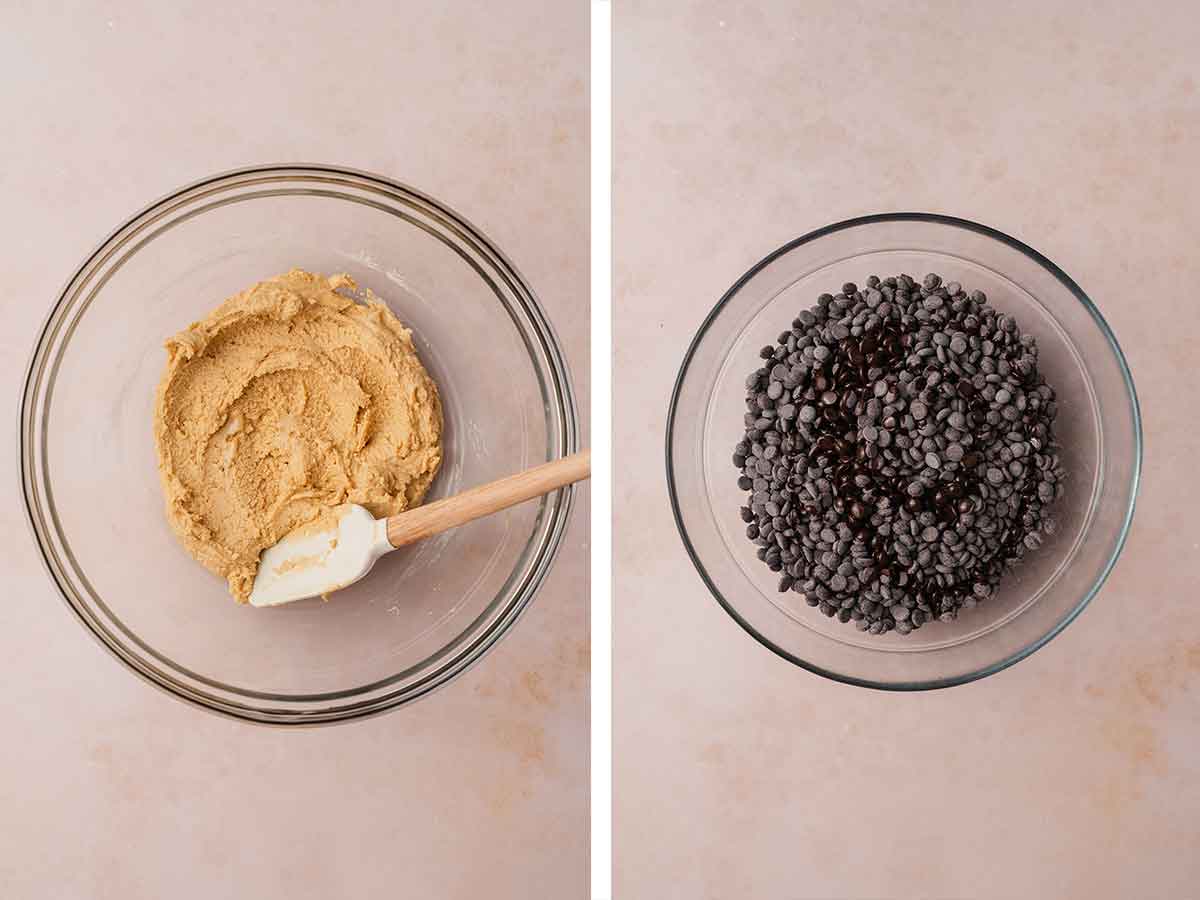
- Stir well to combine and place in the fridge for around 5 minutes so it firms up.
- In a microwave-safe bowl, add the chocolate chips and coconut oil.
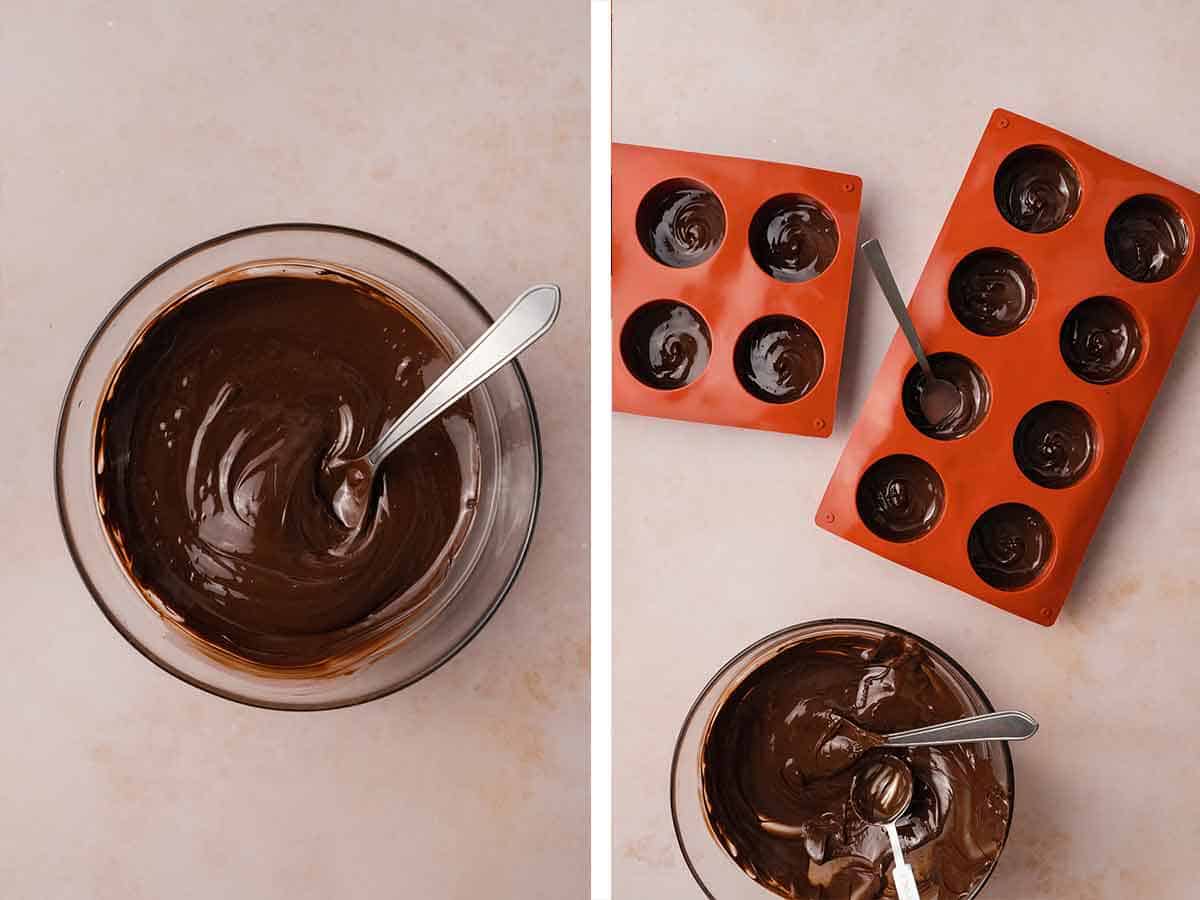
- Microwave on high in 20-second increments, stirring in between until the chocolate is fully melted.
- Place 1 tablespoon of melted chocolate into each cavity of the muffin mould (if you do not have a silicone muffin mould, you can place a cupcake liner into a metal muffin tray to make removing them easier). Use a spoon to gently spread the melted chocolate up the sides of the mould. Transfer to the freezer for 10 minutes to allow the chocolate to harden.
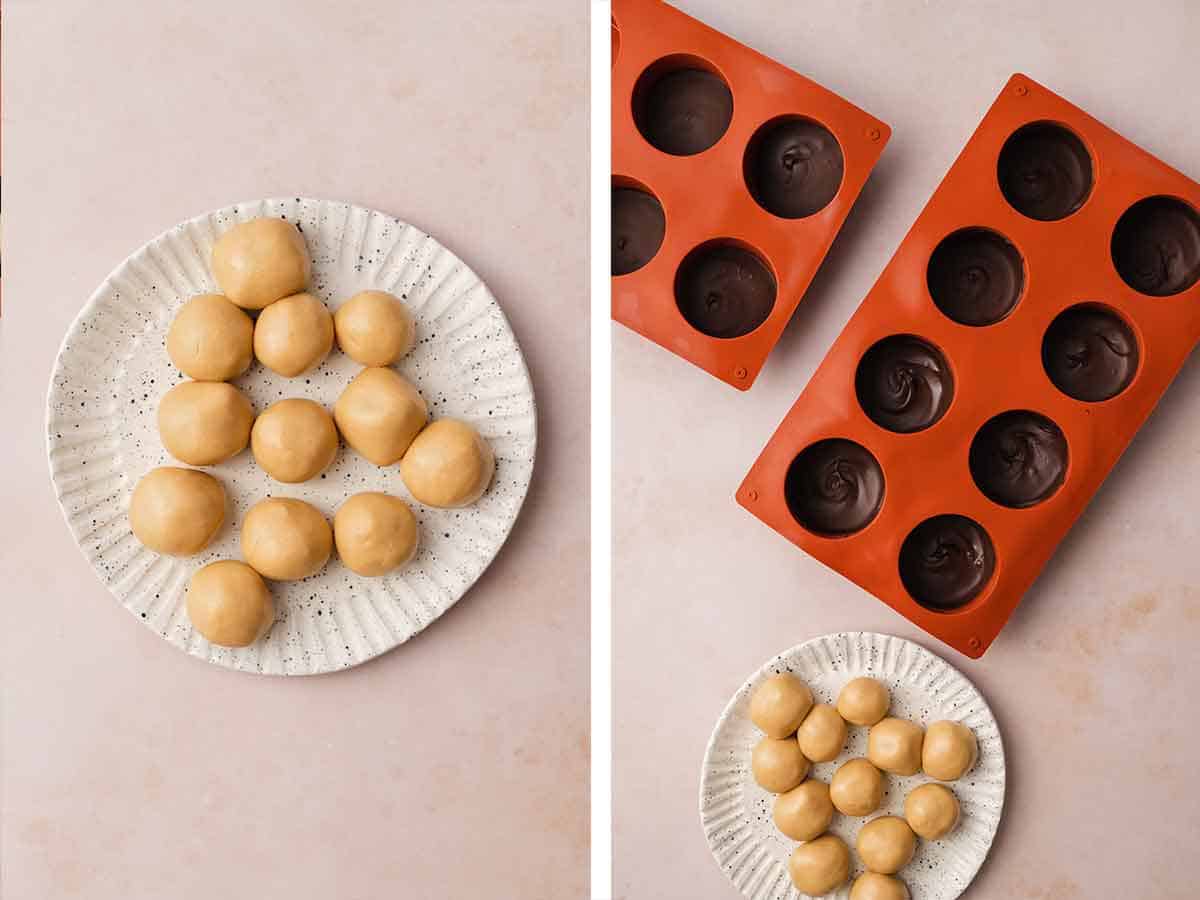
- Meanwhile, roll your peanut butter mixture into 12 balls. Check that the chocolate has been set; if set, remove it from the freezer. If not, continue to freeze.
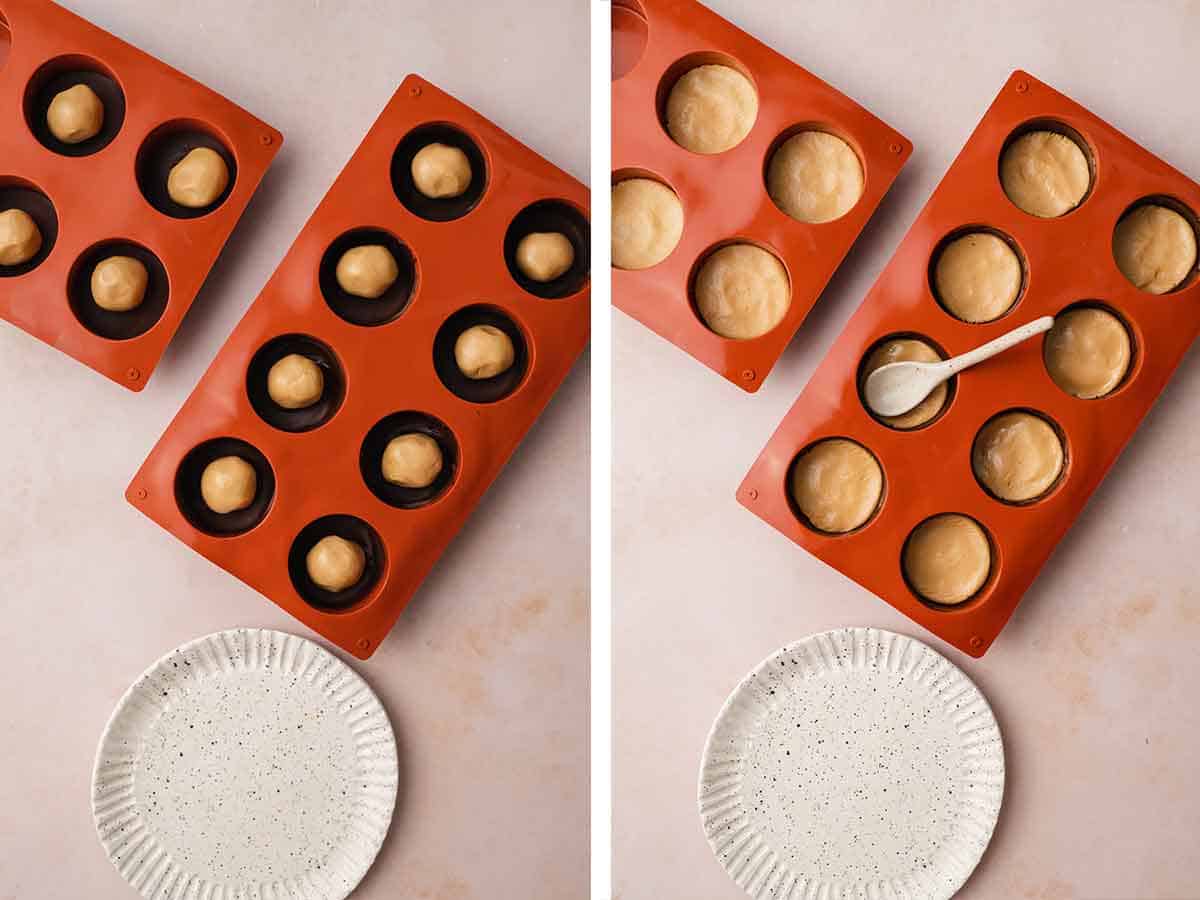
- Place each peanut butter ball into the center of each chocolate covered mould.
- Gently press down to flatten the mixture.
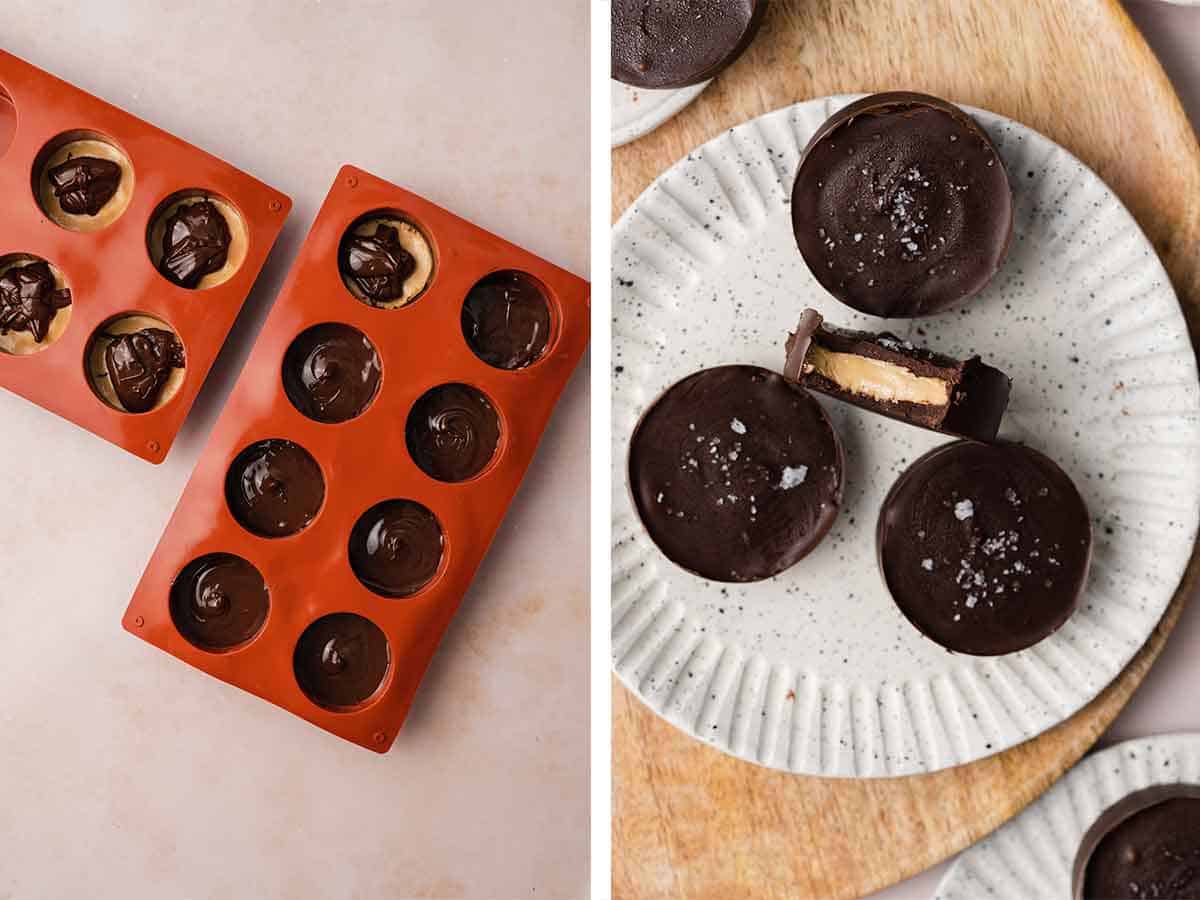
- Cover the top of the mixture with 1 tablespoon of remaining chocolate (gently reheat the chocolate in the microwave if it has hardened). Place in the freezer for about 10 minutes to harden, top with flakey sea salt before serving if desired.
Recipe Tips and Notes
- Make sure the protein powder you are using tastes good. This recipe will not mask the flavor of the protein powder if it doesn’t taste great on its own.
- I love to sprinkle a bit of flaky sea salt on top, as it pairs nicely with chocolate and peanut butter.
- I’m using two of the KANTNÅL silicone muffin mould from IKEA.
- If you do not have a silicone muffin mould, you can place a cupcake liner into a metal muffin tray to make removing them easier. Do not place this directly into a regular muffin tin, as it’ll be very difficult to get out.
Make Ahead Tips
- If you don’t plan to eat all of these protein chocolate peanut butter cups immediately, you should tightly wrap up the moulds in the freeze with a layer of plastic wrap. This helps prevent them from tasting like the freezer. Alternatively, transfer them into a freezer-safe bag and keep them in the freezer for up to 3 months. Do not keep them at room temperature.
- Store them in the freezer, as they can get soft in the fridge.
Can I use another nut butter?
Yeah! If you don’t have peanut butter, you can also use almond butter, cashew butter, etc. You can even use a combination if you don’t have enough and have some jars to finish up.
Protein Chocolate Peanut Butter Cups
These homemade protein peanut butter cups come together so easily in a few simple steps! A rich chocolate layer wrapped around a creamy peanut butter center, these no-bake peanut butter cups make for the perfect snack or dessert.
Print Recipe
Rate this Recipe
Servings: 12 servings
Ingredients
For the Peanut Butter Layer
- ½ cup peanut butter, runny/natural
- 2 tablespoons maple syrup
- 1 tablespoon coconut oil, melted
- ¼ cup vanilla protein powder, or unflavoured protein powder
For the Chocolate Layer
- 2 cups chocolate chips
- 1 tablespoon coconut oil
- flakey sea salt for topping
Instructions
- In a large mixing bowl combine peanut butter, maple syrup, coconut oil, and protein powder. Stir well to combine and place in the fridge for around 5 minutes.
- In a microwave-safe bowl, add the chocolate chips and coconut oil. Microwave on high in 20-second increments, stirring in between until the chocolate is fully melted.
- Place 1 tablespoon of melted chocolate into each cavity of the muffin mould (if you do not have a silicone muffin mould, you can place a cupcake liner into a metal muffin tray to make removing them easier). Use a spoon to gently spread the melted chocolate up the sides the mould to coat. Transfer to the freezer for 10 minutes to allow the chocolate to harden.
- Meanwhile, roll your peanut butter mixture into 12 balls and once the chocolate has set, place each ball into the center of each mould. Gently press down to flatten the mixture and cover the top of the mixture with 1 tablespoon of remaining chocolate (gently reheat the chocolate in the microwave if it has hardened). Place in the freezer for about 10 minutes to harden, top with flakey sea salt before serving if desired.
Tried this recipe?Did you make this recipe? I’m always so happy to hear about it! I’d love to see how it turned out. Tag me at @CarmysHungry on Instagram so I can see it! If you enjoyed the recipe, I’d really appreciate a comment with a 5 star rating! ♥
Nutrition Per Serving
Calories: 252kcal | Carbohydrates: 26g | Protein: 5g | Fat: 15g | Saturated Fat: 7g | Polyunsaturated Fat: 1g | Monounsaturated Fat: 3g | Trans Fat: 0.1g | Cholesterol: 9mg | Sodium: 73mg | Potassium: 77mg | Fiber: 1g | Sugar: 22g | Vitamin A: 67IU | Vitamin C: 0.2mg | Calcium: 55mg | Iron: 1mg
More Recipes You’ll Love
- Protein Peanut Butter Cheesecake Cups
- Strawberry Yogurt Bites
- Blueberry Parfait
- Biscoff Overnight Oats
Other places to connect with me
@carmyshungry on Instagram
Facebook
Shop my Amazon faves
Email: [email protected]
Leave a Reply