
Coming together in a flash, this bulgogi fried rice is a simple and delicious recipe that’s perfect for a weeknight meal. Full of mouthwatering savory flavor, you will want to make this bulgogi beef fried rice weekly! It also keeps well, so it’s perfect as a packed lunch.
What happens when you have leftover bulgogi and rice in the fridge? This delicious bulgogi fried rice! It came out so flavorful and I immediately wanted more, so this recipe was born! Full of savory bulgogi beef, meaty mushrooms, and a crispy and savory rice, you’ll be hooked as well!

Why You’ll Love This Recipe
- It’s very easy to make, and everything quickly comes together in a skillet! The longest part about this whole recipe is marinating the beef but that’s only 30 minutes and you can spend those 30 minutes preparing the sauce, cutting mushrooms, and beating the eggs.
- Between the beef, mushrooms, and eggs, this bulgogi beef fried rice this very hearty and filling.
- A majority of these ingredients are pantry staples. If you’re a regular with my recipes, chances are you already have everything you need to make this fried rice recipe.
Ingredients You’ll Need
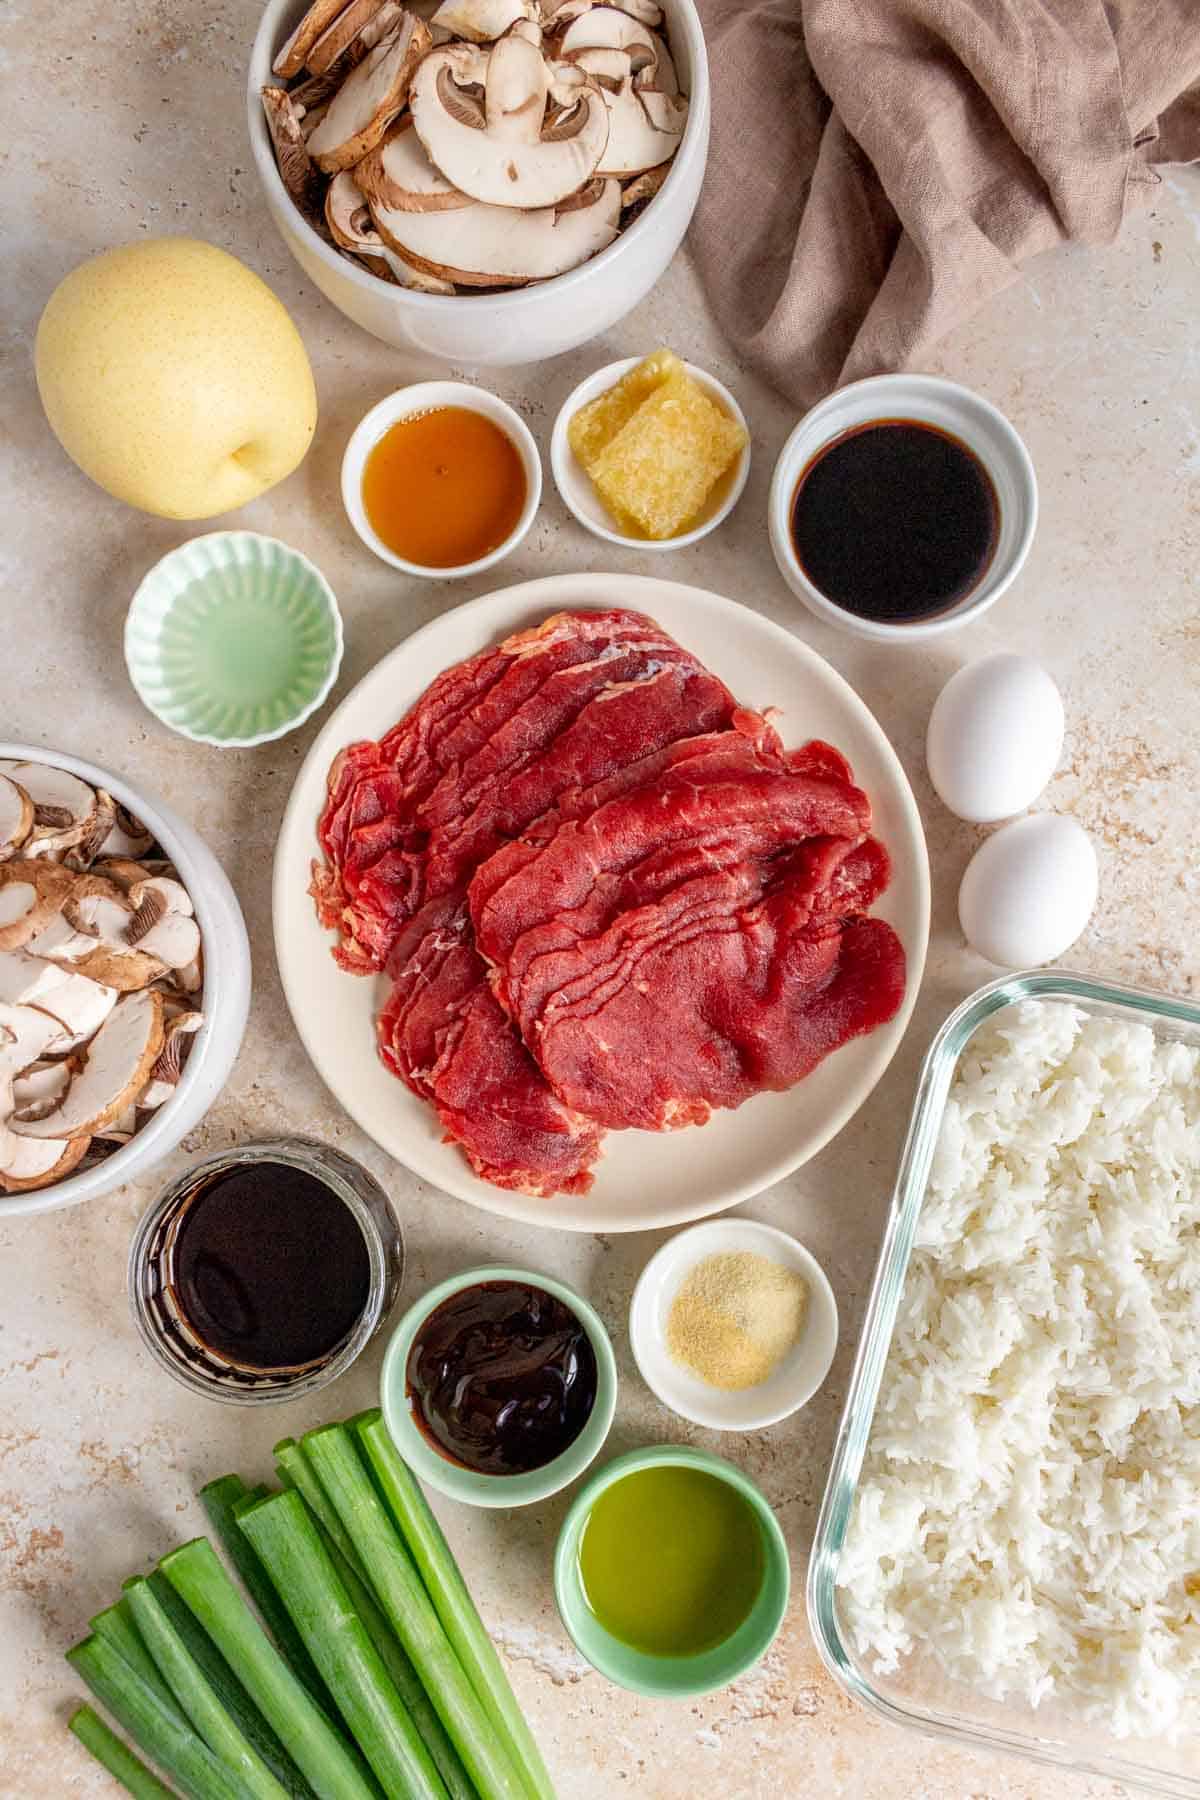
- sliced beef — you can use any cut of sliced beef. If you have a Korean grocery store near you, you can find specific bulgogi-style sliced beef. They’re usually very thinly sliced.
- soy sauce — I recommend using low sodium soy sauce. If you’d like some darker coloring, you can add a tablespoon of dark soy sauce. You’ll need soy sauce for both the beef and the sauce.
- mirin — mirin is a Japanese sweet rice wine, if you are unable to find it, you can try rice vinegar with extra honey to mimic the taste.
- Asian pear — this helps tenderize the meat. The pear also adds sweetness to the beef. My local Costco carries Asian pears now, so it’s much easier to find now. However, if you can’t find it at your Costco, you can try your local Korean or Asian grocer!
- garlic — the more, the merrier! I don’t believe in too much garlic lol.
- sesame oil — I use pure sesame oil to add a nice nutty flavor to the sauce.
- oyster sauce — don’t worry, while it’s made from oyster extract, it doesn’t taste like oysters! Not sure what it is? Check out my post on What Is Oyster Sauce.
- garlic and onion powder — just a pinch for some extra flavor.
- oil — use your oil of choice to cook the mushrooms.
- mushrooms — I use baby bella mushrooms but you can pretty much use any mushrooms.
- salt — just a pinch for the mushrooms.
- leftover cooked rice — I always use jasmine rice. Chilled leftover rice is ideal as cold rice is firmer and decreases the chances of your fried rice turning out mushy.
- eggs — I use two eggs for the fried rice. You can grab some extra eggs to fry to put on top of the fried rice.
- green onions — the more the merrier, in my humble-green-onion-loving-opinion.
How to Make Bulgogi Fried Rice
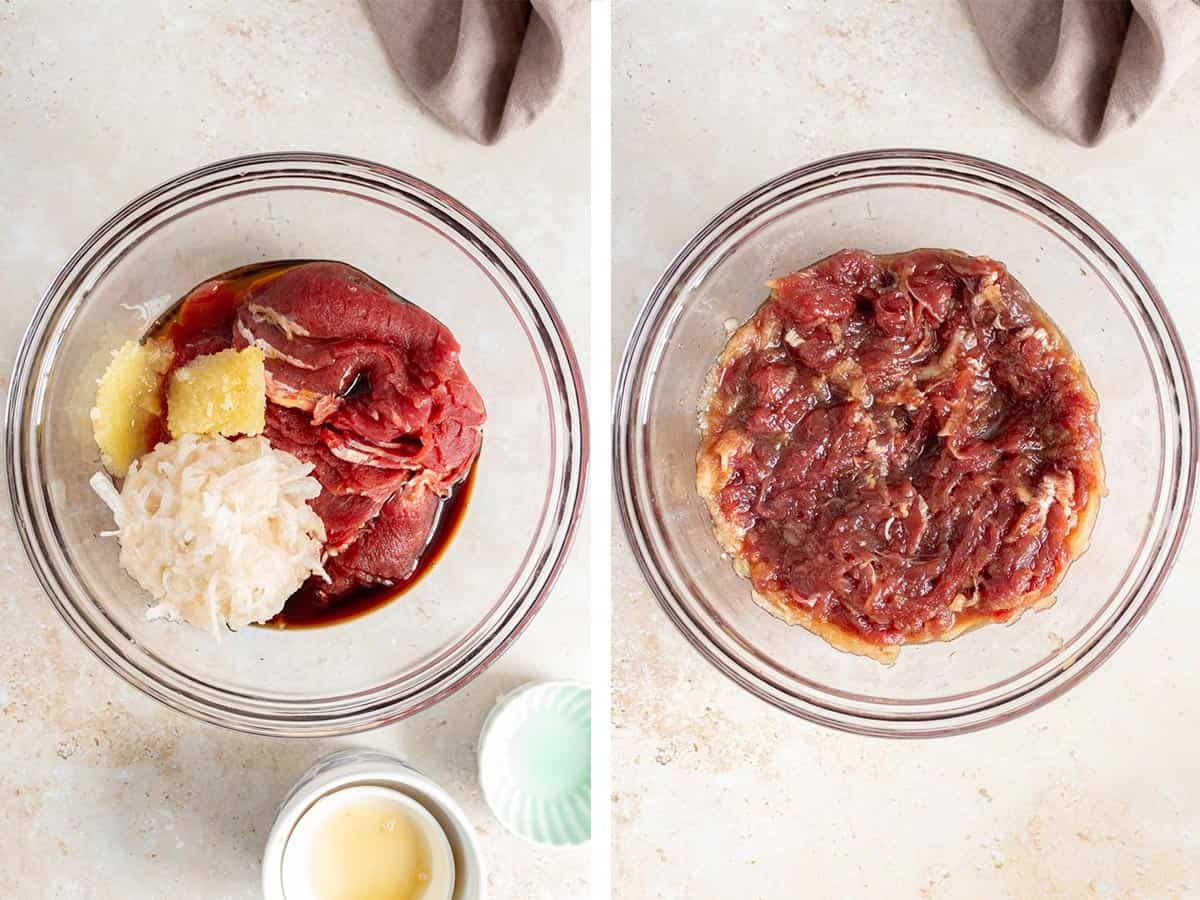
- To a large bowl, add the sliced beef, soy sauce, mirin grated pear, minced garlic, and sesame oil. Using clean hands or gloved hands, massage to combine everything. Set aside to marinate for 30 minutes.
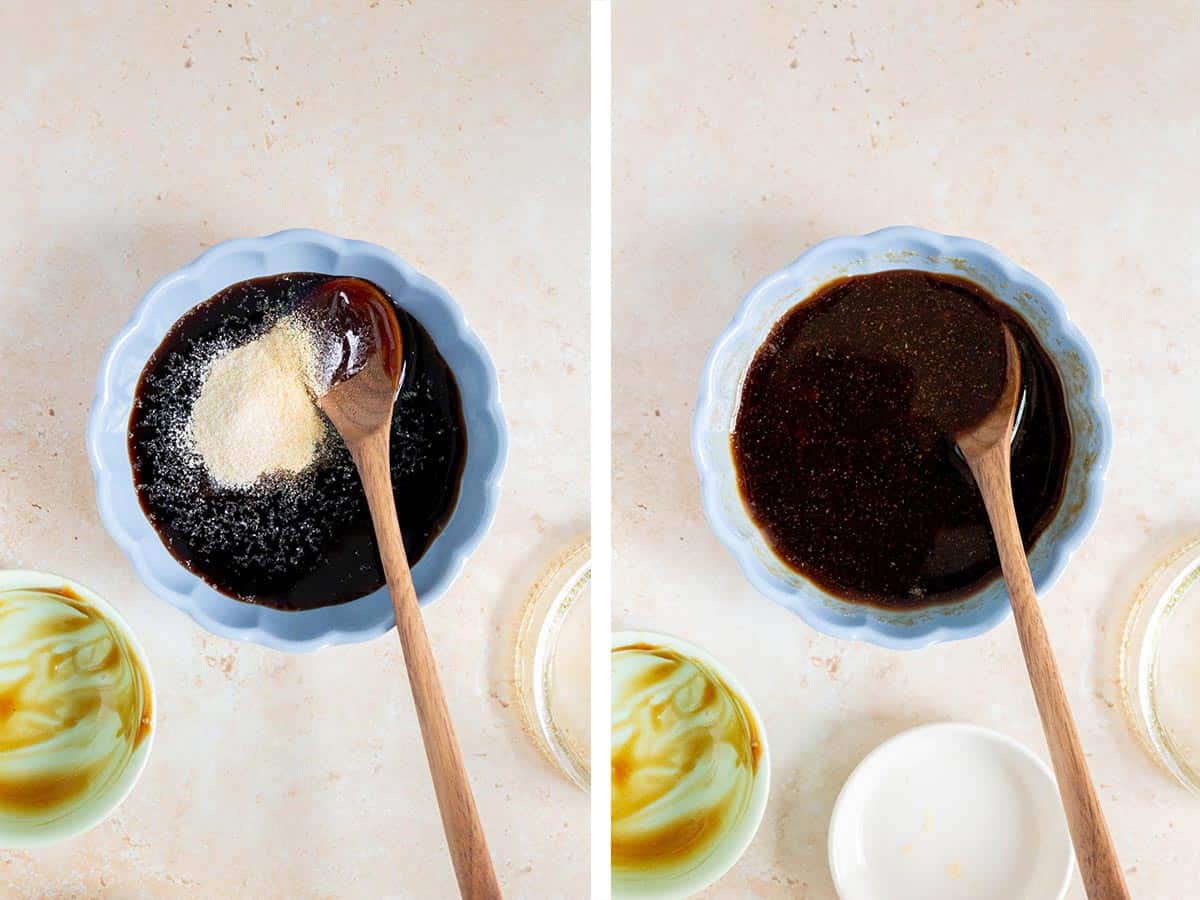
- In a small bowl, combine the soy sauce, oyster sauce, garlic powder, and onion powder. Set aside.
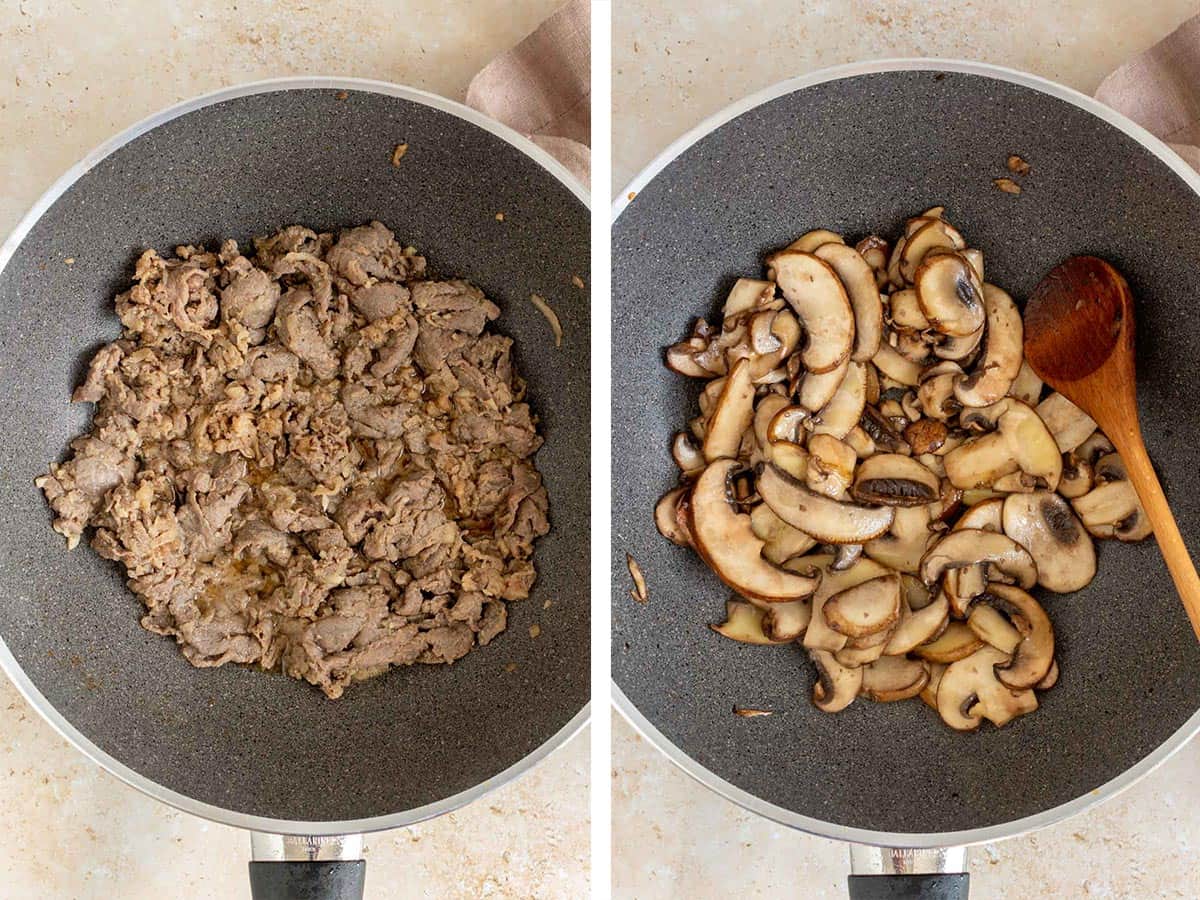
- In a large non-stick skillet over medium heat, add the marinaded beef, shaking off any excess marinade, in a single layer. Allow the beef to cook for 30 seconds untouched before moving the meat around the skillet. You want to move the meat quickly around the pan as the meat is super thin so it’ll cook quickly. Once browned and cooked through, transfer the meat to a plate and set aside. This should take around 4 to 5 minutes.
- To the skillet, add the oil and once hot, add the mushrooms. Cook for a few seconds and add the salt. Cook the mushrooms, stirring occasionally, for 4 to 5 minutes or until browned to your liking.
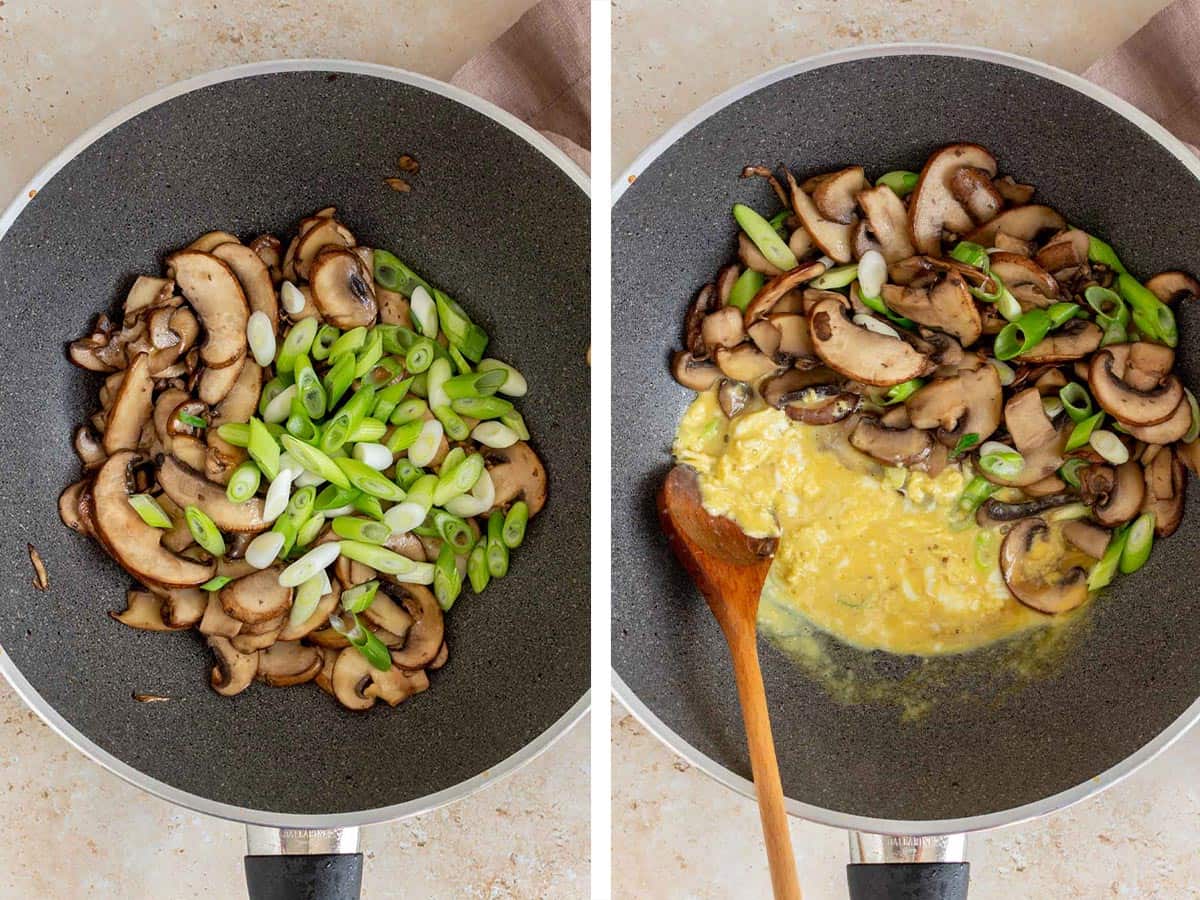
- Add the white and light green parts of the green onions, saute for a minute and then push it side on the skillet, exposing half of the pan.
- Add the beaten eggs to the exposed skillet and lightly scramble it. Once mostly cooked through, combine it with the mushrooms and green onions.
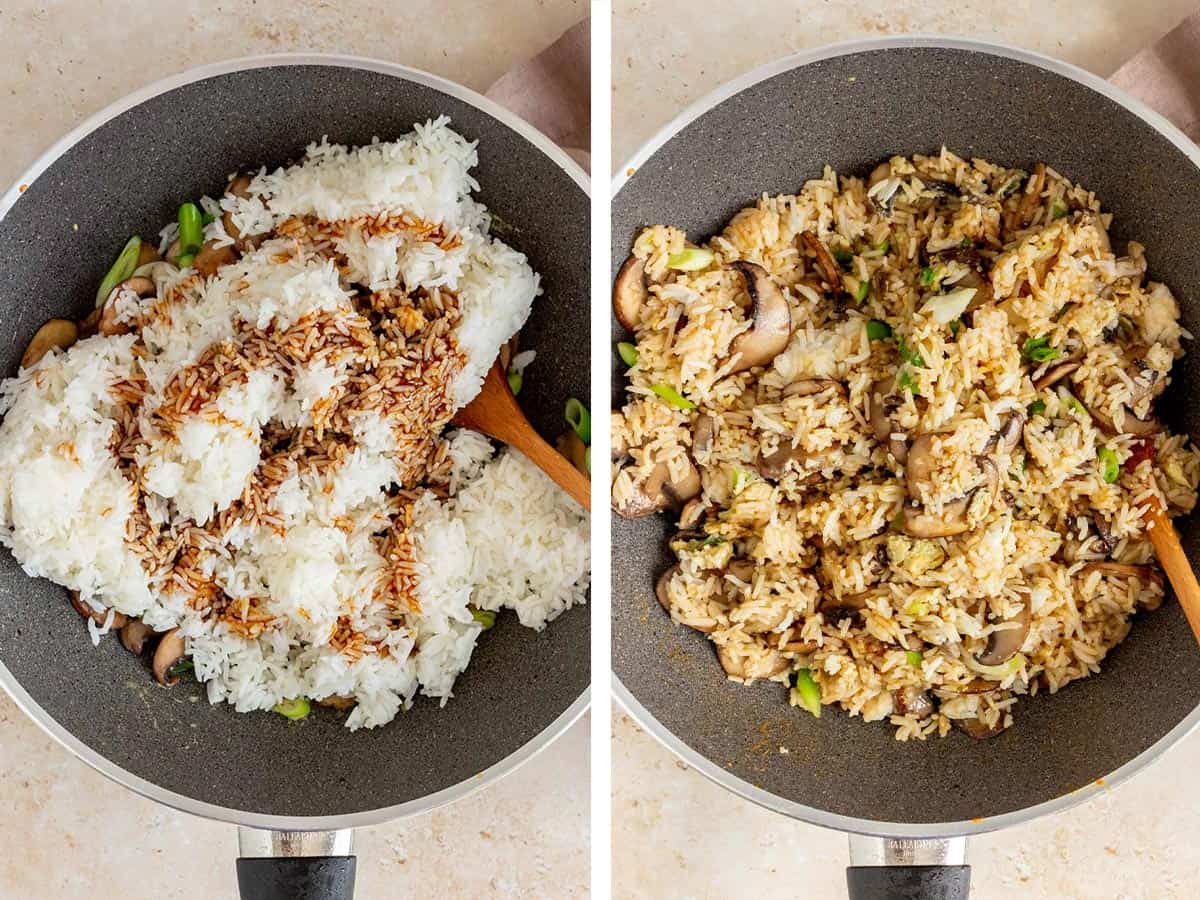
- Add the cold rice to the skillet. Give the sauce a stir and pour on top.
- Toss to combine everything. Cook for two to three minutes or until the rice is hot.

- Add the cooked bulgogi beef and the remaining green onions to the skillet and toss to combine. Enjoy!

Recipe Tips and Notes
- You can add a tablespoon of dark soy sauce to the sauce if you’d like a darker color to your fried rice. You can swap it for a tablespoon of regular soy sauce. Keep in mind that dark soy sauce is saltier.
- If you’re using a cast iron skillet, you might need a bit of extra oil in the skillet when you cook the beef. The ingredients in the marinade are enough to cook the beef if you’re using a non-stick skillet.
- If you’re a fan of crispy rice, you can press the rice down into the skillet and leave it untouched for a couple of minutes and allow the rice to crisp up.
- If you have a rice cooker, you can change the setting to make slightly “harder” rice when you cook it the night before. It’ll help the rice grains hold their shape better when you use it for fried rice. (Here’s a review of the rice cooker I have).
- Optional: add kimchi to the skillet before the eggs and saute with the mushrooms and green onions if you’re a fan of kimchi. You can also check out my kimchi fried rice!
- Optional: add a spoonful of chili crisp to the sauce for a bit of heat. You can also drizzle chili crisp onto the rice before serving.
- Optional: for some extra veggies, you can add a handful of frozen peas, shredded carrots, diced bell peppers, edamame, and more!
- I enjoy adding extra sesame seeds, shredded seaweed, and a fried egg on top of my bulgogi fried rice.

Make Ahead Tips
- Meal prep: once cooled, store the cooled bulgogi fried rice in an airtight container for up to 4 days in the fridge.
- Freezer: allow the fried rice to cool before transferring into an airtight container and storing them in the freezer. Fried rice can last for up to 3 months.
I always use cold leftover rice from the fridge overnight as it has had the chance to firm up. Using cold rice makes it easier to separate when frying and decreases the chances of your fried rice turning out mushy. I’ve tried this with freshly cooked rice before and it gets sticky and mushy quickly. I always make my rice the day before. If you don’t have leftover rice, you can try to prepare the rice beforehand and then spread it out on a sheet pan so it can cool quickly in the fridge for an hour or so.

Bulgogi Fried Rice
Ingredients
For the Bulgogi
- 1 to 1½ pounds thinly sliced beef
- ¼ cup soy sauce, low sodium
- 2 tablespoons mirin
- 1 Asian pear, grated
- 2 tablespoons minced garlic
- 1½ tablespoon sesame oil
For the Sauce
- 5 tablespoons soy sauce, low sodium (optional, swap 1 tablespoon for dark soy sauce)
- 3 tablespoons oyster sauce
- ½ teaspoon garlic powder
- ½ teaspoon onion powder
For the Fried Rice
- 2 tablespoons oil
- 4 cups sliced mushrooms, (two 227 grams packages)
- 4 cups cold cooked rice
- 2 eggs, beaten
- 1 bunch green onions, diced, white and light green parts separated from the dark green parts.
Equipment
- Large skillet
Instructions
- To a large bowl, add the sliced beef, soy sauce, mirin grated pear, minced garlic, and sesame oil. Using clean hands or gloved hands, massage to combine everything. Set aside to marinate for 30 minutes.
- In a small bowl, combine the soy sauce, oyster sauce, garlic powder, and onion powder. Set aside.
- In a large non-stick skillet over medium heat, add the marinaded beef, shaking off any excess marinade, in a single layer. Allow the beef to cook for 30 seconds untouched before moving the meat around the skillet. You want to move the meat quickly around the pan. Once browned and cooked through, transfer the meat to a plate and set aside. This should take around 4 to 5 minutes.
- To the skillet, add the oil and once hot, add the mushrooms. Cook for a few seconds and add the salt. Cook the mushrooms, stirring occasionally, for 4 to 5 minutes or until browned to your liking.
- Add the white and light green parts of the green onions, saute for a minute and then push it side on the skillet, exposing half of the pan.
- Add the beaten eggs to the exposed skillet and lightly scramble it. Once mostly cooked through, combine it with the mushrooms and green onions.
- Add the cold rice to the skillet. Re-stir the sauce and pour on top. Toss to combine everything. Cook for two to three minutes or until the rice is hot.
- Add the cooked bulgogi beef and the remaining green onions to the skillet and toss to combine.
Nutrition Per Serving
More Fried Rice Recipes to Try
- Tuna Kimchi Fried Rice
- Ketchup Fried Rice
- Japanese Fried Rice
- Hibachi Fried Rice
- Sriracha Fried Rice
- Beef Fried Rice with Fried Egg
Other places to connect with me
@carmyshungry on Instagram
Facebook
Shop my Amazon faves
Email: [email protected]
Leave a Reply