
This dry brined spatchcock turkey recipe will give you a juicy, delicious turkey every time. Made with simple ingredients, this spatchcock turkey recipe is so flavorful and will quickly become your favorite way to cook a whole turkey for your next Thanksgiving or holiday gathering.
A dry brined spatchcock turkey is your secret to the most flavorful, juiciest, and crispiest turkey for Thanksgiving, Christmas, or just any time you want to have a turkey without having to babysit a bird in the oven.
Wet Brine vs Dry Brine
A wet brine is typically made from water, salt, and sometimes along with sugar, herbs, and spices. The turkey is submerged in the brine solution before cooking, allowing it to absorb moisture and flavor over time. The salt in the wet brine helps the meat retain water, which can lead to a juicier roasted turkey.
A dry brine is very similar. A dry brine also consists of salt, sugar, herbs, and spices but it is simple as named, dry, as it doesn’t use water. When you dry brine a turkey, the salt, sugar, herbs, and spices are rubbed directly onto the surface of the meat. The salt will draw moisture out, but then that moisture is reabsorbed back into the meat, along with salt and flavors.
Both methods are an amazing way to tenderize meat, add moisture, and infuse flavors throughout the turkey and both has their place in the kitchen. However, I’m a huge fan of the dry brine as one of the downfalls of a wet brine is finding a pot large enough to submerge the whole turkey in! It’s also kind of difficult to fit a pot that large into the fridge. So personally, I go with a dry brine for turkey when possible. You also tend to get a crispier turkey with the use of a dry brine as the skin stays dry.
What is Spatchcocking?
Spatchcocking, also known as butterflying, is a culinary technique used to prepare poultry, such as turkey or chicken. This method allows for quick and even cooking. The process involves removing the backbone of the bird and flattening it out before cooking.
By spatchcocking a turkey, it lies flat and cooks more evenly, with both the dark and white meat cooking through at the same time. There’s also more surface area exposed to the heat, so you get way more crispy, golden skin. Check out my post on spatchcocking chicken if you want to try this method on a chicken without dry brining!
Why You’ll Love This Recipe
- There’s no need to baste the turkey! Once the turkey is in the oven to roast, it’s pretty hands off. There’s no need to constantly check on the bird and baste it.
- It roasts faster when spatchcocked, so you don’t have to spend hours on a turkey! Traditionally, it’s recommended to roast an unstuffed turkey for around 13 minutes per pound whereas a spatchcocked turkey requires around 6 minutes per pound!
- You get so much crispy skin! Since the whole turkey is laid flat, the entire turkey is exposed to the heating element in the oven and all the skin will crisp up.
Ingredients You’ll Need

- turkey — make sure your turkey is fully thawed before you start working on it. If the turkey is still semi-frozen while you dry brine it, the moisture from the thawing turkey will essentially wash away the brine in the fridge.
- dry brine — you will need kosher salt, brown sugar, paprika (smoked or sweet, your choice!), garlic powder, onion powder, ground pepper, fresh sage, fresh rosemary, and lemon zest for the dry brine. Around the holiday season, I like to double check all my spices are still fresh. If you have a bulk bottle of garlic powder or onion powder or etc, I recommend checking on it! Sometimes it takes me a while to go through a big bottle of seasoning that I bought on sale only for it to become stale before I can get through it. While seasonings don’t really “expire,” they do lose their potency and flavor over time.
- aromatics — to add more flavor to the turkey while it cooks, I place onions, carrots, celery, sage, thyme, and lemons underneath the turkey. I don’t recommend skipping this part as it also imparts flavor to the drippings that come off the turkey that you’ll want to save to make the homemade gravy! It adds a delicious depth of flavor that you’ll miss out on if you skip the aromatics!
- butter — make sure you are using unsalted butter. The dry brine on the turkey will have enough salt so you don’t want to make the turkey saltier with salted butter. You’ll also need unsalted butter to make the gravy.
- warmed broth — I like having warmed broth on hand when making the homemade gravy. Before I’ve used room temperature broth and I find that with warmed broth, you’re less likely to get a clumpy gravy. It incorporates much more smoothly with the drippings and roux.
- flour — to make the roux for the gravy.
- seasoning — you’ll need a bit of onion powder, garlic powder, salt, and pepper to season the gravy.
How to Make a Dry Brined Spatchcock Turkey

- Whisk the kosher salt, brown sugar, paprika, garlic powder, onion powder, ground pepper, sage, rosemary, and lemon zest together in a small bowl. Set aside.

- Place the turkey on a large cutting board. Using kitchen shears or a sharp knife, cut alongside the backbone and remove it and any small bones sticking out.

- Turn the turkey breast side up on the cutting board and place your palms over the center of the breastbone to press firmly down between the two breasts, flattening out the turkey.
- Place the turkey on a large baking sheet and rub the dry brine all over the turkey, including under the skin and on the underside.
- Refrigerate uncovered for at least 24 hours.

- Preheat an oven to 400°F. Remove the dry brined turkey from the fridge and let it come to room temperature. If there is excess moisture on the skin of the turkey, gently pat it dry with paper towels.
- Meanwhile, in a large rimmed baking sheet (or a large roasting pan) lined with foil, add the onions, carrots, and celery. Top with the sage, thyme, rosemary, and cut lemons.
- Place the turkey on top of the vegetables and herbs.

- Smear softened butter all over the turkey and under the skin, evenly coating the turkey. Use more butter if needed.
- Roast until the skin of the turkey is golden brown and the internal temperature of the breasts are at least 155°F (68°C), and the thighs, at least 165°F (74°C), about 80-90 minutes.
- Remove from the oven and transfer to a cutting board and lightly tent with foil. Rest for at least 20 minutes before slicing.

- Pour the liquid from the baking sheet (or roasting pan) through a strainer; discard the onions, carrots, celery, herbs, and lemon wedges.
- Melt butter in a saucepan over medium heat. Whisk in the flour until smooth.
- Stir continuously for about 2 minutes until a thick paste forms, forming a roux. The roux should be thick. If you run a spoon or spatula through it, the roux should coat the spatula without dripping off.
- Slowly whisk in the strained liquid from the turkey while whisking constantly. Start with 1 cup and continue to add the rest of the drippings until there’s enough added to your liking.
- Whisk in the warm broth if you’d like more gravy than what the drippings provided. Whisk until totally smooth with no lumps. Add the garlic powder, onion powder, salt, and pepper. Cook while whisking until the gravy has thickened to your liking, about 5 minutes.
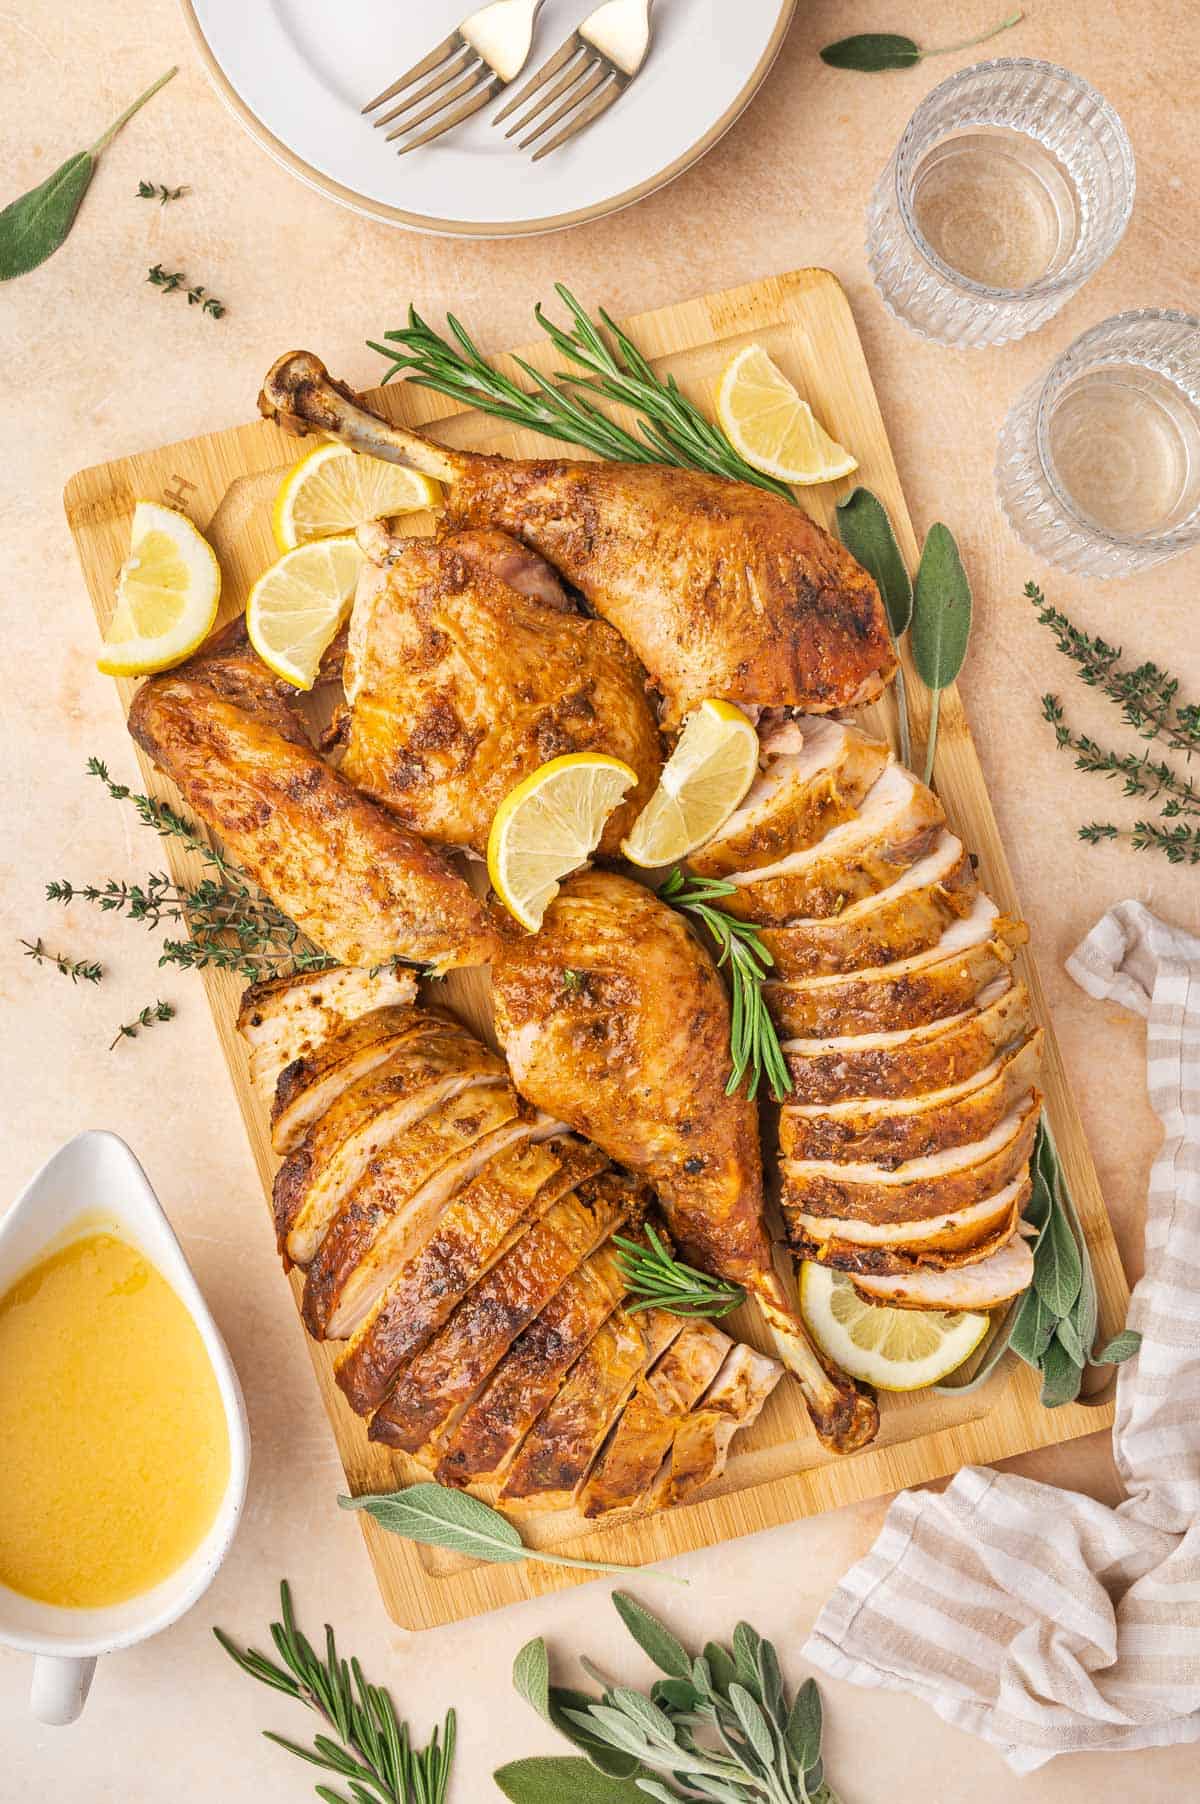
- Serve gravy with the turkey. Garnish with fresh herbs and lemons if desired.

Recipe Tips and Notes
- Since the turkey is laid flat, you don’t technically require a roasting pan, just a sheet pan (you can still use one if you’d like!). This means you get a little extra oven space to slide another sheet pan of vegetables underneath! Try my roasted brussels sprouts!
- Make sure you give yourself enough time to bring the turkey to room temperature! This helps promote even and uniform cooking as there wouldn’t be cold spots in the turkey. It generally takes around 1 to 2 hours for the turkey to come to room temperature.
- If the turkey wings are cooking too quickly, you can use foil and cover the wing tips!
- Don’t skip resting for a juicy and moist turkey! Letting the spatchcock turkey rest for around 20 minutes before cutting into it to lets the meat reabsorb the juices. If you don’t rest the turkey, the juices will run out when you slice it and the meat will be dry. Use the resting time to make the gravy!
- Use a good pair of sharp kitchen shears to cut the backbone out of the turkey. A good pair will make your life so much easier. When you’re cutting the backbone out, be sure to cut as close as possible to the bone on both sides so that you don’t lose any meat in the process.
- Always pat dry your turkey before you start working with it. This will help the dry brine stick better to the turkey and the skin get crispier.
- Make sure to get the dry brine all over the turkey, including under the skin and underneath the turkey. I usually stick a chopstick or a long spoon under the skin of the breast to loosen the skin enough to allow the seasoning to go in.

- By leaving the turkey uncovered in the fridge, it helps the skin dry out, which will lead to crispier skin when roasting. If you have the time, you can leave it uncovered for up to 3 days for even more flavor. I wouldn’t dry brine for more than 3 days as it can get a little too salty for my liking.
- Don’t toss the turkey bones! After you carve the turkey, save the bones to make bone broth! You can roast the backbone on the side and freeze that alongside your bones to make a broth later!
- Be generous with the seasoning and butter mixture! You can add extra seasoning and additional butter.
- Don’t baste your turkey. Basting adds moisture to the skin and makes it less crispy.
Leave the Dry Brine!
After dry brining, do not rinse the turkey. Rinsing the turkey can wash away the flavor. Simply pat the turkey dry with paper towels to remove any excess moisture.

Storage Tips
- Meal prep: once cooled (it could takes at least an hour, depending on how much leftovers there are), store the turkey in an airtight container for up to 4 days in the fridge.
- Freezer: allow the turkey to cool before transferring into an airtight container before storing them in the freezer. Cooked turkey can last for up to 3 months in the freezer.
- Leftovers: Try this Pesto Turkey Sandwich, Turkey Stir Fry, or Turkey Melt with your leftover turkey!
As a rule of thumb, plan for about 1 to 1½ pounds of turkey per person if you’re serving a whole bird. I usually get a larger bird than I need so I can have leftovers!
Use about 1 tablespoon of kosher salt per 5 pounds of turkey.
A good rule of thumb for a spatchcock turkey is to roast it in the oven for around 6 minutes per pound. You can use a meat thermometer to check for doneness. The turkey breasts should have reached at least 155°F, and the thighs, at least 165°F.
I also recommend leaving the dry brine on for longer if you are cooking a turkey larger than 14 pounds to ensure the dry brine can really work its magic throughout the entire bird. Also, please make sure there’s room in your fridge!

Serving Ideas
Need some side dishes to go with your spatchcock turkey for Thanksgiving? Here are a few of my favorite side dishes! They’re also super easy to scale up for a crowd! I like to use a variety of kitchen appliances so I don’t have to rely on using just the oven and planning around the turkey.
- Boursin Mashed Potatoes
- Caramelized Onion Mashed Potatoes
- Sourdough Stuffing with Sausage and Sage
- Brioche Stuffing with Rosemary and Sausage
- Maple Mustard Brussels Sprouts
- Honey Sriracha Brussels Sprouts
- Air Fryer Garlic Bread
- Slow Cooker Cranberry Sauce
- Slow Cooker Sweet Potatoes
- Rosemary Roasted Potatoes
- Roasted Brussel Sprouts and Carrots
- Air Fryer Fingerling Potatoes
- “Baked” Potatoes in the Instant Pot

Dry Brined Spatchcock Turkey
Ingredients
- 12-14 lb turkey, thawed, giblets and neck removed
For the Dry Brine
- 2½ tablespoons kosher salt
- 1 tablespoon brown sugar
- 1 tablespoon paprika
- 1 tablespoon garlic powder
- 1 tablespoon onion powder
- ½ tablespoon ground pepper, or more
- 2 tablespoons fresh sage, finely chopped
- 1 tablespoon fresh rosemary, chopped
- 1 tablespoon lemon zest
For the Turkey
- 1 onion, chopped into 4
- 3 large carrots, peeled and chopped
- 3 celery ribs, chopped
- 1 bunch fresh sage
- 1 bunch fresh thyme
- 2 sprigs fresh rosemary
- 2 lemons, cut into 4
- 1 stick unsalted butter, (8 tablespoons), softened (or more)
For the Gravy
- 1 to 2 cups broth from drippings
- 1 cup warm broth
- 4 tablespoons unsalted butter
- 4 tablespoons flour
- ¼ teaspoon onion powder
- ¼ teaspoon garlic powder
- 1 pinch salt and pepper
Instructions
Dry Brine the Turkey
- Whisk the kosher salt, brown sugar, paprika, garlic powder, onion powder, ground pepper, sage, rosemary, and lemon zest together in a small bowl. Set aside.
- Place the turkey on a large cutting board. Using kitchen shears or a sharp knife, cut alongside the backbone and remove it and any small bones sticking out.
- Turn the turkey breast side up on the cutting board and place your palms over the center of the breastbone to press firmly down between the two breasts, flattening out the turkey.
- Place the turkey on a large baking sheet and rub the dry brine all over the turkey, including under the skin and on the underside.
- Refrigerate uncovered for at least 24 hours.
Roast the Turkey
- Preheat an oven to 400°F.
- Remove the dry brined turkey from the fridge and let it come to room temperature. If there is excess moisture on the skin of the turkey, gently pat it dry with paper towels.
- Meanwhile, in a large rimmed baking sheet (or a large roasting pan) lined with foil, add the onions, carrots, and celery. Top with the sage, thyme, rosemary, and cut lemons. Place the turkey on top of the vegetables and herbs.
- Smear softened butter all over the turkey and under the skin, evenly coating the turkey. Use more butter if needed.
- Roast until the skin of the turkey is golden brown and the internal temperature of the breasts are at least 155°F (68°C), and the thighs, at least 165°F (74°C), about 80-90 minutes.
- Remove from the oven and transfer to a cutting board and lightly tent with foil. Rest for at least 20 minutes before slicing.
For the Gravy
- Pour the liquid from the baking sheet (or roasting pan) through a strainer; discard the onions, carrots, celery, herbs, and lemon wedges.
- Melt butter in a saucepan over medium heat. Whisk in the flour until smooth.
- Stir continuously for about 2 minutes until a thick paste forms, forming a roux. The roux should be thick. If you run a spoon or spatula through it, the roux should coat the spatula without dripping off.
- Slowly whisk in the strained liquid from the turkey while whisking constantly. Start with 1 cup and continue to add the rest of the drippings until there’s enough added to your liking.
- Whisk in the warm broth if you’d like more gravy than what the drippings provided. Whisk until totally smooth with no lumps. Add the garlic powder, onion powder, salt, and pepper. Cook while whisking until the gravy has thickened to your liking, about 5 minutes.
- Serve gravy with the turkey. Garnish with fresh herbs and lemons if desired.
Nutrition Per Serving
Other places to connect with me
@carmyshungry on Instagram
Facebook
Shop my Amazon faves
Email: [email protected]
Leave a Reply