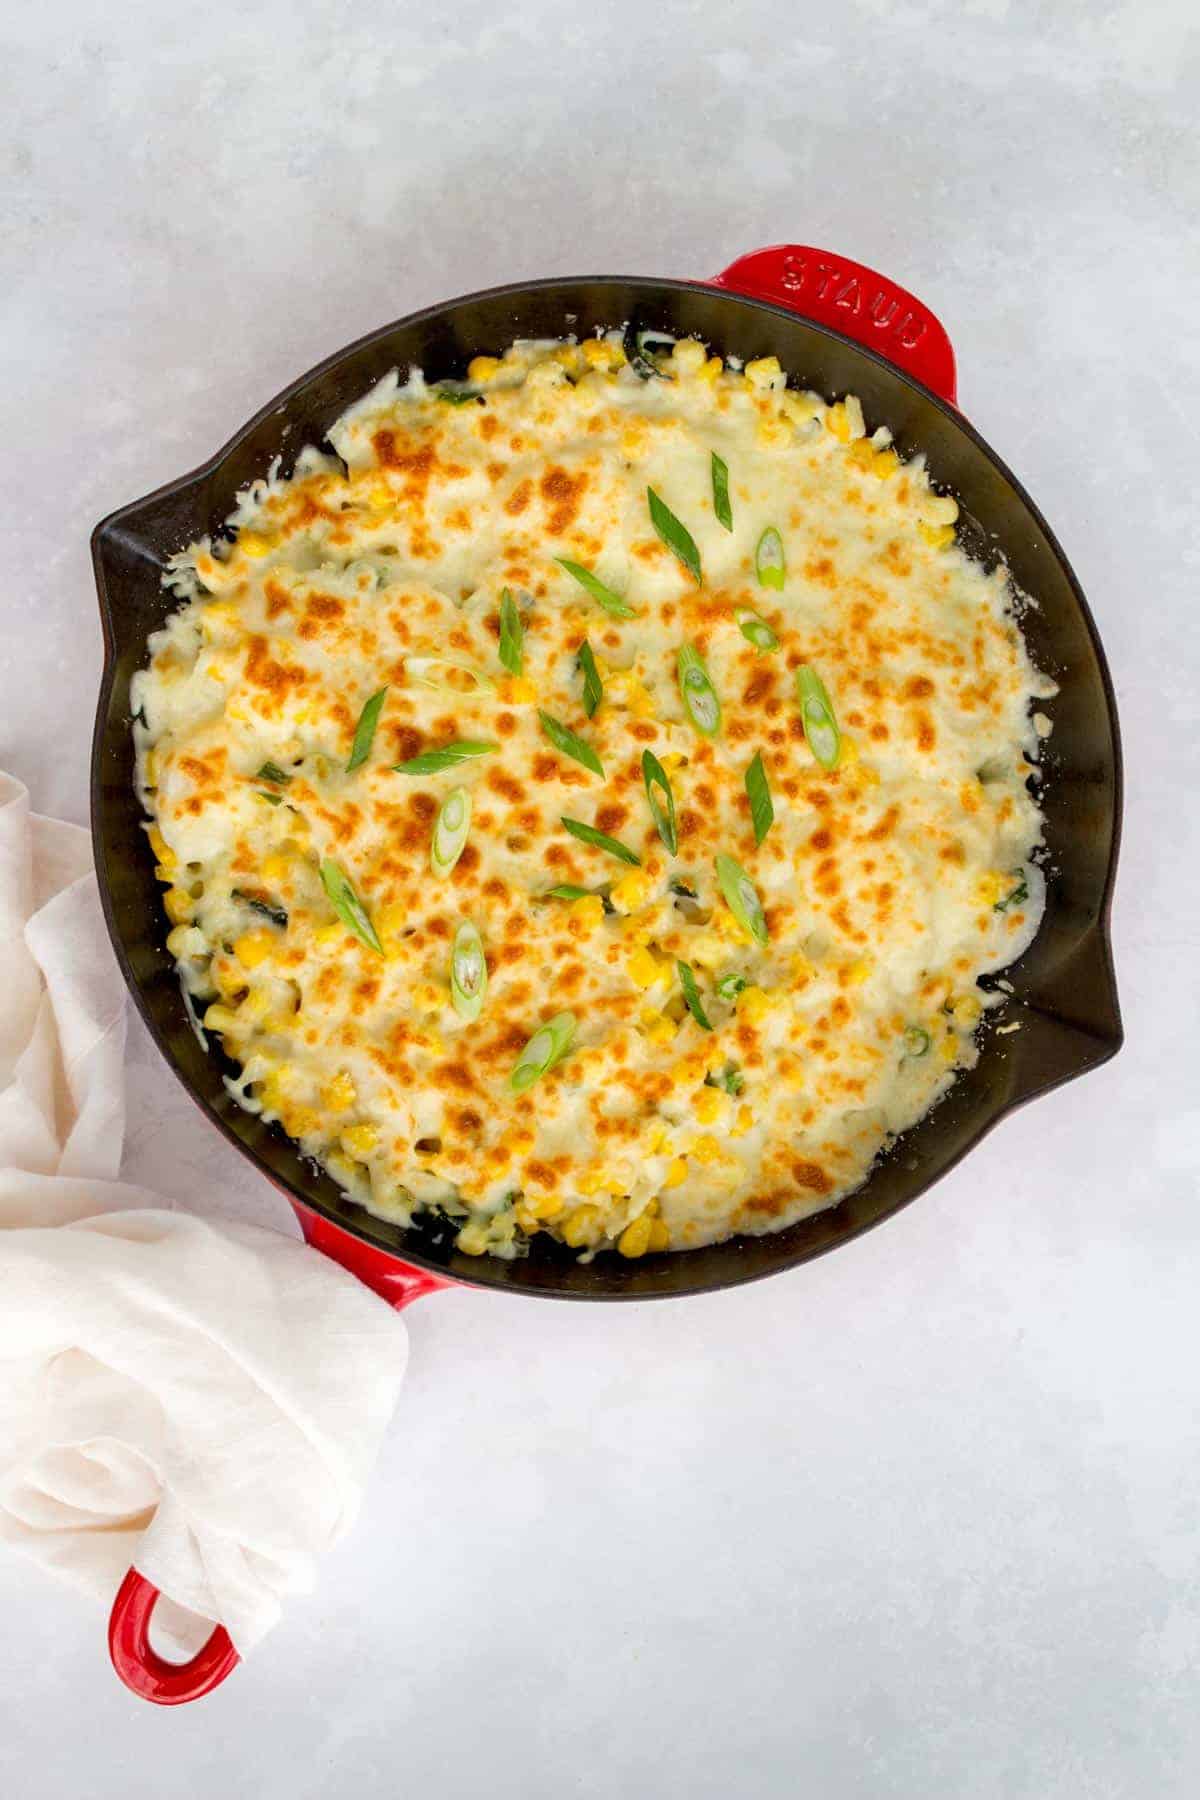
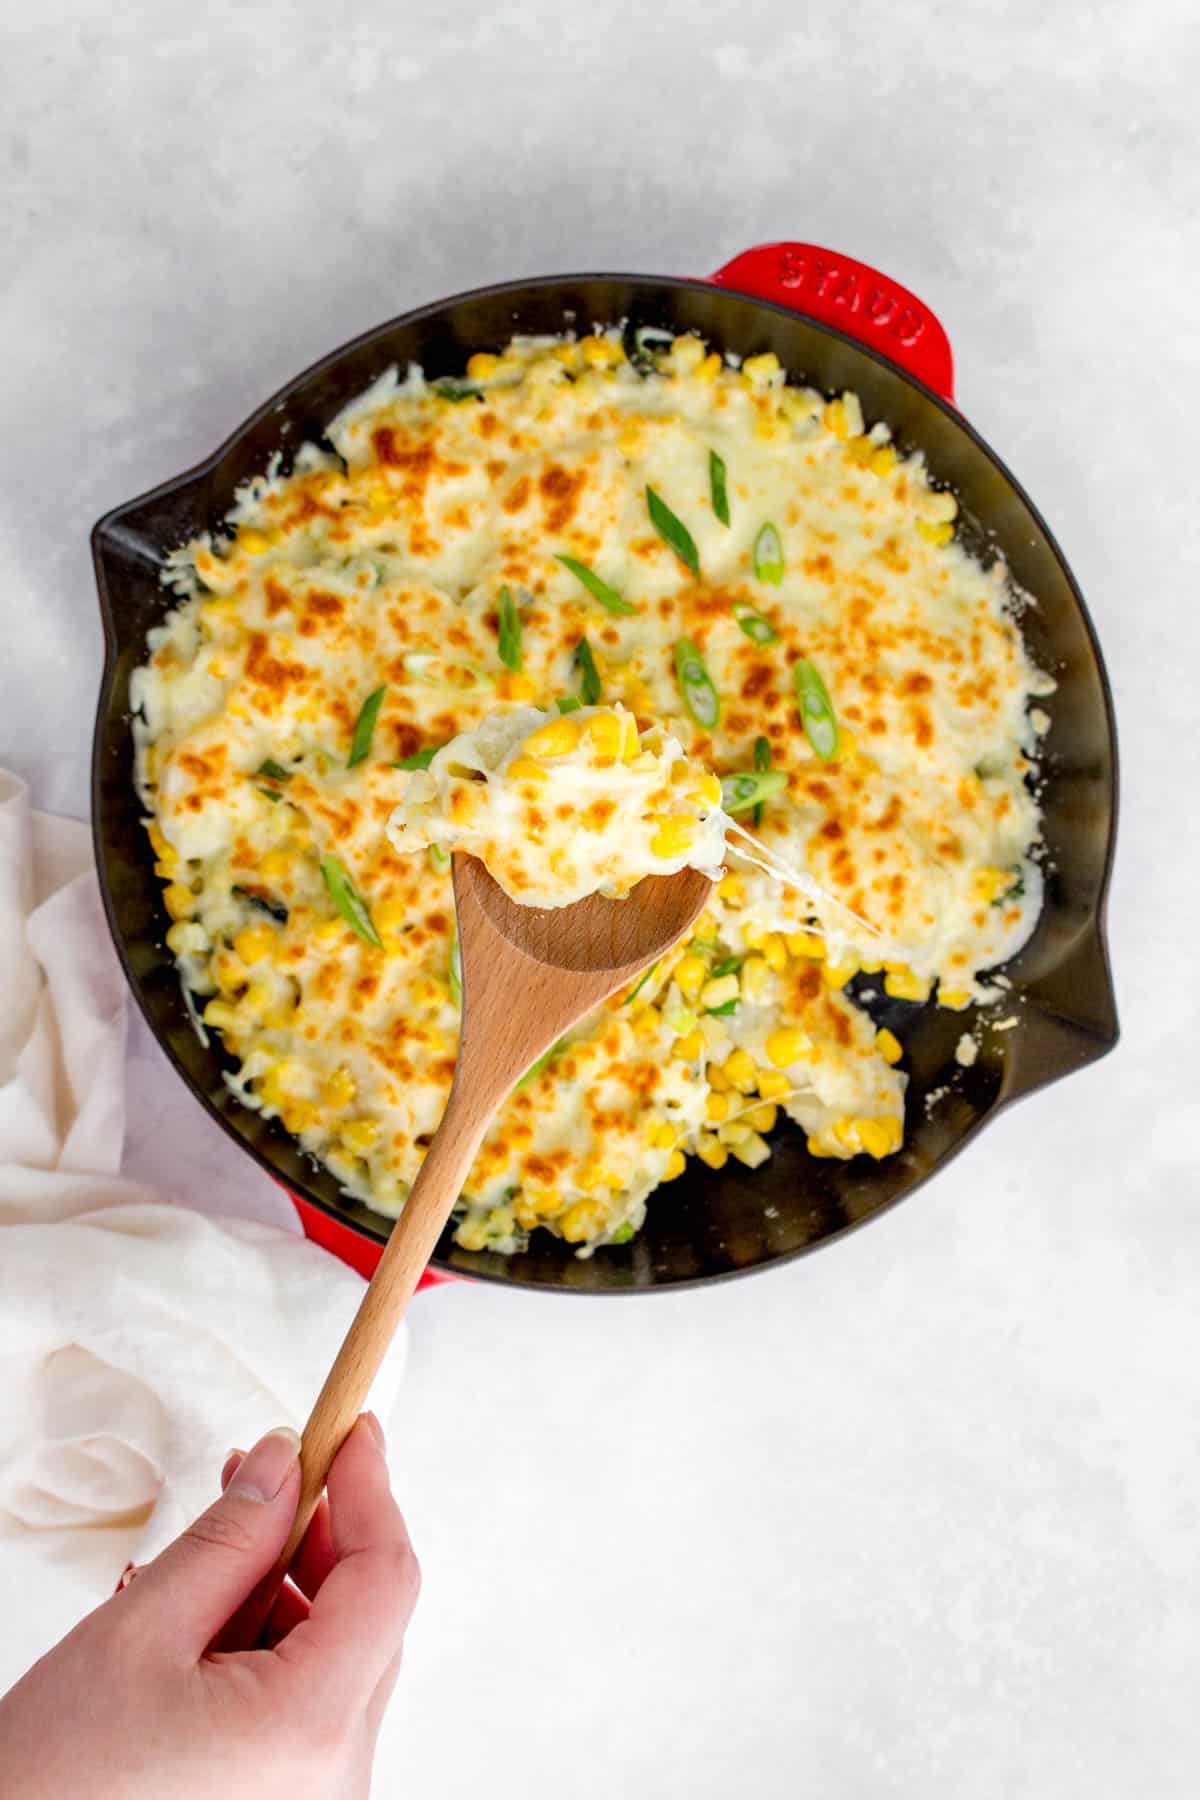
A simple and delicious side dish that is packed with gooey cheese, this Korean Corn Cheese is made with just a handful of ingredients and in a couple of minutes!
There is nothing better then when the waiter approaches my table with a sizzling cast iron plate filled with a bubbly cheesy corn cheese (콘치즈). I really mine this Korean staple but moving away from all my favourite Korean restaurants means it’s time to make it at home.
Why You’ll Love This Simple Corn Side Dish
- It’s really easy to make as you’re really only sautéing a couple of ingredients being covering it in shredded cheese. You’ll definitely want a cast iron for this since broiling the cheese on the corn really gives you that perfect sizzling bubbly cheese.
- You can use whatever you have. You can make this corn cheese recipe with canned corned, frozen corn, or fresh corn. While canned corn is preferred, sometimes you just have to make do with what you’ve got!
- You only need a handful of ingredients. The corn and cheese are the star ingredients and don’t need that much more!
What You’ll Need
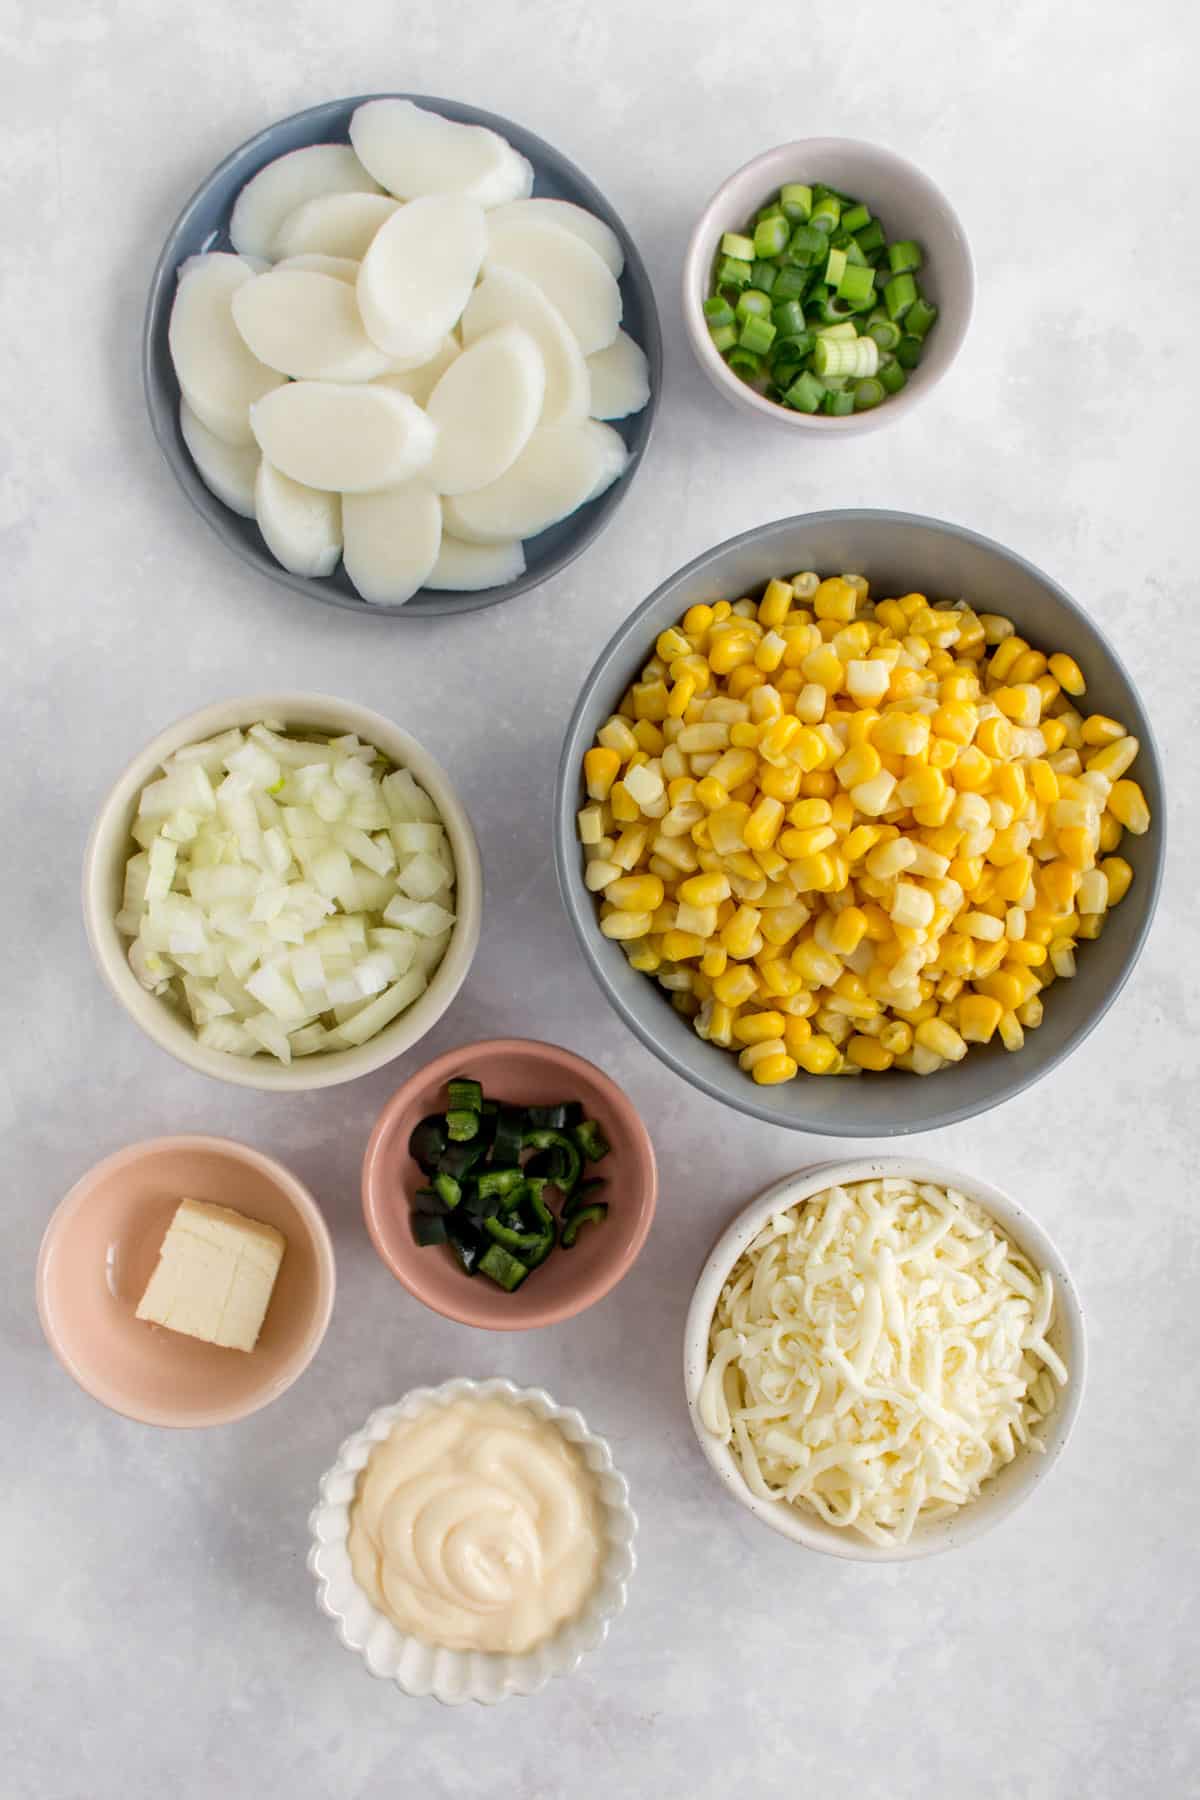
- butter — unsalted butter is my go-to.
- onion
- salt
- corn — canned or fresh corn works. If you’re using frozen corn, be sure to thaw them first.
- rice cakes — this is optional. If you can’t find it, you can skip it. Be sure to give them a soak ahead of time if they’re frozen.
- jalapeno — for a little extra heat.
- green onions
- mayonnaise
- shredded mozzarella cheese
How to Make Korean Corn Cheese
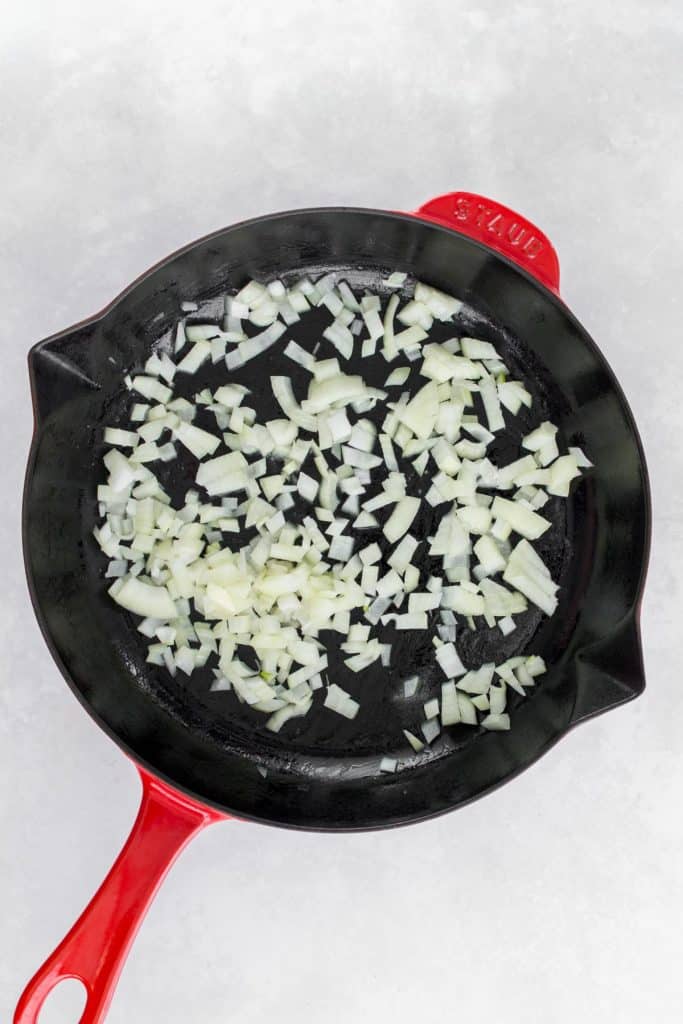
- On medium heat, melt the butter in a cast iron skillet.
- Add in the diced onions and salt and sauté for 2 to 3 minutes, until the onions have softened.
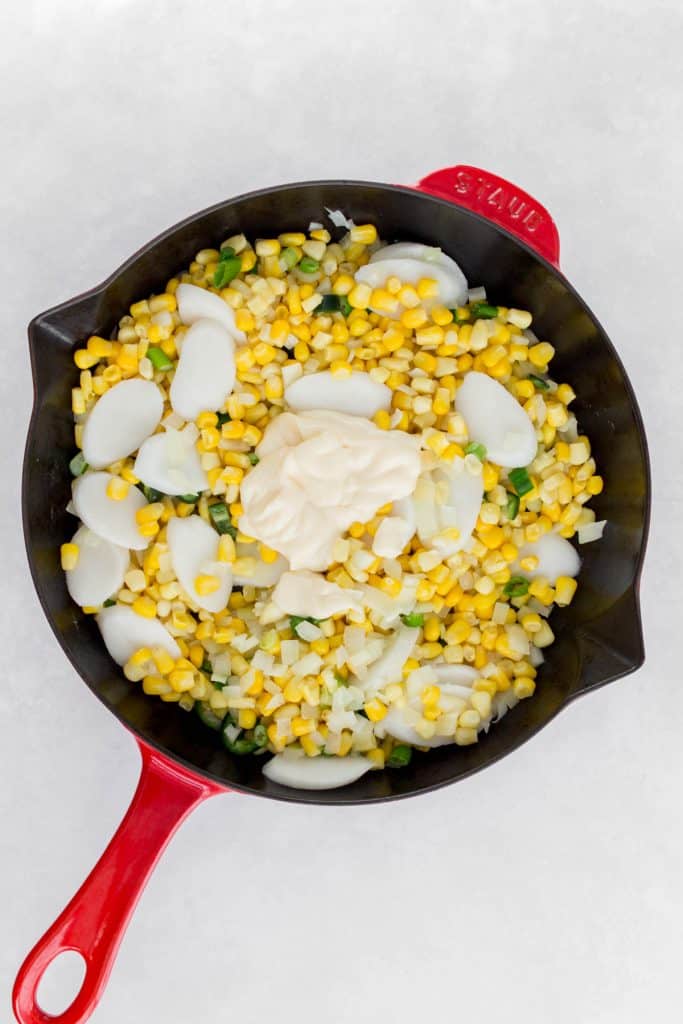
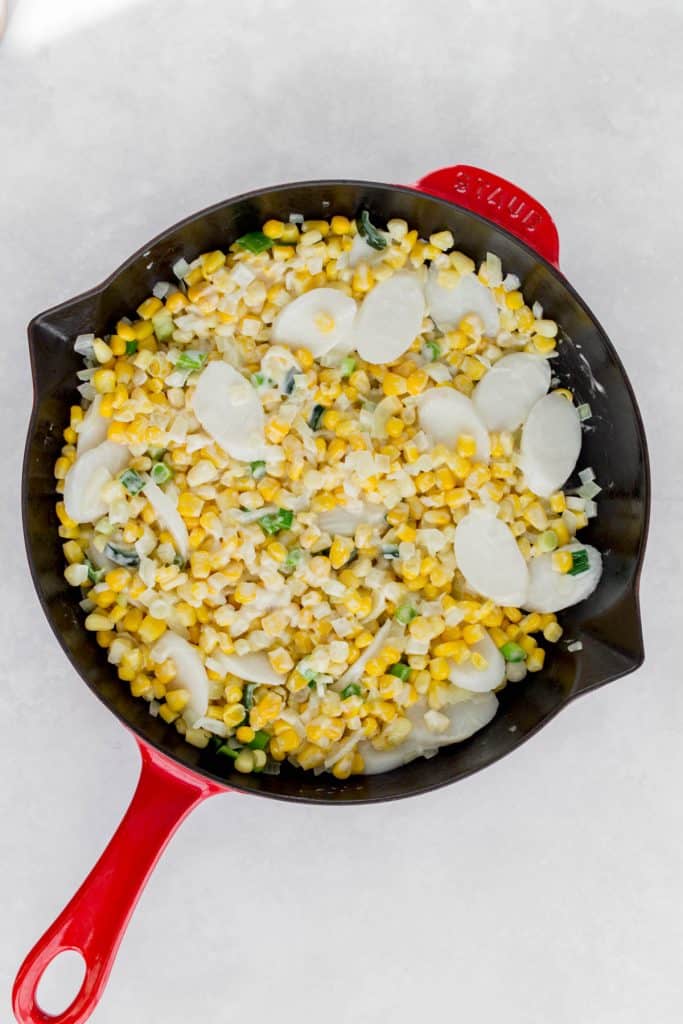
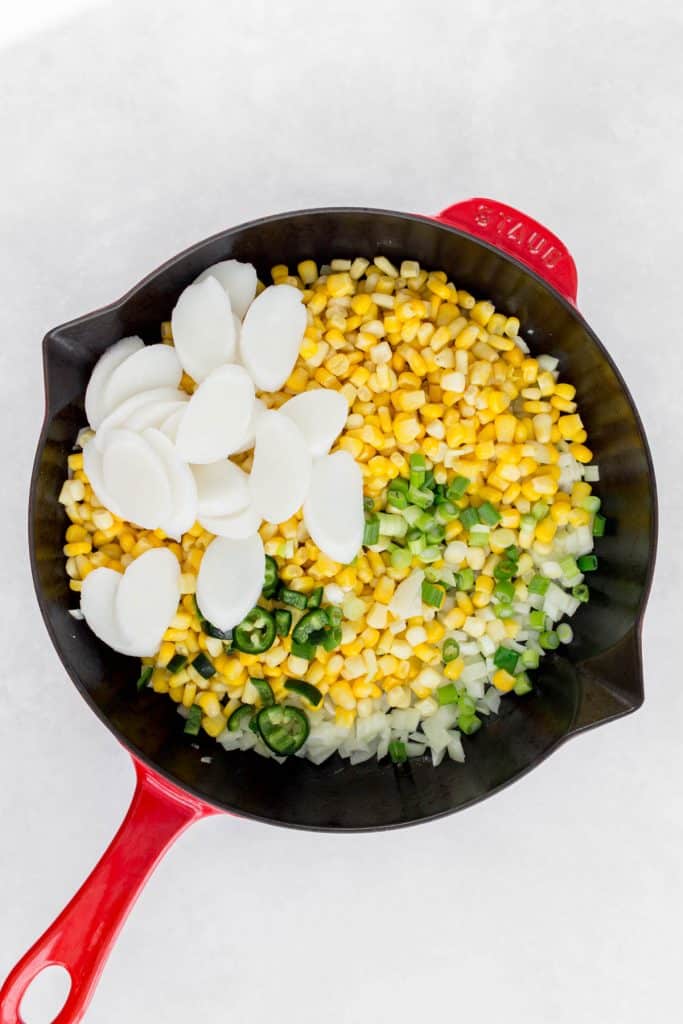
- Add in the rice cakes, jalapeno, green onions, and mayonnaise. Stir to combine.
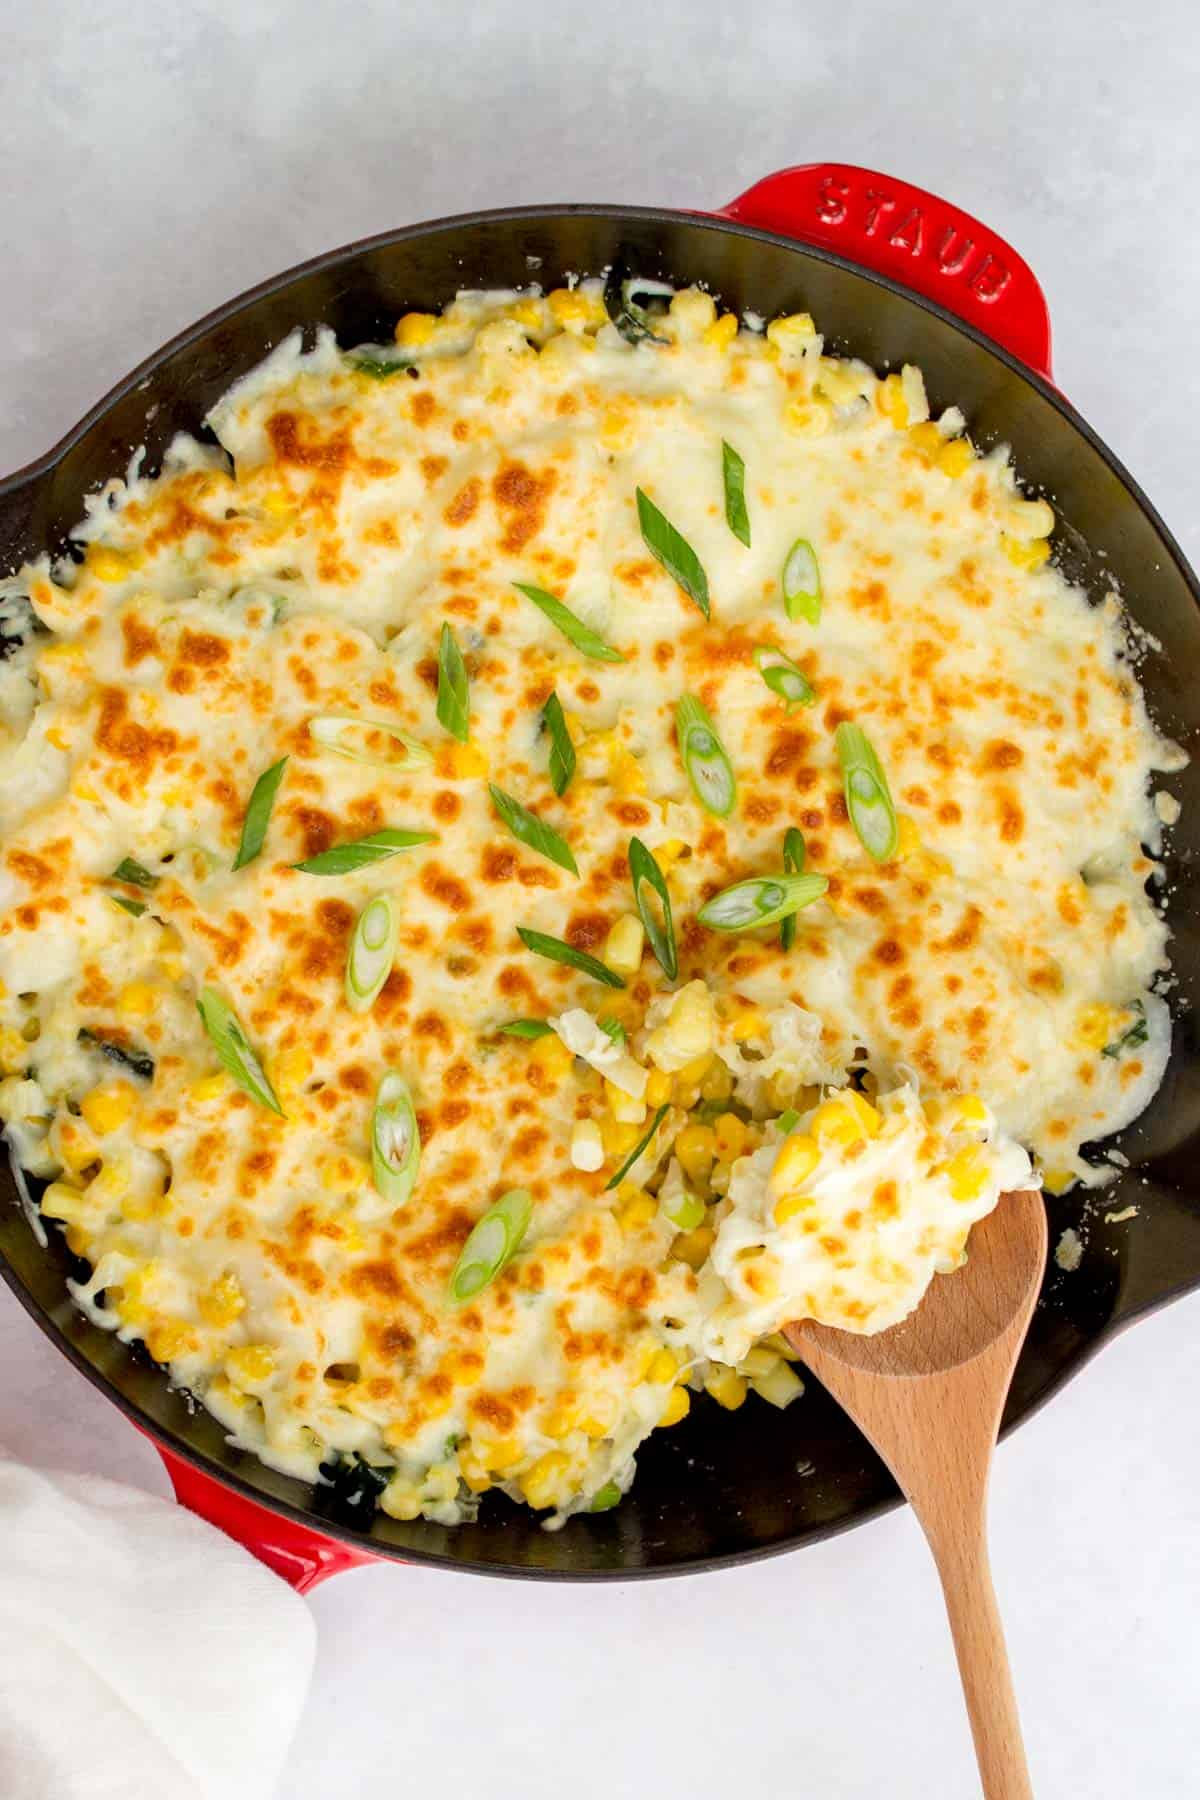
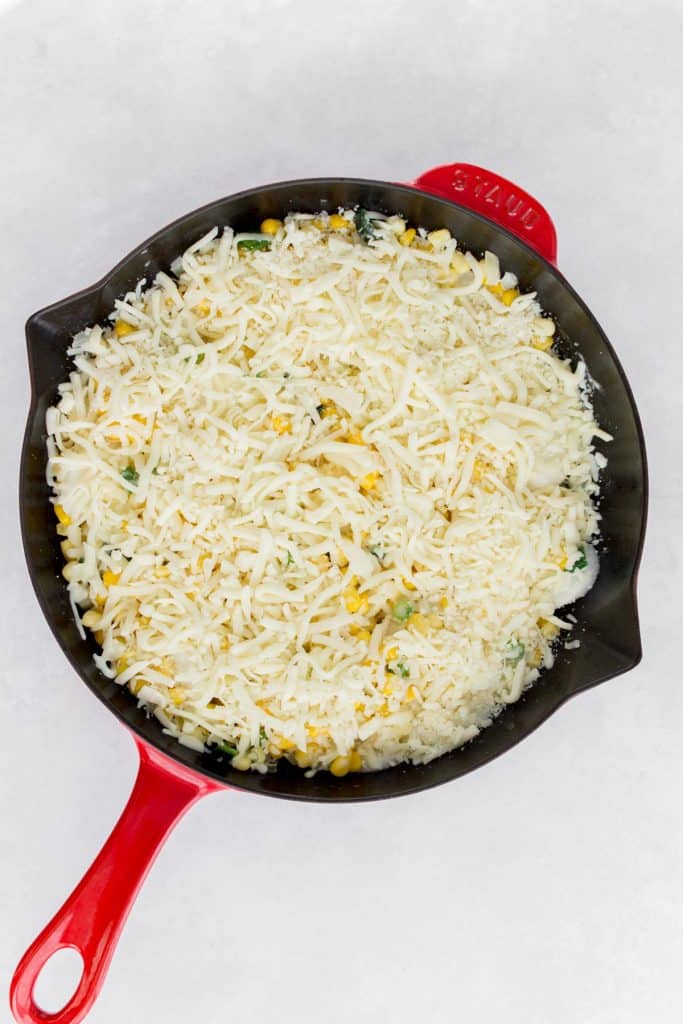
- Top with shredded cheese and then transfer to the oven.

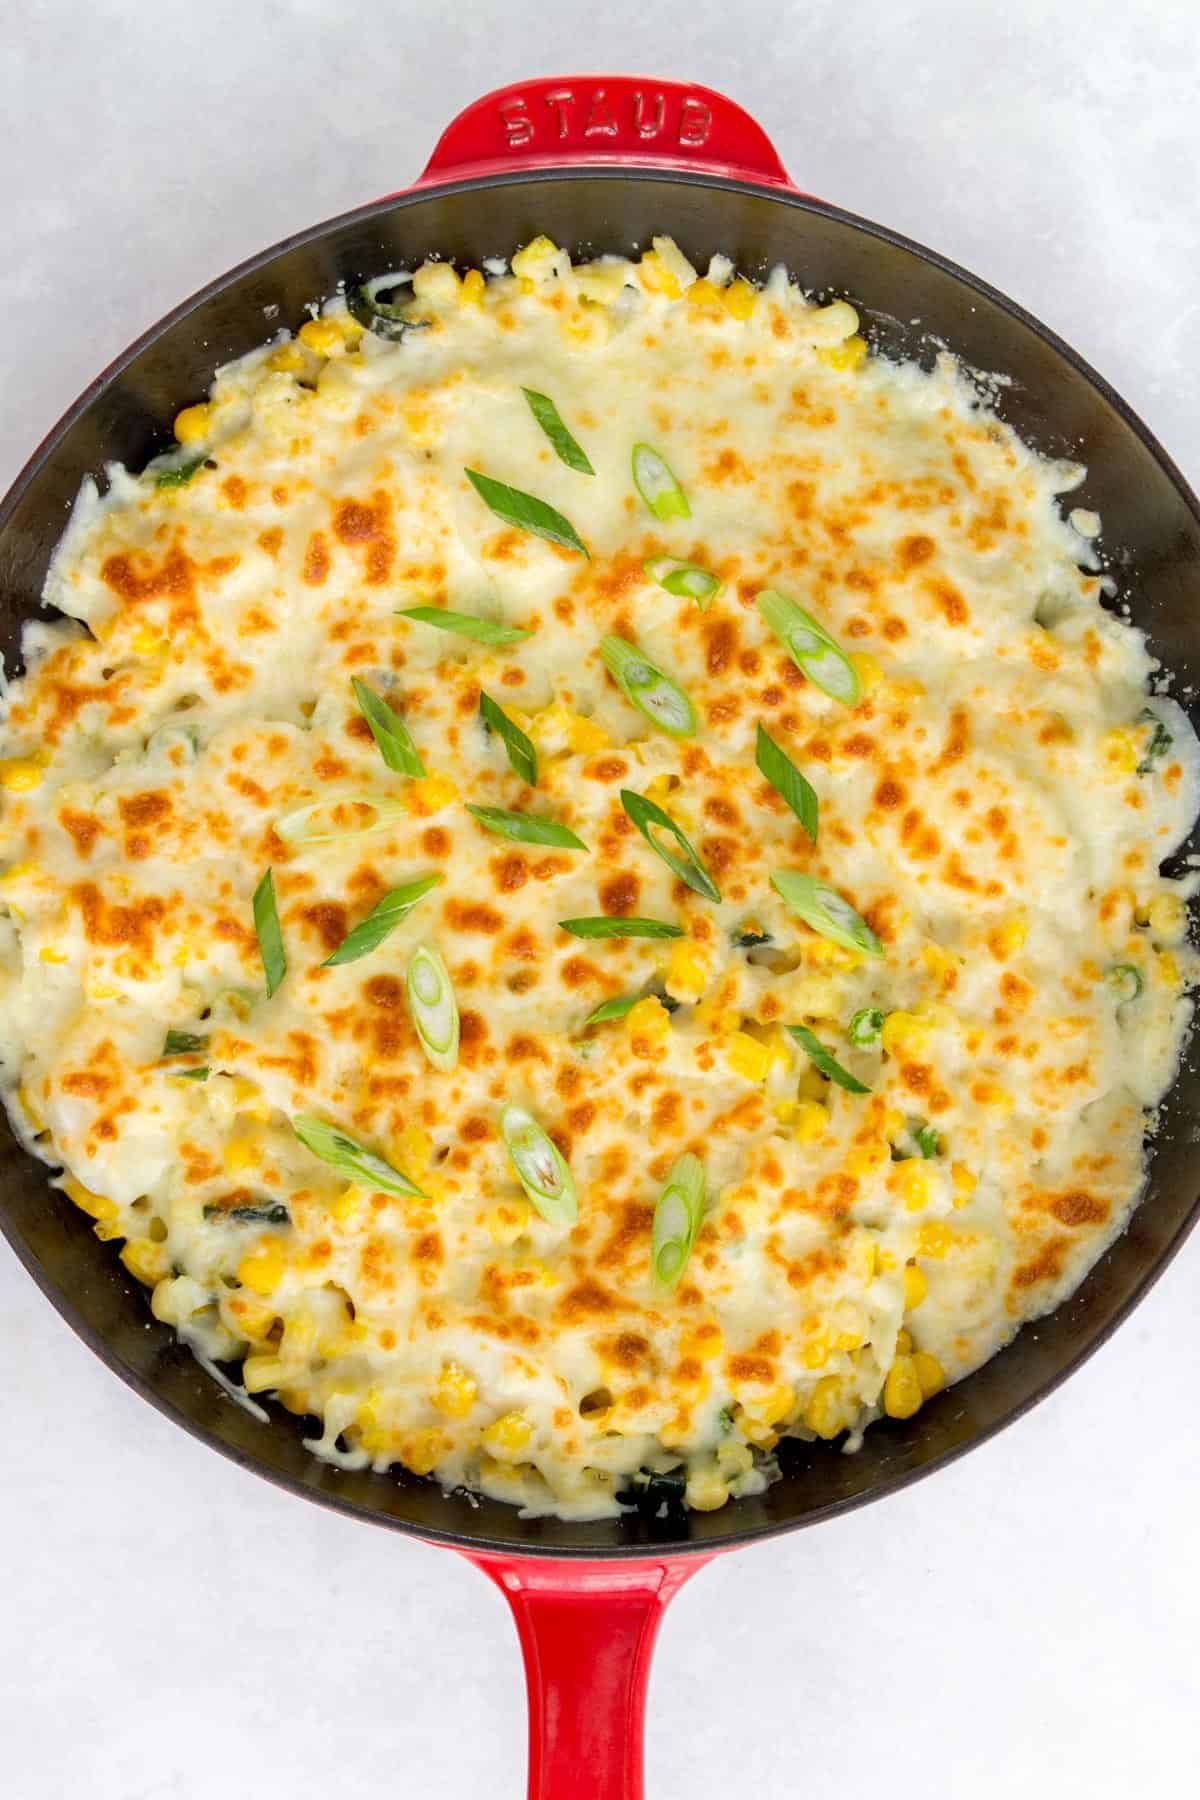
- Broil for 3 to 4 minutes or until the cheese has melted and is starting to turn golden, keeping a close eye on it to make sure it doesn’t burn.
Tips and Notes
- To make this even more cheesy, you can mix in shredded cheese alongside the mayo before adding the shredded cheese on top. There’s not such thing as too much cheese right?
- You can add other vegetables in this cheese corn such as bell peppers, diced broccoli, peas, etc if you wish. I like adding extra vegetables just so I can say I’ve eaten my (cheese coated) vegetables of the day.
- This is the cast iron I use.
- Serve this with my Air Fryer Korean Fried Chicken or my double fried Korean Fried Chicken for that Korean fried chicken joint experience at home.
- For a lighter side, serve this cheesy corn recipe with my seasoned spinach or silken tofu recipe.
- Leftovers: You can store leftovers in the fridge in an airtight container. I usually just reheat it in the oven at 250°F until heated through.

Korean Corn Cheese
A simple and delicious side dish that is packed with gooey cheese, this Korean Corn Cheese is made with just a handful of ingredients and in a couple of minutes!
Print Recipe
Rate this Recipe
Servings: 4 servings
Ingredients
- 1½ tbsp unsalted butter
- 1 small yellow onion, diced
- ½ tsp salt
- 2 cups corn, drained
- ½ – 1 cup rice cakes, optional
- 1 jalapeno, deseed and diced
- 2 stalks green onions, diced
- ¼ cup mayonnaise
- 1 cup shredded mozzarella cheese, or more
Equipment
Instructions
- On medium heat, melt the butter in a cast iron skillet.
- Add in the diced onions and salt and sauté for 2 to 3 minutes, until the onions have softened.
- Add in the corn, rice cakes, jalapeno, green onions, and mayonnaise. Stir to combine.
- Top with shredded cheese and then transfer to the oven.
- Broil for 3 to 4 minutes or until the cheese has melted and is starting to turn golden, keeping a close eye on it to make sure it doesn’t burn.
Notes
Calories are merely an estimate based on the plugin used for the recipe card. Calories do not include Korean rice cakes as it is listed as optional.
Tried this recipe?Did you make this recipe? I’m always so happy to hear about it! I’d love to see how it turned out. Tag me at @CarmysHungry on Instagram so I can see it! If you enjoyed the recipe, I’d really appreciate a comment with a 5 star rating! ♥
Nutrition Per Serving
Calories: 301kcal | Carbohydrates: 19g | Protein: 9g | Fat: 22g | Saturated Fat: 8g | Trans Fat: 1g | Cholesterol: 39mg | Sodium: 558mg | Potassium: 244mg | Fiber: 2g | Sugar: 5g | Vitamin A: 630IU | Vitamin C: 11mg | Calcium: 155mg | Iron: 1mg
More Side Dishes You’ll Love
- Air Fryer Garlic Bread
- Air Fryer Popcorn Shrimp
- Cheddar Cheese Buns
- Crispy Baked Teriyaki Tofu
- Korean Purple Rice
- Soy Sauce Eggs
- Quick Pickled Carrots
- Quick Pickled Cabbage
- Silken Tofu Recipe
Other places to connect with me
@carmyshungry on Instagram
Facebook
Shop my Amazon faves
Email: [email protected]
Cat says
There’s no mention of corn in the recipe instructions!!!
Carmy says
Thanks for letting me know! I’ve updated the recipe to add the corn to the instructions.
Maria says
Does the rice cakes have to be cooked first or can I just throw them in?
Carmy says
If they come frozen, they need to be soaked first. If they’re fresh, you can add them in.